|
Creating Multiple Users |
Scroll |
In cases where a large number of Portal users should be created at once, the process can be automated by synchronizing with an external database. This can be done in the Therefore™ database by using SQL statements and getting values from other tables.
New entries will be inserted into the TheUserSync table in the Therefore™ database. The server will then automatically synchronize changes every 10 minutes.
|
Each row in the TheUserSync table is one search for one user. To have multiple searches for a single user, multiple rows must be added using the same values for the Email and UserName columns. |

 How do I create multiple Therefore™ Portal users at the same time?
1.In order to create Therefore™ Portal users from an external database, the database or table must provide at least the e-mail address of the user and a user name (this can be the same as the e-mail if desired).
2.Execute an SQL statement to insert new entries into the columns of the Therefore™ database's TheUserSync table. See the following script as an example which draws values from the table "CustomerData".
INSERT INTO TheUserSync (Email, QueryNo, UserName, UserType, UserPwd, OneTimePwd, ConditionXML, SyncState)
SELECT Email, 68, Email, 4, NULL, 1, '<Conds><C><FieldNo>1020</FieldNo><Filter>' + CustomerID + '</Filter></C></Conds>', 1
FROM CustomerData
| The columns of the TheUserSync table are described below. |
Column |
Description/Notes |
The e-mail address of the user, used to uniquely identify each Portal user. This field is mandatory. |
|
QueryNo |
The Search ID of the search assigned to this user. The Search ID can be found either in the TheQuery table or in the Therefore™ Portal Configuration dialog. |
UserName |
The user name of the Portal user. If you add multiple searches for one user, the user name must be the same for each entry. |
UserType |
Always set to this to 4 for Portal users. Anything not set to 4 will be ignored. |
UserPwd |
The cleartext password for the user. If this is set to NULL, a password will be generated for the user by the server. The generated password is always a one-time password; the user must change it at the next login. |
OneTimePwd |
The only valid values are 0 or 1. 0: The user's password is provided in the column UserPwd. 1: The user's password is provided in the column UserPwd but it must be changed at the next login. This setting has no effect when the UserPwd is set to NULL. |
ConditionXML |
The XML string used to restrict the viewing conditions for this user and search. See step 3 below for more details on this value. |
SyncState |
The current synchronization state for each entry. Valid values are 0-4. 0: The entry is synched, no action required by the server. Created users are set to this state by the server. Do not create new entries with 0 or the user will not be created. 1: The entry is not yet synched, and is marked for synchronization. When creating or making changes to users, set this to 1 so the server will synchronize them. 2: This entry is marked for deletion. The entry and corresponding Portal user will be deleted. This is the recommended method for deleting Portal users. Do not delete entries from the table manually. Simply set the SyncState to 2, and they will be automatically deleted the next time the synchronization runs. 3: An error occurred when adding a new entry or changing an existing one. The previous state was 1. See the event log for more details. Once the issue has been resolved, set the state back to 1 to re-attempt the synchronization. 4: An error occurred when deleting an existing entry. The previous state was 2. See the Event Viewer for more details. Once the issue has been resolved, set the state back to 2 to re-attempt the deletion. |
3.Setting the ConditionXML correctly is essential to restrict each user's viewing permissions. The following procedure is recommended:
i.Create a sample Portal user in the Therefore™ Solution Designer.
ii.Set the appropriate condition for this user.
iii.Go into the Therefore™ database and access the table ThePortalAccess.
iv.Copy the ConditionXML from the ConditionXML column for the sample user. You will use this as a template.
v.Modify this XML string for each user and apply the correct condition. Change the value between the <Filter> tags.
vi.Apply the changed ConditionXML to the TheUserSync table.
|
It is very important to set these conditions correctly in order to restrict the types of documents each user is allowed to view. If these conditions are not set properly, a user may be able to view other users' documents or unauthorized confidential information. |
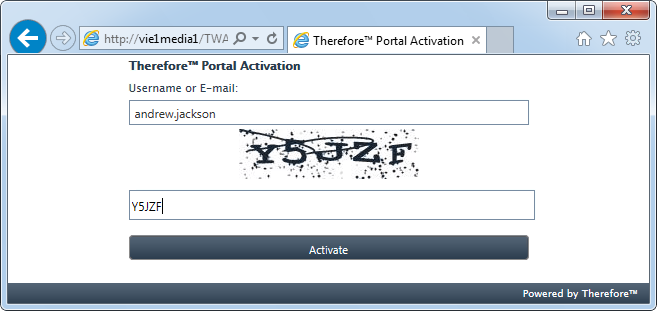
How do I notify users that their account has been created?
1.Users whose accounts have been created by synchronization must first activate their accounts to receive their password. An administrator must send a notification to each user with their user name and a link to the Therefore™ Portal activation page. The link is: http://server/TWA/Portal/PortalActivation.aspx. Replace server with the server name and change TWA to the tenant name in multi-tenant systems only.
2.Users need to enter their user name and click Activate to receive their generated password per e-mail, which they can then use to log in to the Therefore™ Portal.