|
Mailboxes |
Scroll |
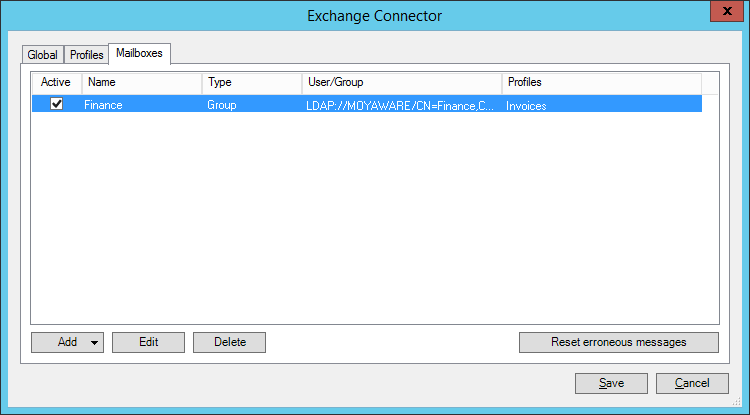
After defining your profiles, switch to the Mailboxes tab. This is where you select which user's or group's mailboxes the connector should monitor, and which profiles should be applied.
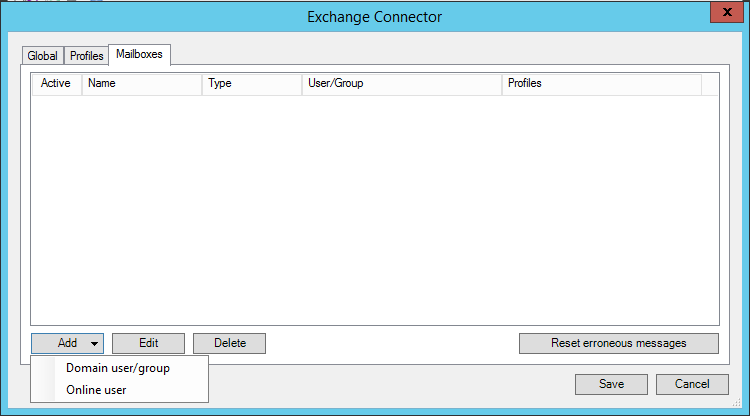
1.On the Mailboxes tab, click Add and select either a domain user/group or an online user.
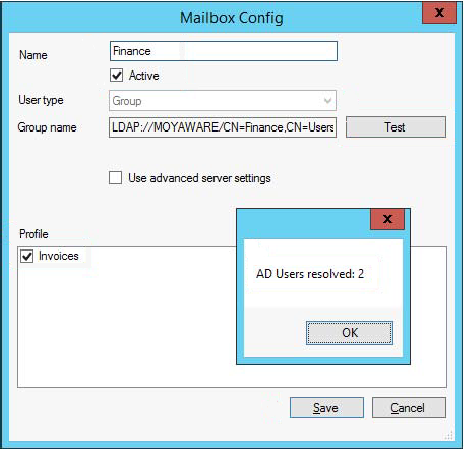
2.Enter the name of the user/group and mark them as Active. In this example, we have chosen the domain group Finance, which includes the mailboxes of all finance department employees. Test the settings by clicking Test. A message is displayed if the test was successful. Click Save when done.
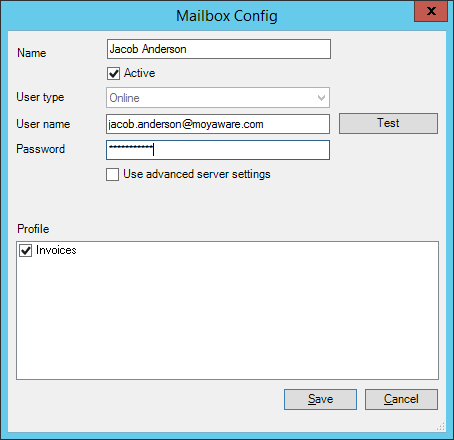
If you choose an Online user, the dialog differs slightly. Enter the name, then username and password of the user. Test the settings by clicking Test. A message is displayed if the test was successful. Click Save when done.
|
This example will only work if every user has been granted impersonation rights. The Therefore™ Connector for Microsoft Exchange will only use "Global" credentials when the password field remains blank. |

3.The user/group will be listed in the Mailboxes tab. Make sure it is active, then click Save when done.