 How do I monitor an Input Folder?
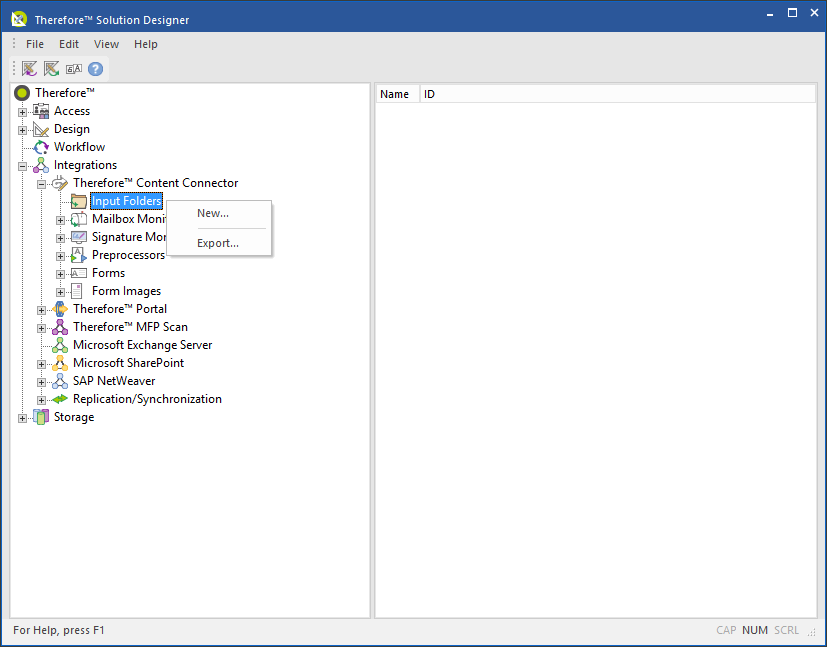
1.Under Thereforeā¢ Content Connector node, right-click on Input Folder and then select New...

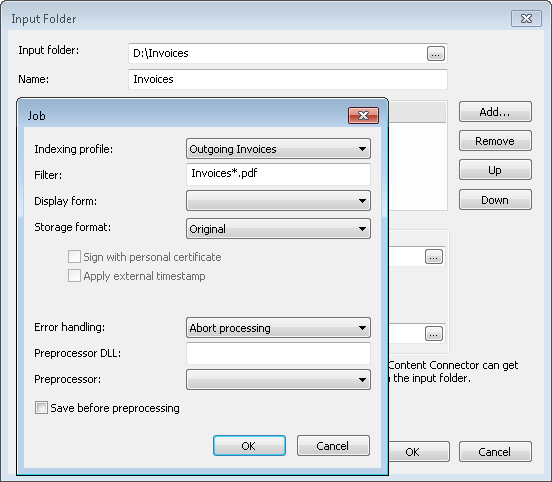
2.Now define the folder and then the job that should be used to process files in this input folder. Give this input folder an intuitive name e.g. Invoices and select Add to define new job. A job consists of an indexing profile together with other settings that can be defined depending on the situation. In our case the input folders should be used for other profiles too and hence a filter can be defined to only process documents with a certain file name.


|
•When using an input folder in Thereforeā¢ Online, it's not necessary to enter the full FTP file path. Only enter the name of the folder to which the document will be uploaded.
•For text and XML files a display form can be defined.
•If required, the storage format can be changed. For PDF formats, it is possible to sign and timestamp the documents.
•For text files, for example, with line feed variations a preprocessor can be defined.
•See the Jobs for more details on the other settings. |
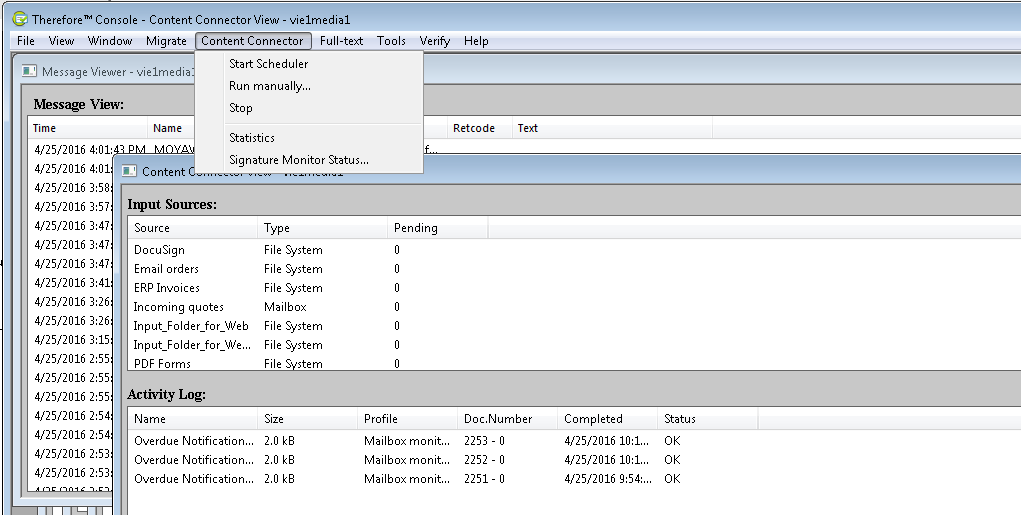
3.Now the Thereforeā¢ Content Connector will automatically process documents placed into this folder based on the configured polling interval and schedule settings. To check that everything is working, the process can be run manually. Open the Thereforeā¢ Console, click Window and then Content Connector View. Under Content Connector click Stop and then Start Scheduler. The new input folder should now be listed and any documents in the folder should be processed correctly. If all successful, open the test document(s) using Thereforeā¢ Navigator as a final check.

|
