
|
Transitions |
Scroll |
Transitions allow the workflow to move from task to task. To create a transition select the Transition task and then move your mouse to the preceding task. The mouse pointer will change to a white hand to indicate you are over the task. Click once to start drawing the transition and then hold your mouse while you drag the transition to the next task. When you are over the task the crossed out circle will disappear indicating that you are on the task. Release your mouse to complete the transition.
|
To aid with the layout each task has multiple anchor points for the transitions. The manual task for example has six different anchor points. |

Right-clicking on a created transition opens a context menu.
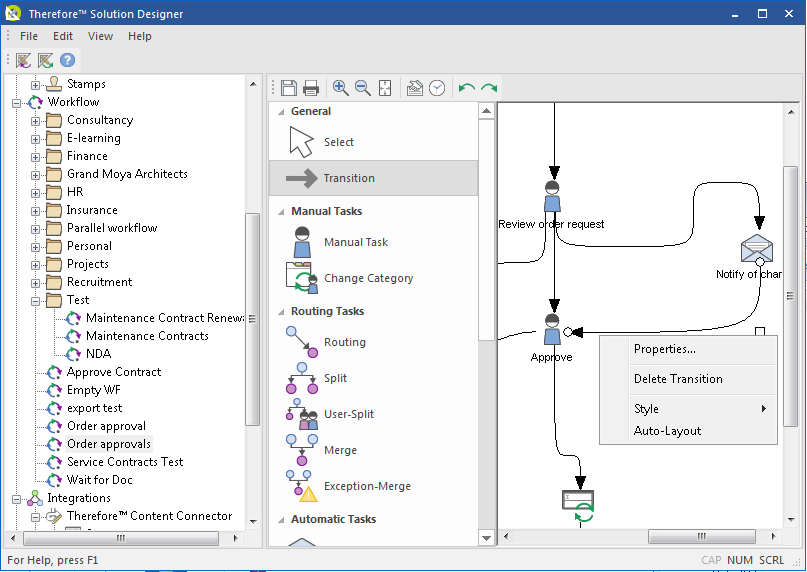
Properties
This opens the Transition Properties dialog.
Delete Transition
This will delete the selected transition.
Style
Three transition types can be chosen.
Bezeir
This is the default setting and allows curved transitions to be created.
Polyline
This restricts the shape of the transition to straight lines, but these can be at any angle.
Perpendicular
This restricts the shape of the transition to perpendicular lines.
Auto Layout
The transition shape is created automatically.
