|
Error Handling |
Scroll |
How do I include Error Handling actions into a Workflow?
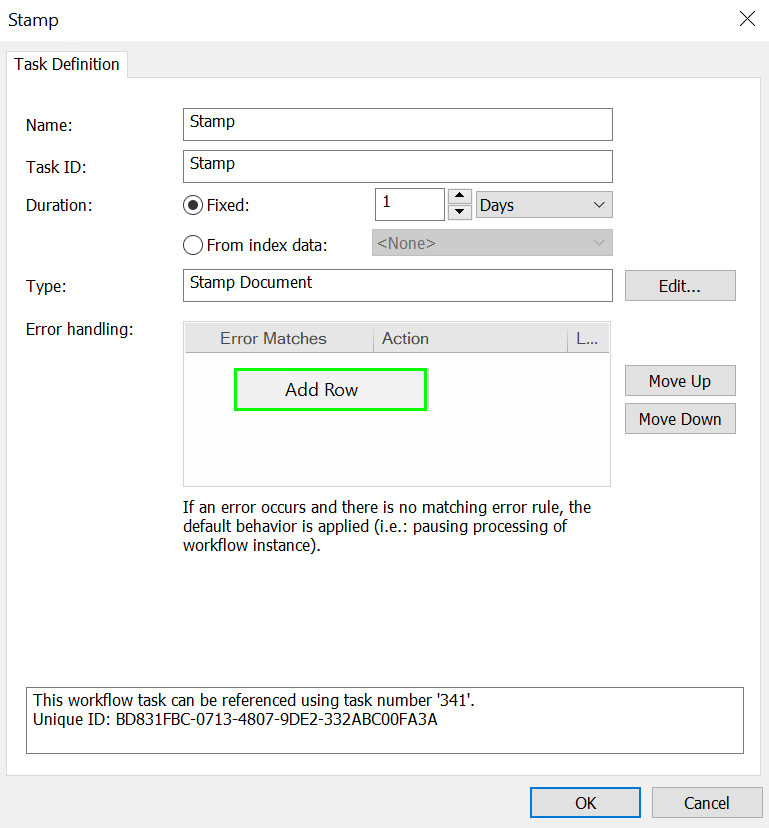
1.While designing a new workflow instance in the Therefore™ Solution Designer click on the task you want to add, then click on the workflow to open a task menu. If you have already designed your workflow right-click on a task and select 'Properties' to open the Task menu. To add a new error rule right-click on the Error Handling table, then click on 'Add row'.
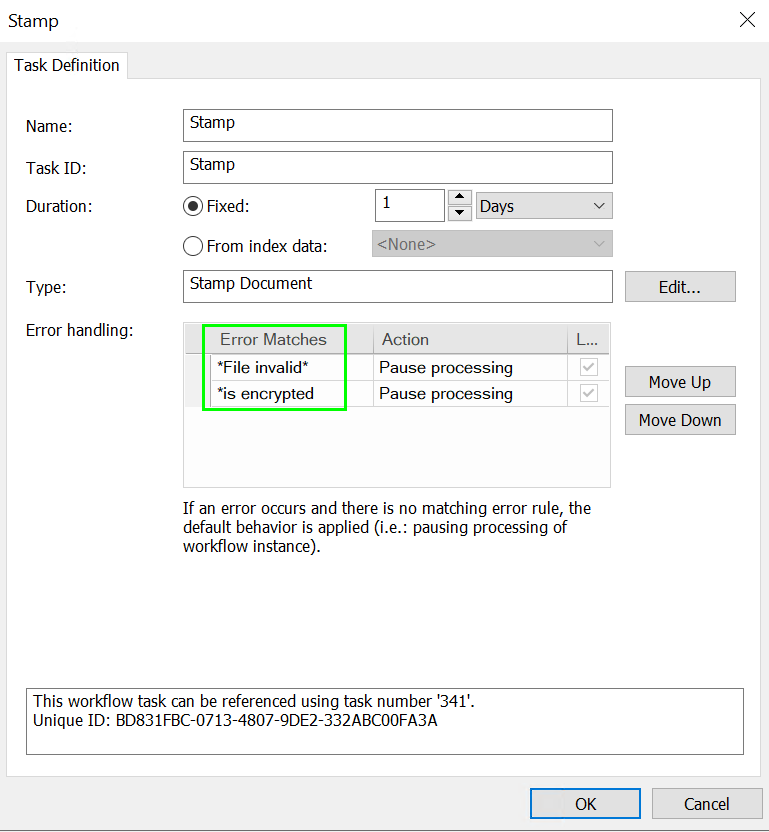
2.One row is needed for one error rule. In the column labeled 'Error Matches', enter the exact error message or a wildcard string (e.g., 'Error message', '*File invalid*').
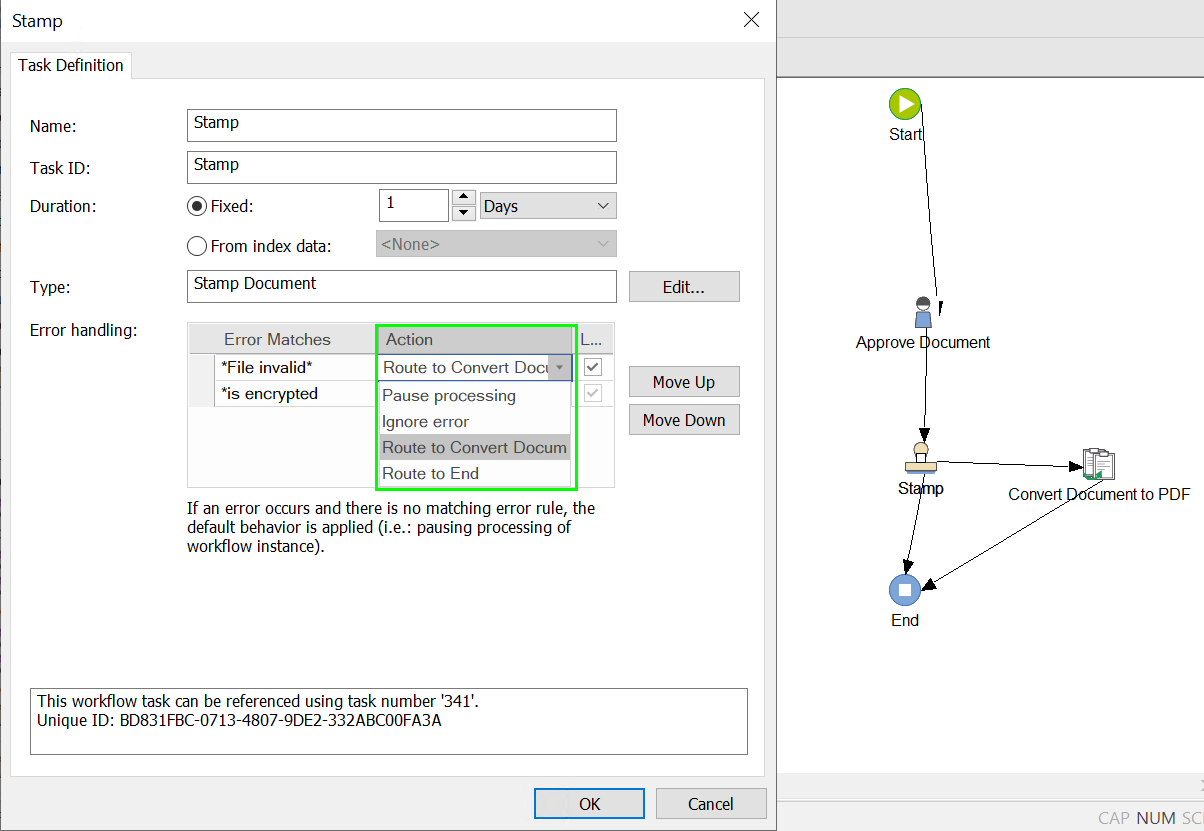
3.Click the arrow icon in the 'Action' column to open a drop-down menu of error handling options. Select "Pause processing" to stop processing the workflow instance if this specific error message occurs, or select 'Ignore error' if this specific error should be ignored. Select 'Route to...' to route to other tasks. These options are only available if the selected tasks is connected to other tasks using transitions. Check the box labeled 'Log' to record the usage of an error rule.
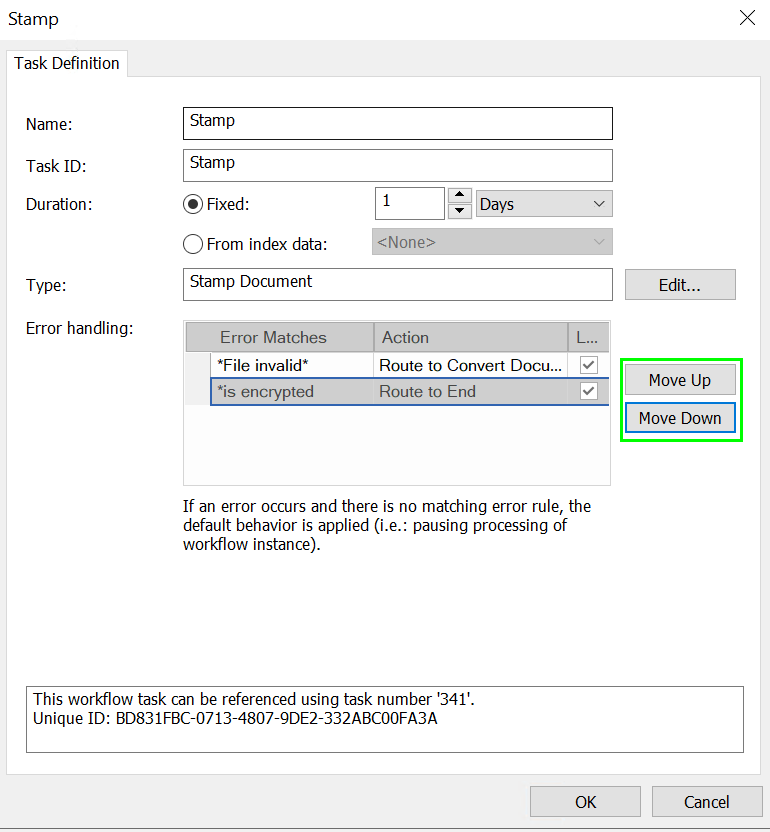
4.Click on a row to select the defined error rule. Use the buttons labeled 'Move up' and 'Move down' to change the position of the error rules. This matters since error rules are processed starting from the top.
|
|---|