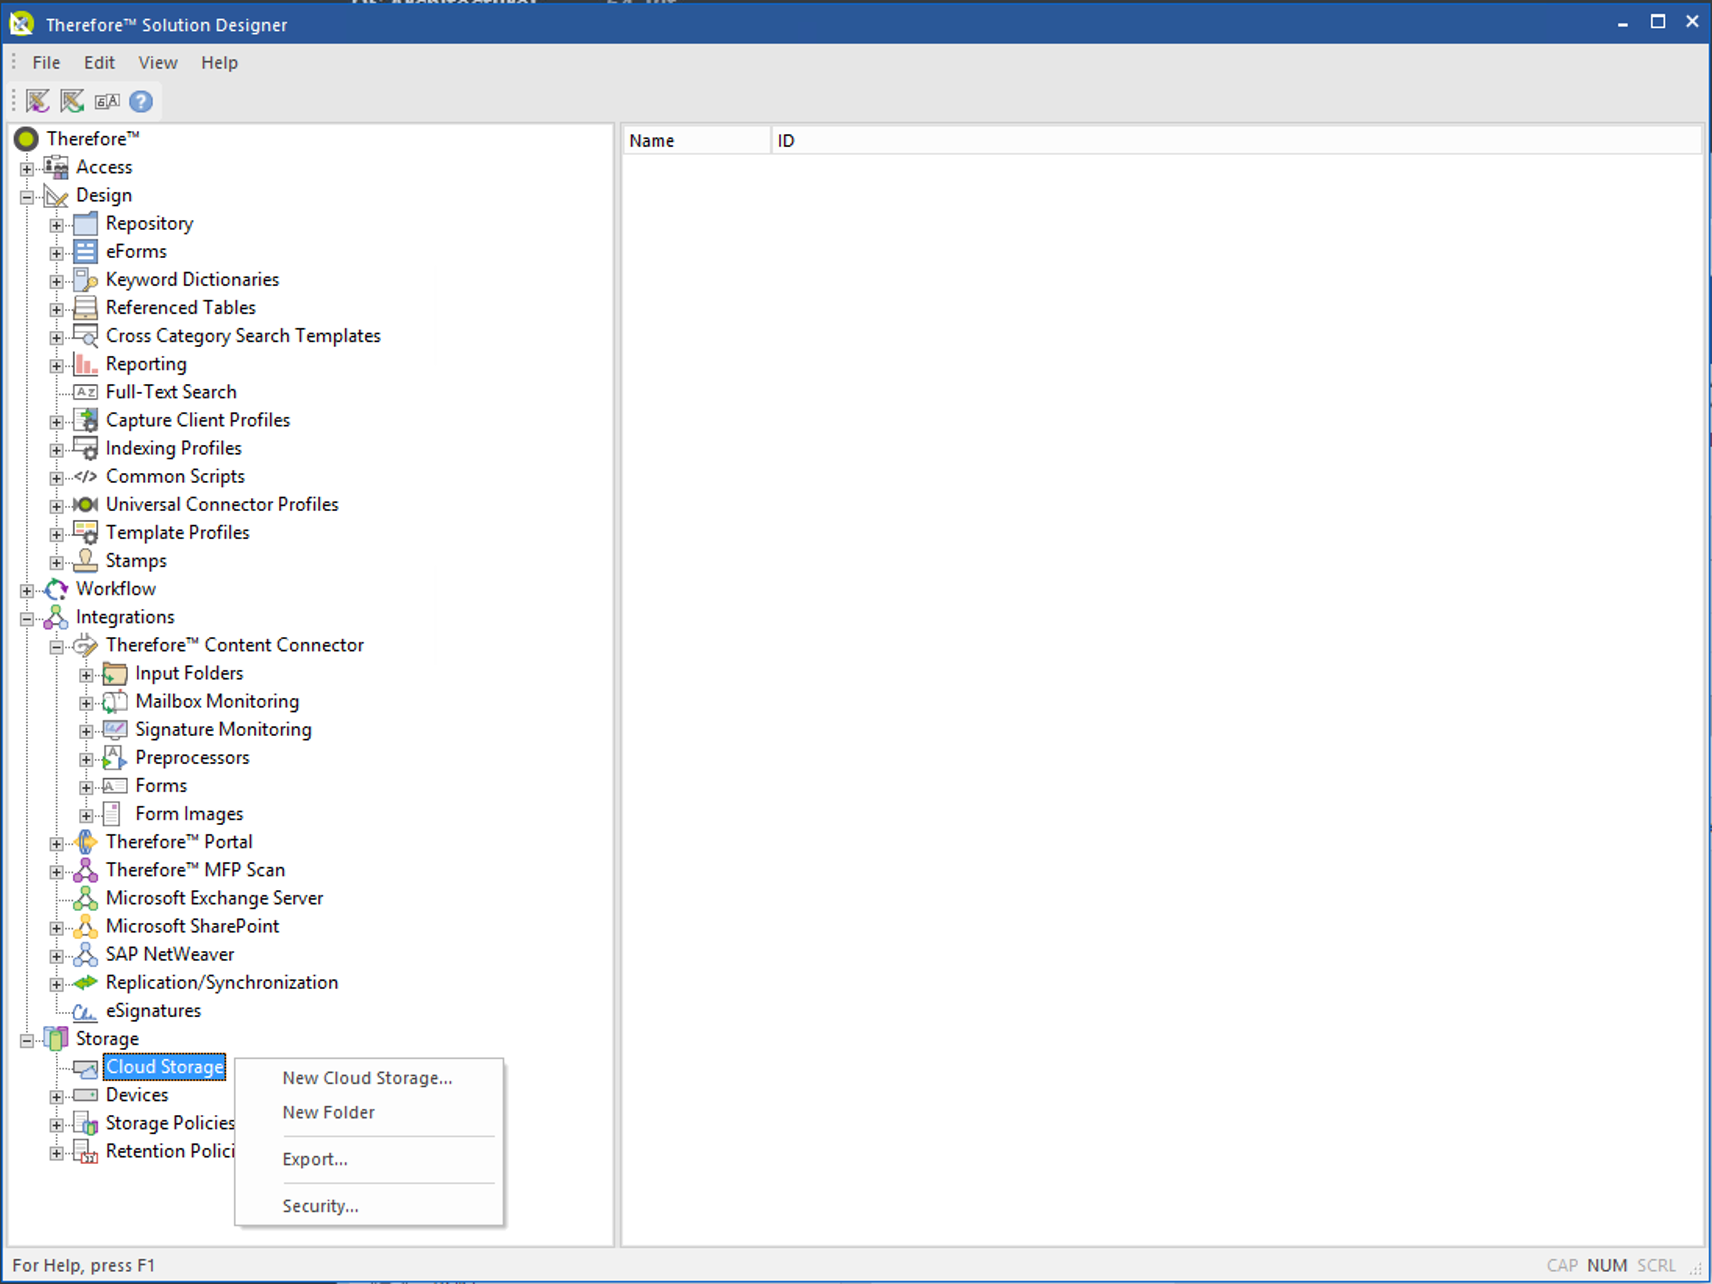
1.Right-click on the Cloud Storage icon in the Therefore™ and select New Cloud Storage.
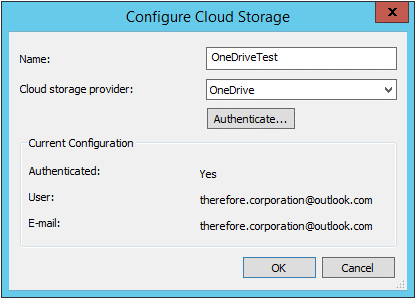
2.In the Configure Cloud Storage dialog, define the OneDrive storage and click Authenticate.
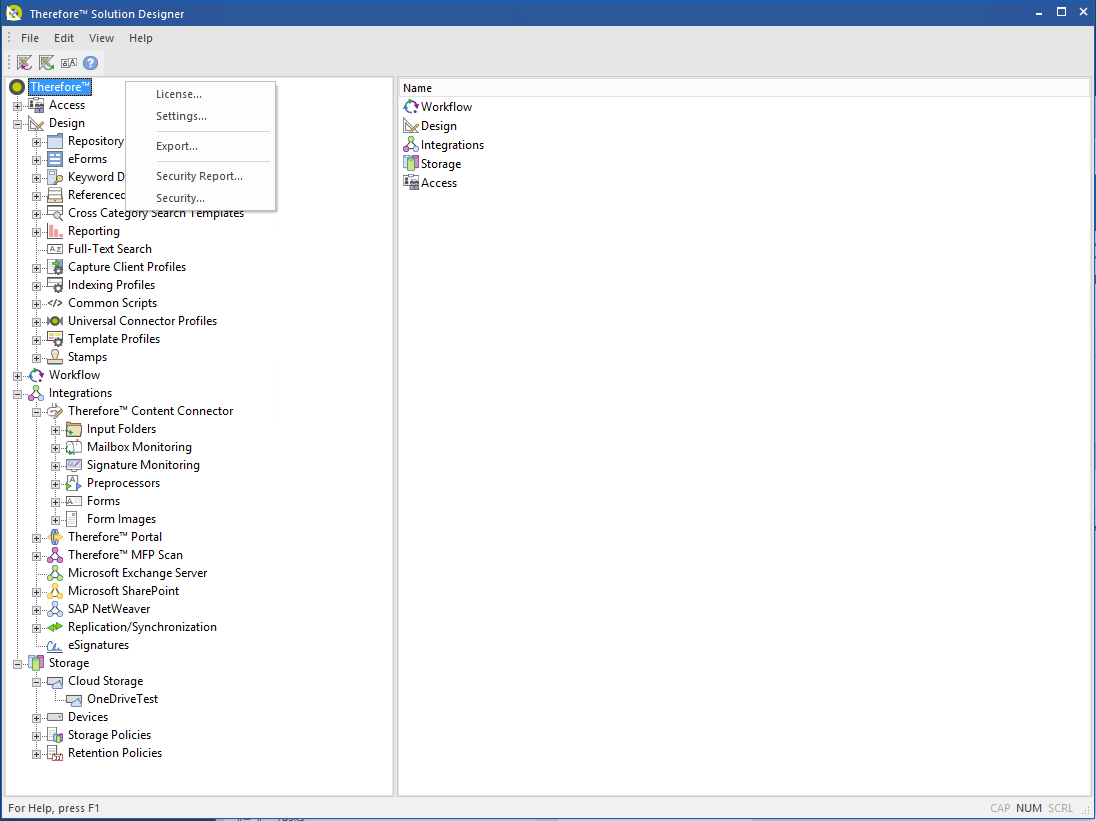
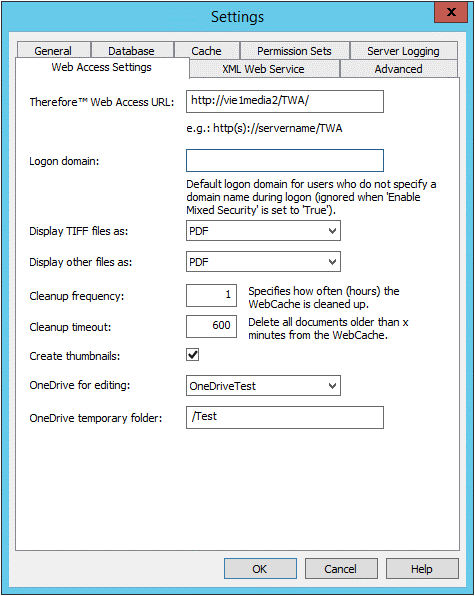
3.Right-click on the Therefore™ node and select Settings on the context menu.

|
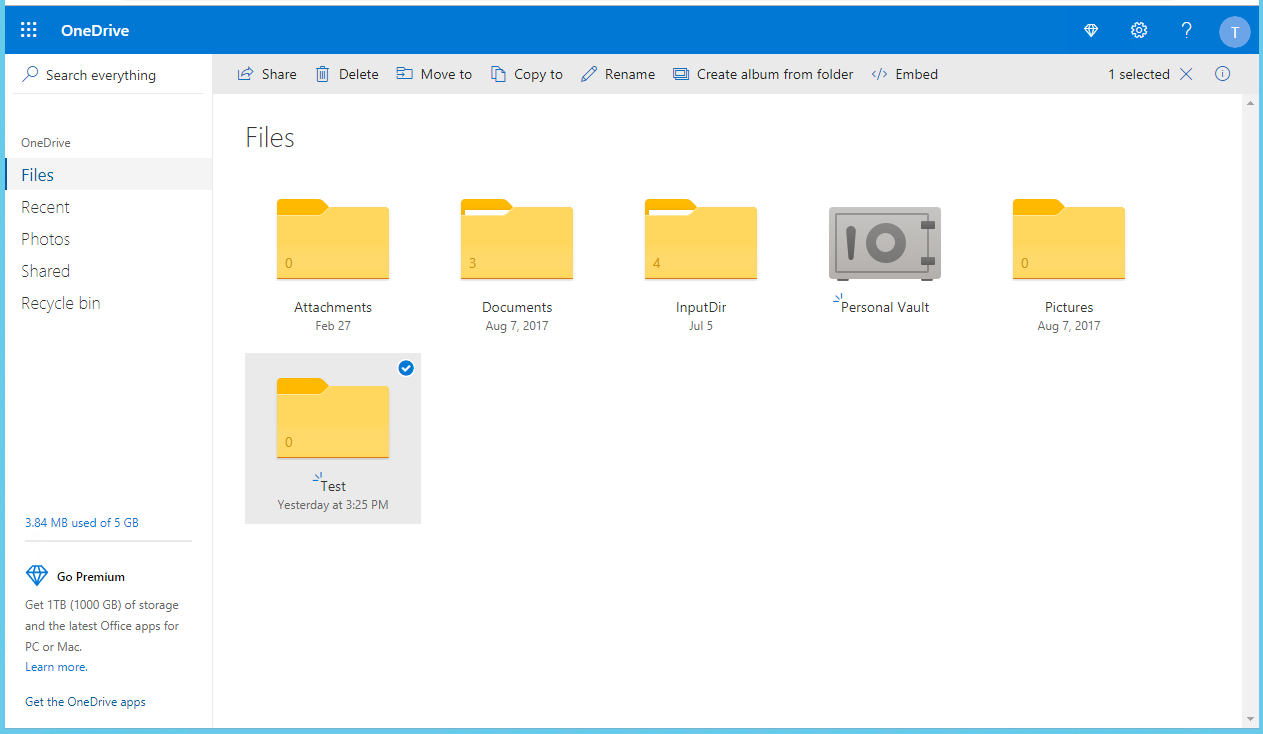
Note: Create a temporary folder in the OneDrive interface (unless a different folder that has already been created is preferred).
|
4.In the Settings dialog, click the Web Access Settings tab. Select the defined OneDrive storage in the drop-down list next to the OneDrive for editing option and define the temporary folder in the OneDrive interface (under it).
|
Note: The folder-path next to the OneDrive temporary folder option starts with '/' followed by the folder-path. Each folder through the folder-path is also separated by a '/'. E.g: /Folder/Folder2/Folder3.
|
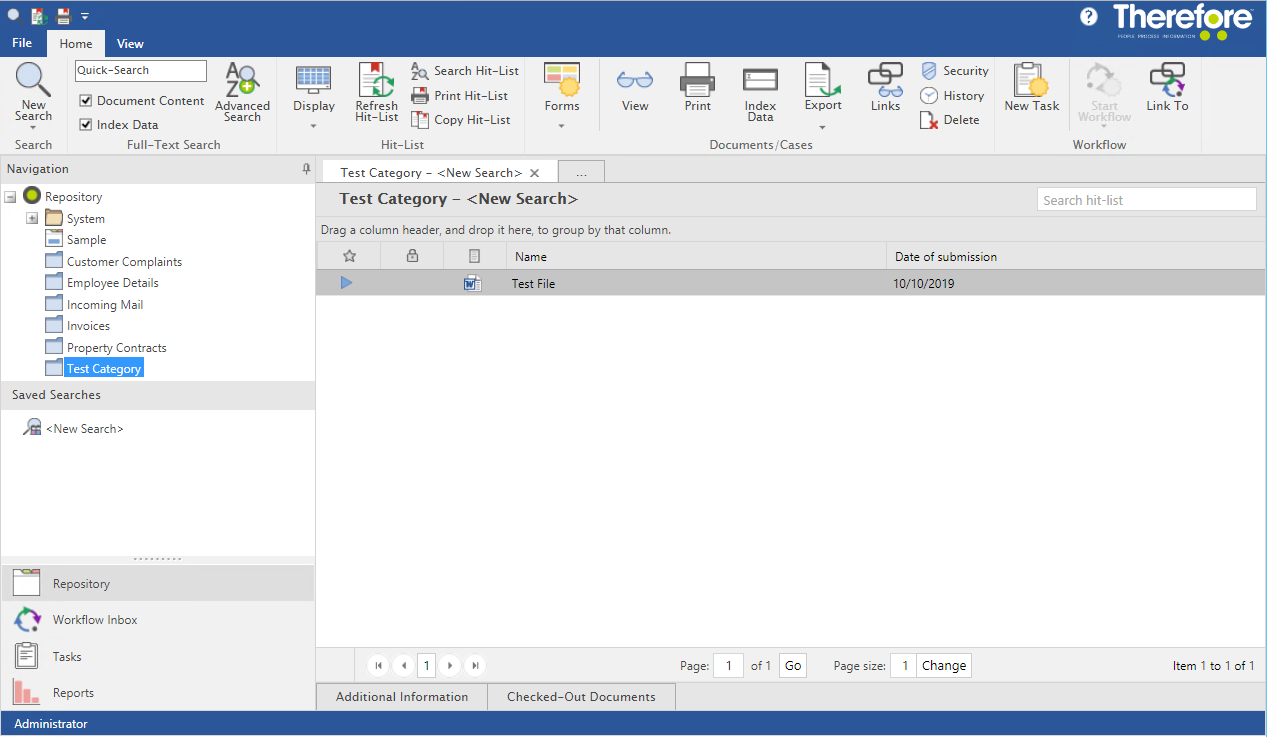
5.Go into the Therefore™ Web Access (Web Navigator) and select the file from within the category intended for editing.
6.After selecting the file (and double-clicking on it) to open the Therefore™ Web Viewer, click the Check Out option and Edit File.
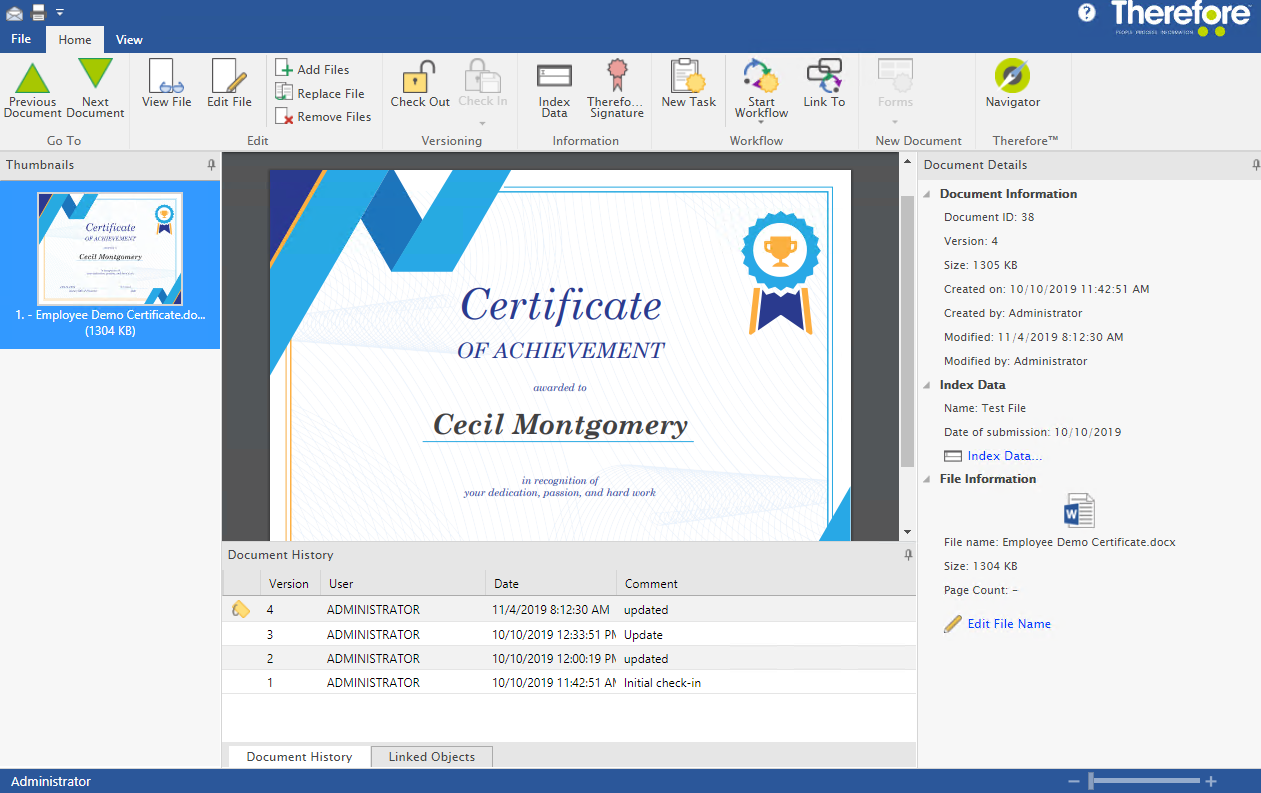
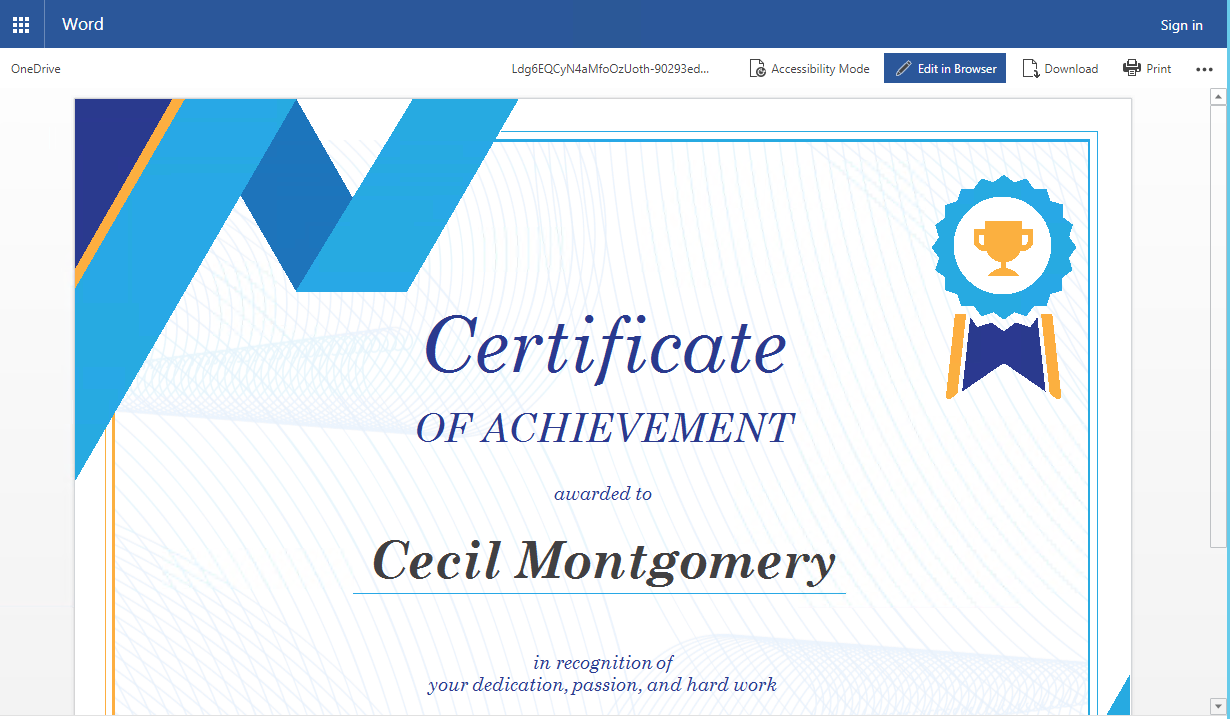
7.A browser window will open with the displayed document and an option to 'Edit in Browser'; click this and a new browser will open allowing the document to be edited.
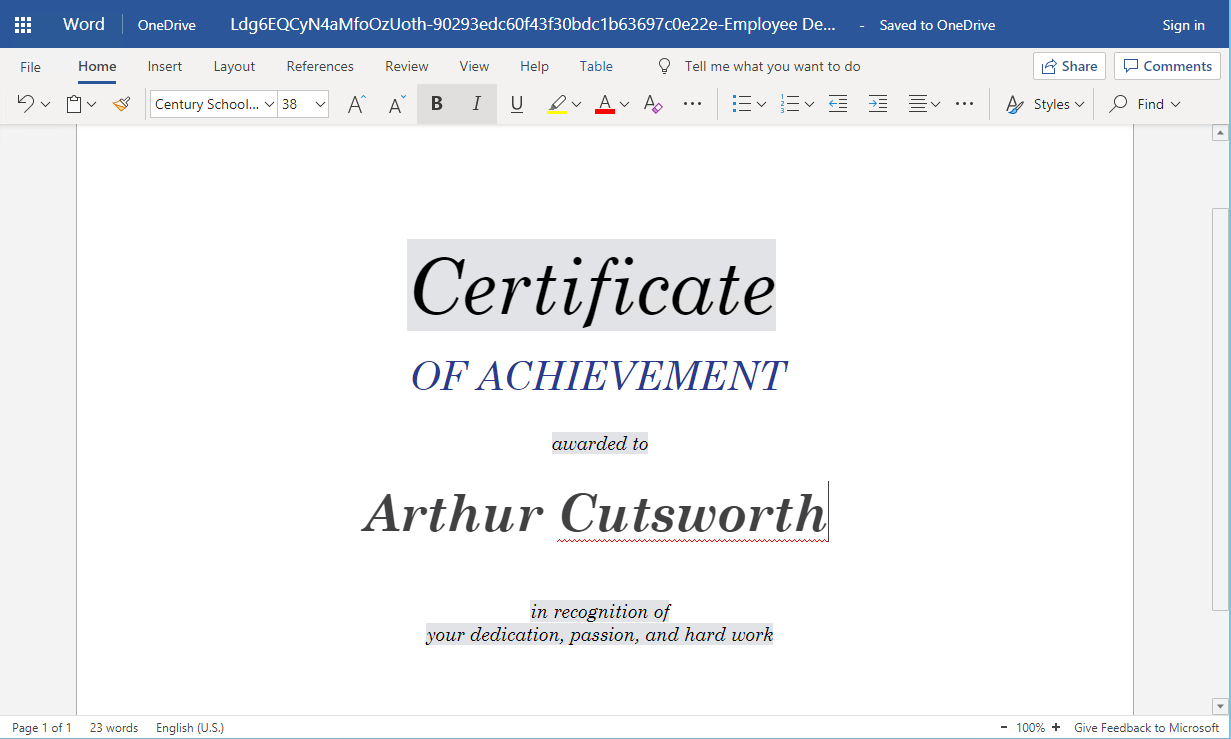
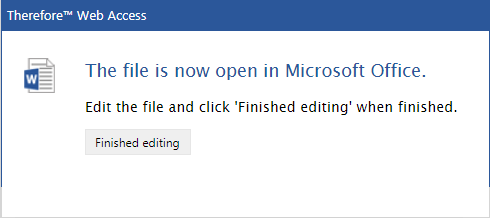
8.Once the document is saved (which is also done automatically) click the Finish Editing button on the pop-up dialog back on the Therefore™ Web Viewer.
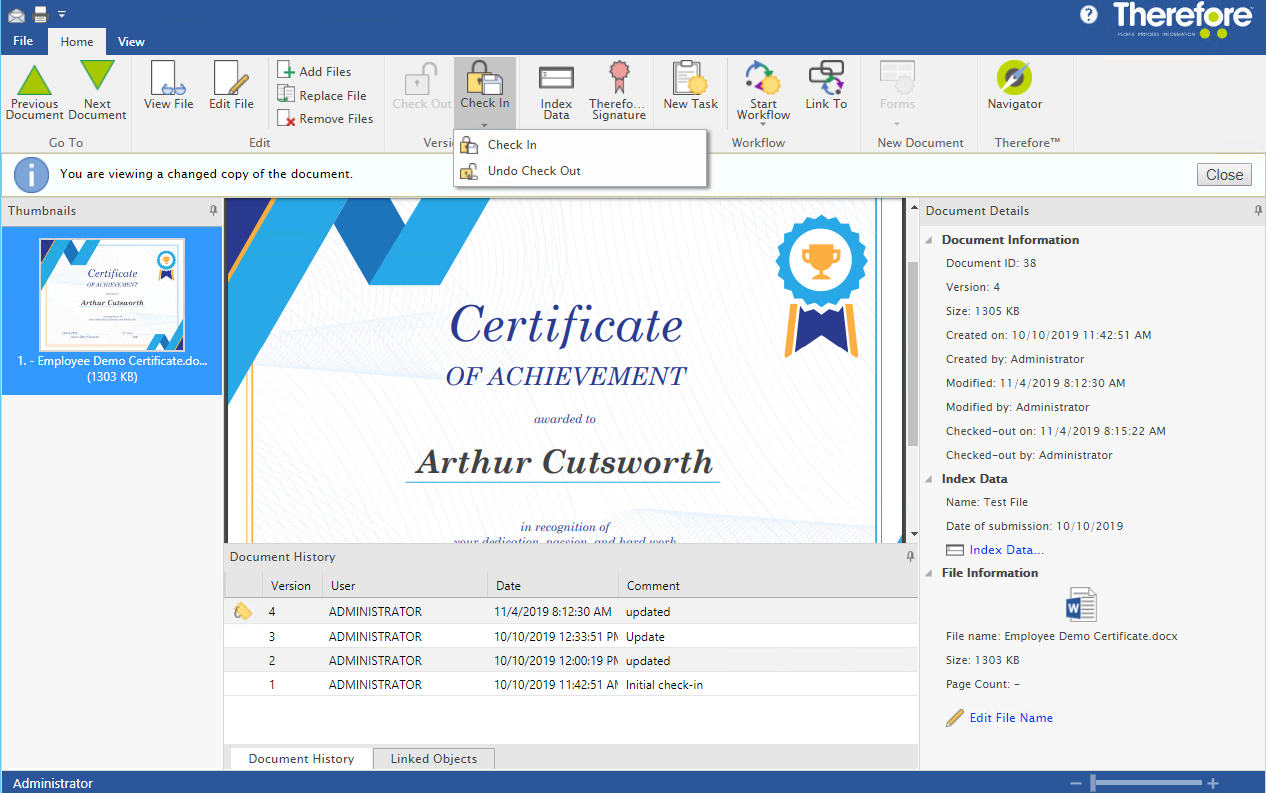
9.In the Therefore™ Web Viewer, click the Check In button for the changes to be saved in Therefore™.
|


