
|
Uploading Documents |
Scroll |
In addition to searching for documents, Therefore™ Portal users can also upload documents.
How do I select categories for uploading documents?
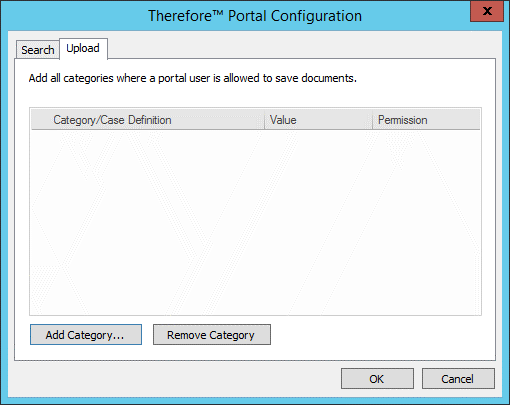
1.Right-click on the Portal object in the Therefore™ Solution Designer and select Manage Portal Categories to open the Portal Configuration dialog.
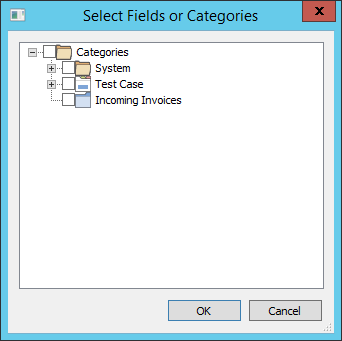
2.Switch to the Upload tab. Click on Add Category and navigate through the tree view to find the desired categories for upload. Check the box for each category you want to add. Selecting an object will also select all objects below its level. Click OK when done.
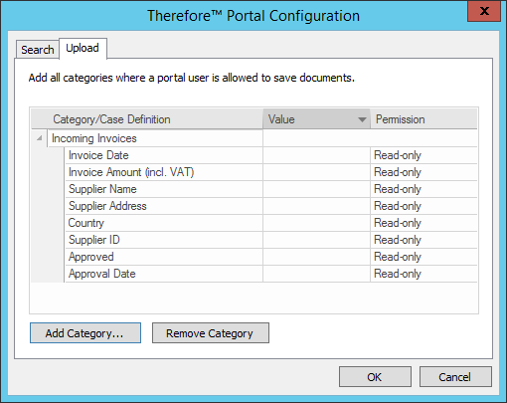
3.The category/case name will be listed, along with the pre-defined Value and the set Permission, which can be changed if necessary.
4.Click OK when done. Permitting users to upload documents is explained in the section Creating Portal Users.
|
|---|
5.Right-click on the Portal object in the Therefore™ Solution Designer and select Manage Portal Categories to open the Portal Configuration dialog.
6.Switch to the Upload tab. Click on Add Category and navigate through the tree view to find the desired categories for upload. Check the box for each category you want to add. Selecting an object will also select all objects below its level. Click OK when done.
7.The category/case name will be listed, along with the pre-defined Value and the set Permission, which can be changed if necessary.
8.Click OK when done. Permitting users to upload documents is explained in the section Creating Portal Users.
