
|
Set up integration with Microsoft Power BI in the Azure portal |
Scroll |
Configuration in the Azure portal
|
Permissions in the Azure portal Please note that no delegated permissions or application permissions need to be added for the Microsoft Entra application created in this step. These permissions are not required for the application to function, and they may cause errors. |

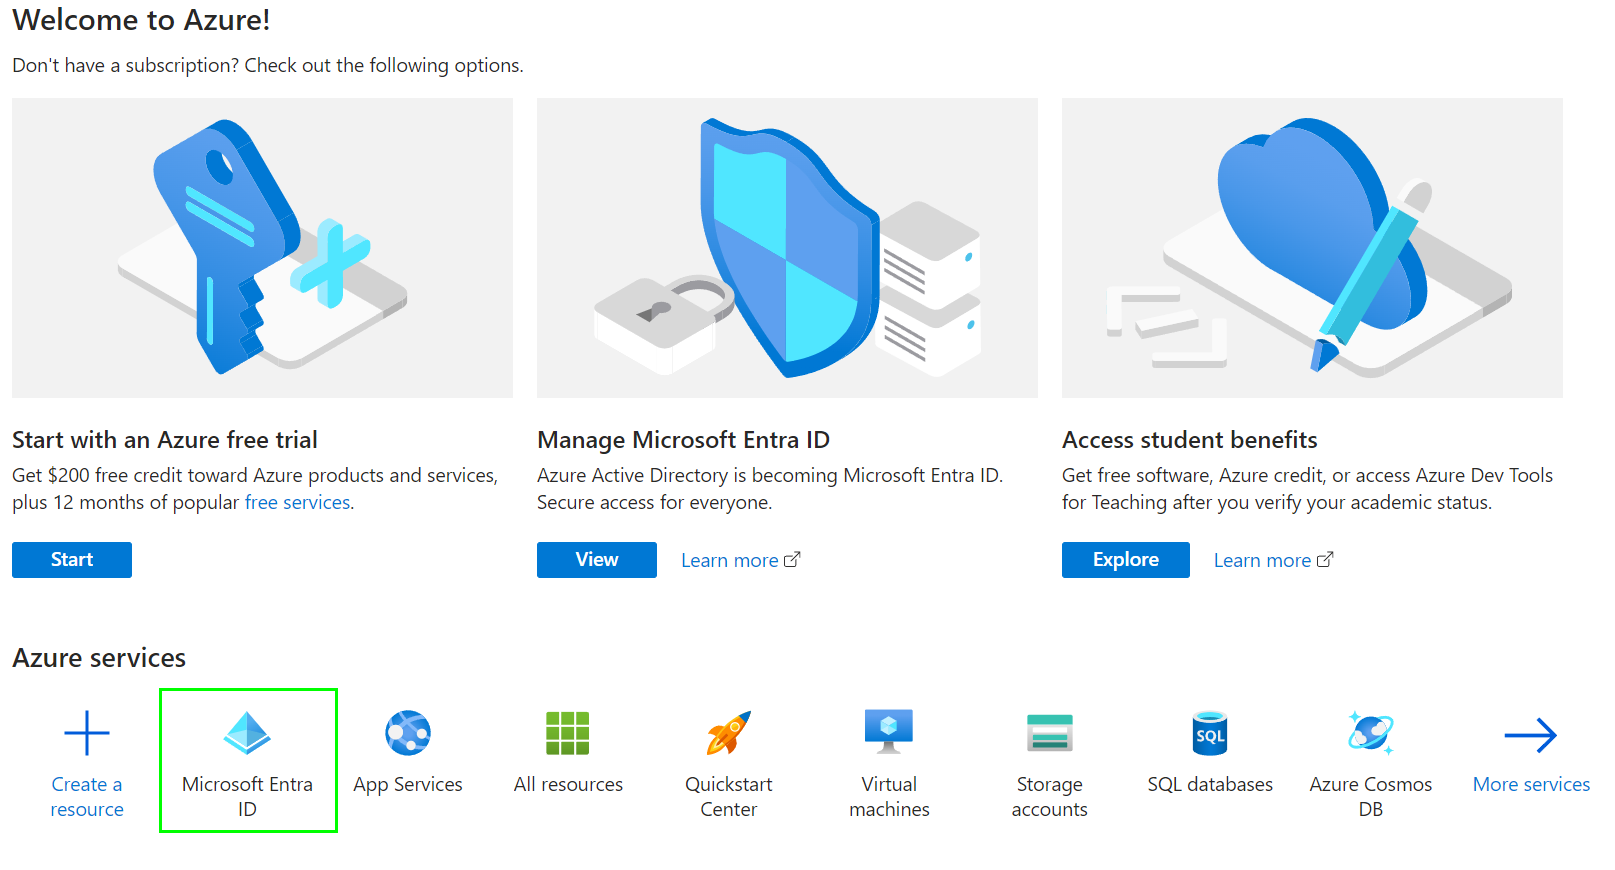
1.Go to the Azure portal and select 'Microsoft Entra ID'. The Azure portal can be accessed using the following link: https://portal.azure.com/#home
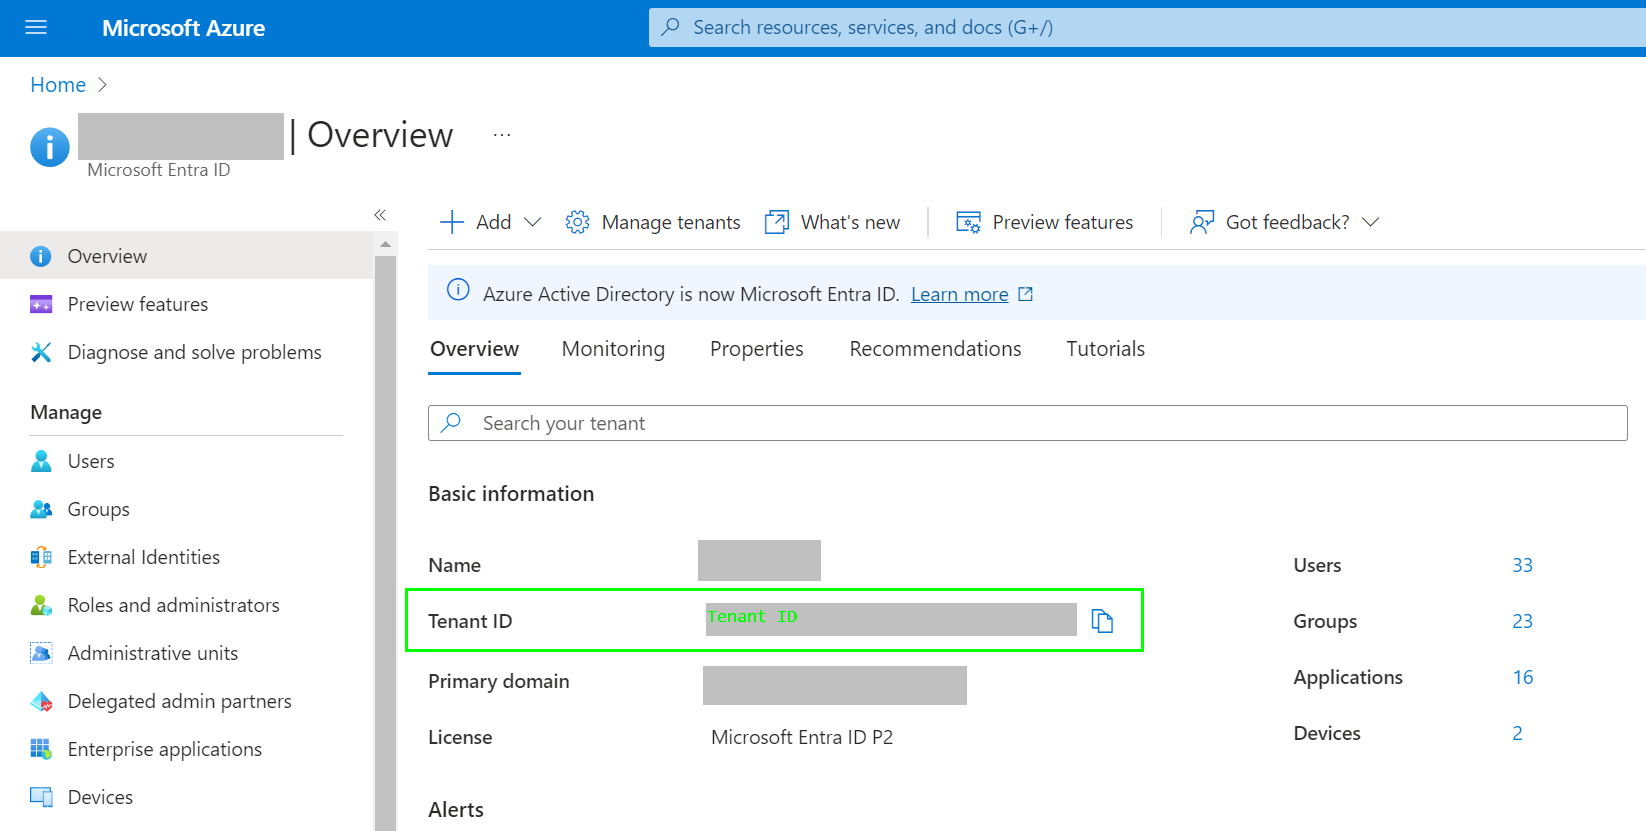
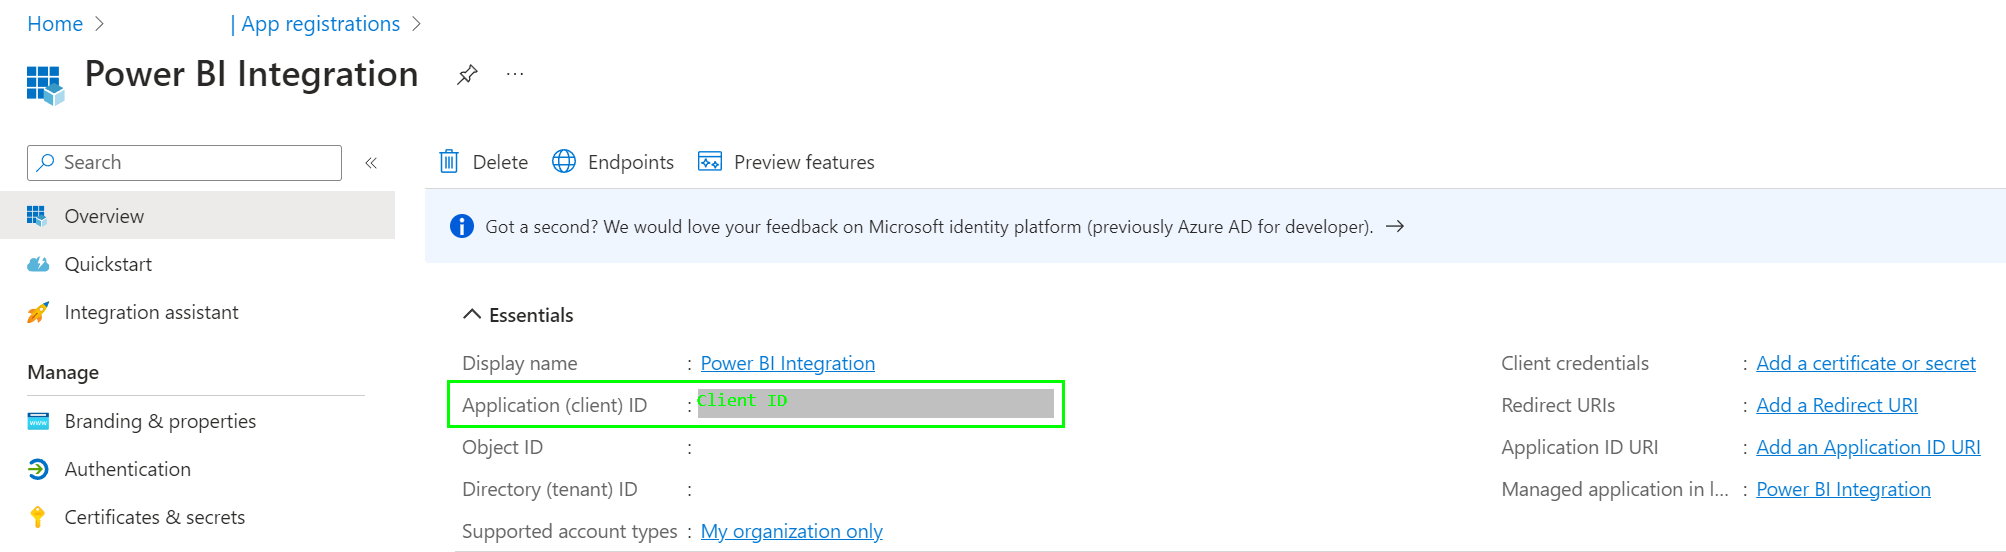
2.You will be taken to the Overview page for your Microsoft Entra ID tenant. Make a note of the Tenant ID. This ID is needed for setting up the integration with Microsoft Power BI in Therefore™.
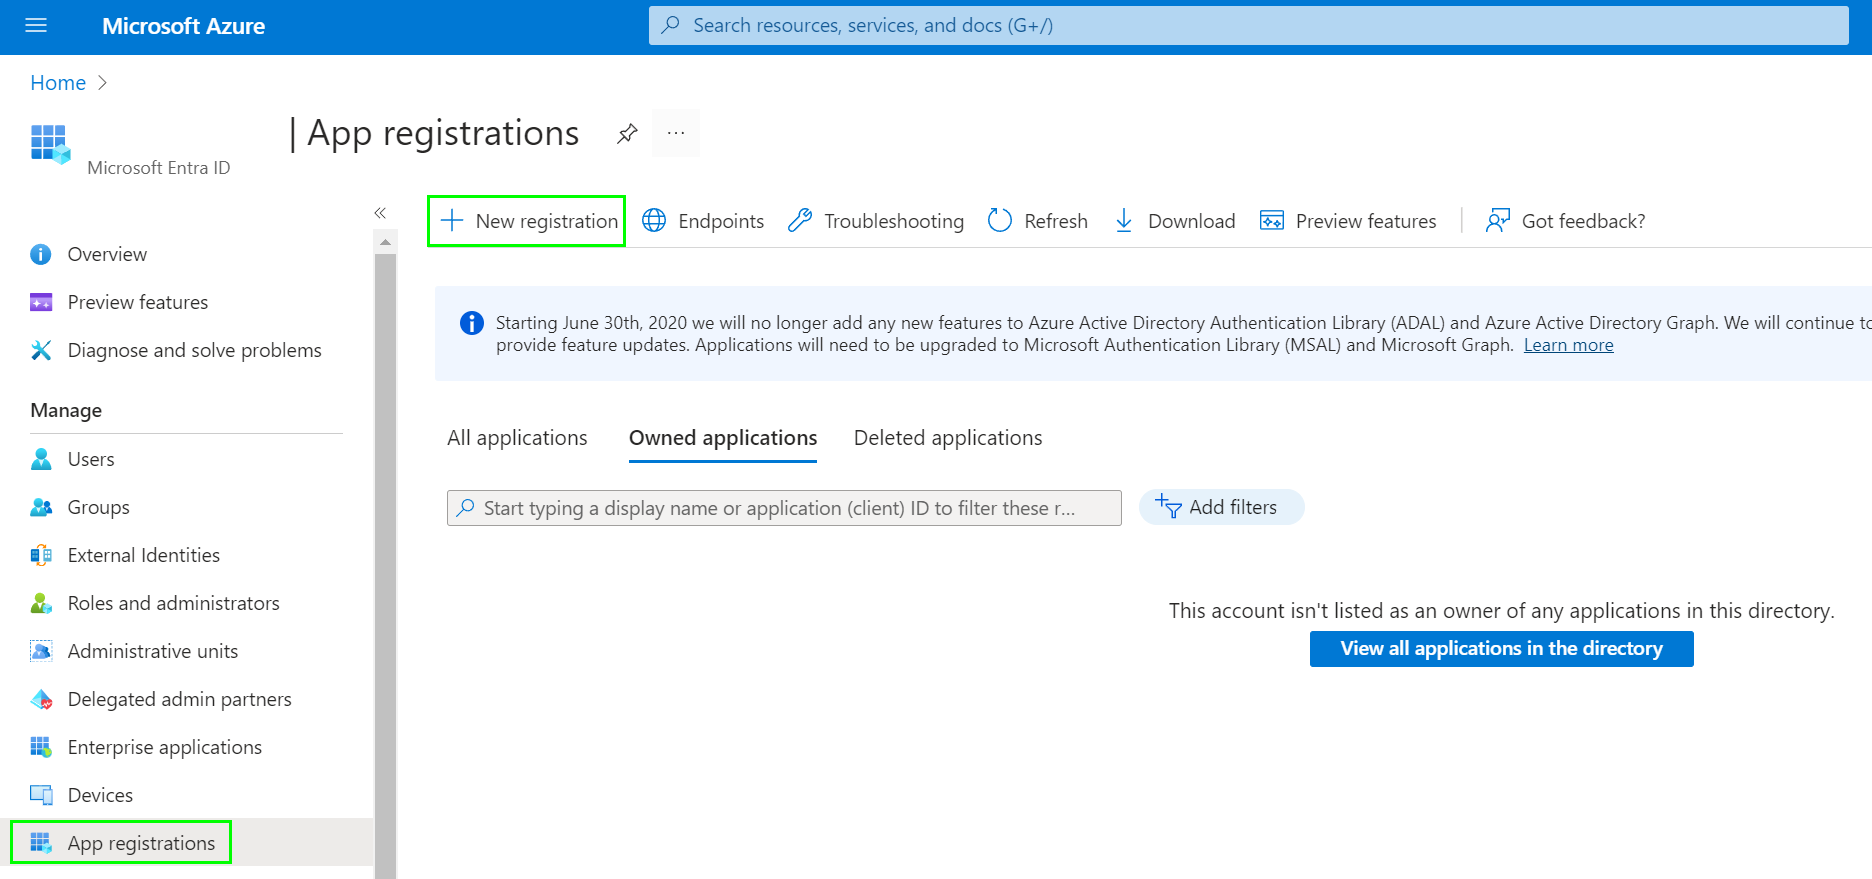
3.Select 'App Registration' from the menu on the left and click 'New registration'.
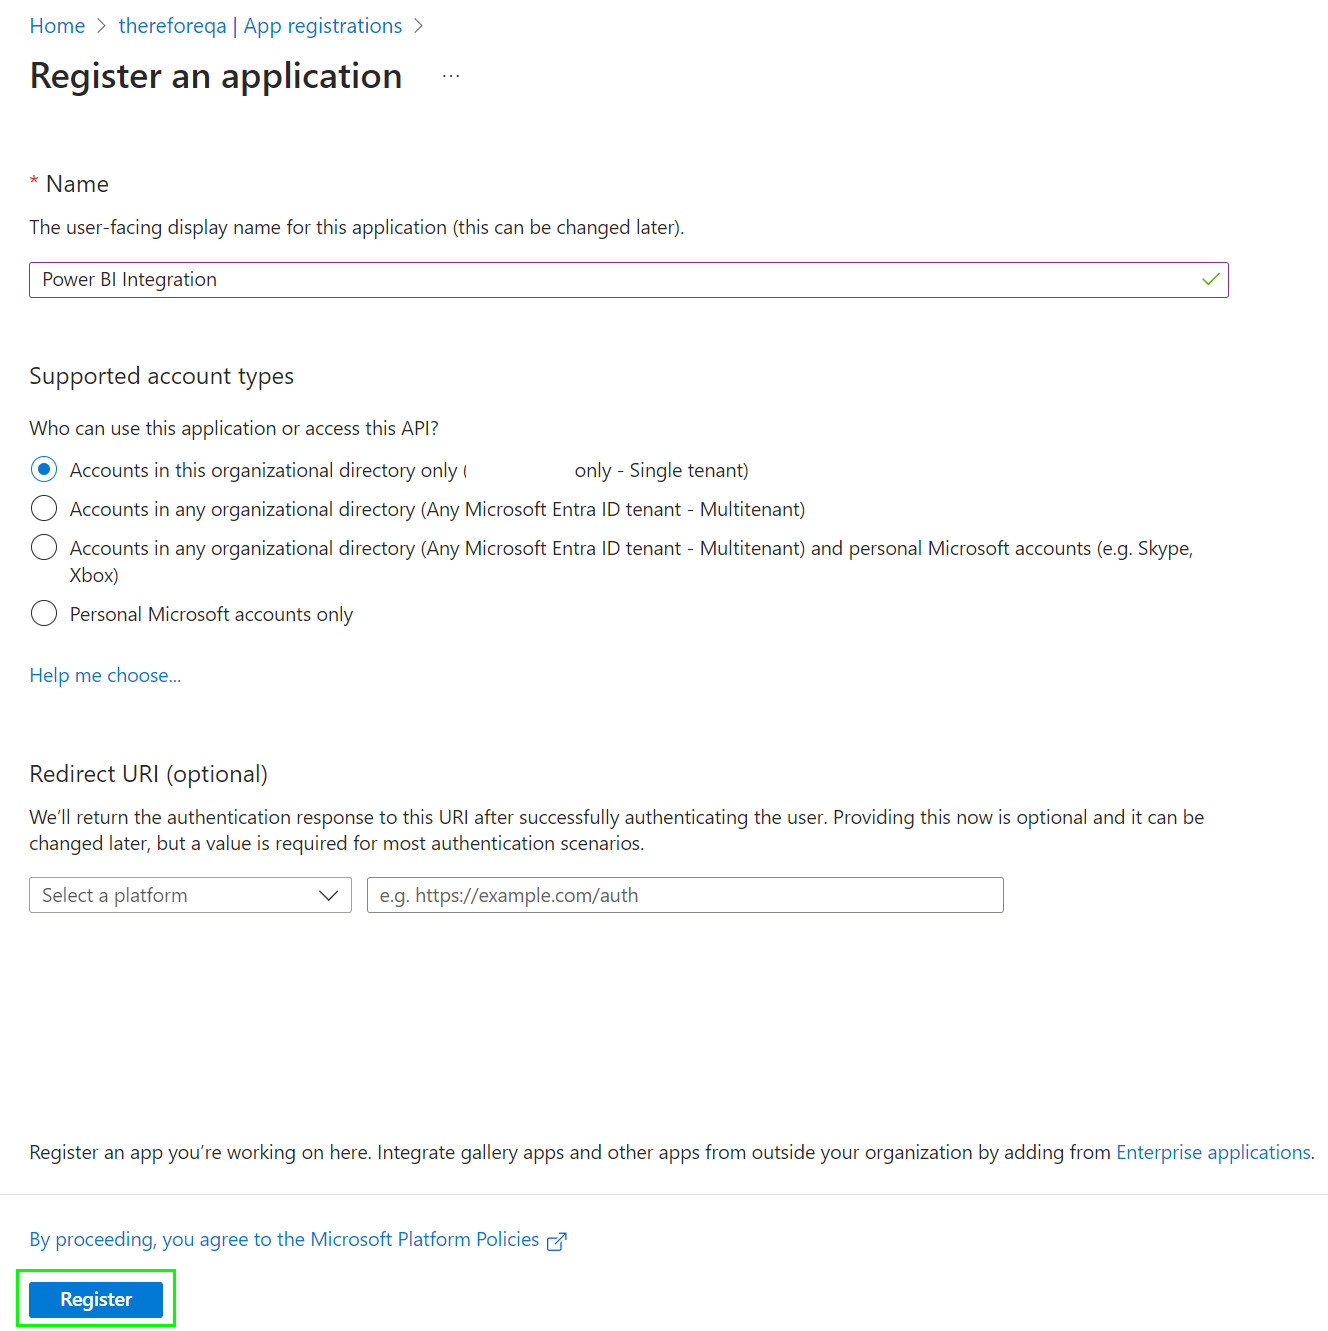
4.Enter a name for your application, select the supported account types, and enter a redirect URL, if needed. Click 'Register' to proceed.
5.Make a note of the 'Application (client) ID' in the Overview section. This ID can be reviewed by selecting the application under 'App registrations' > 'All apps'. It is needed for setting up the integration with Microsoft Power BI in Therefore™.
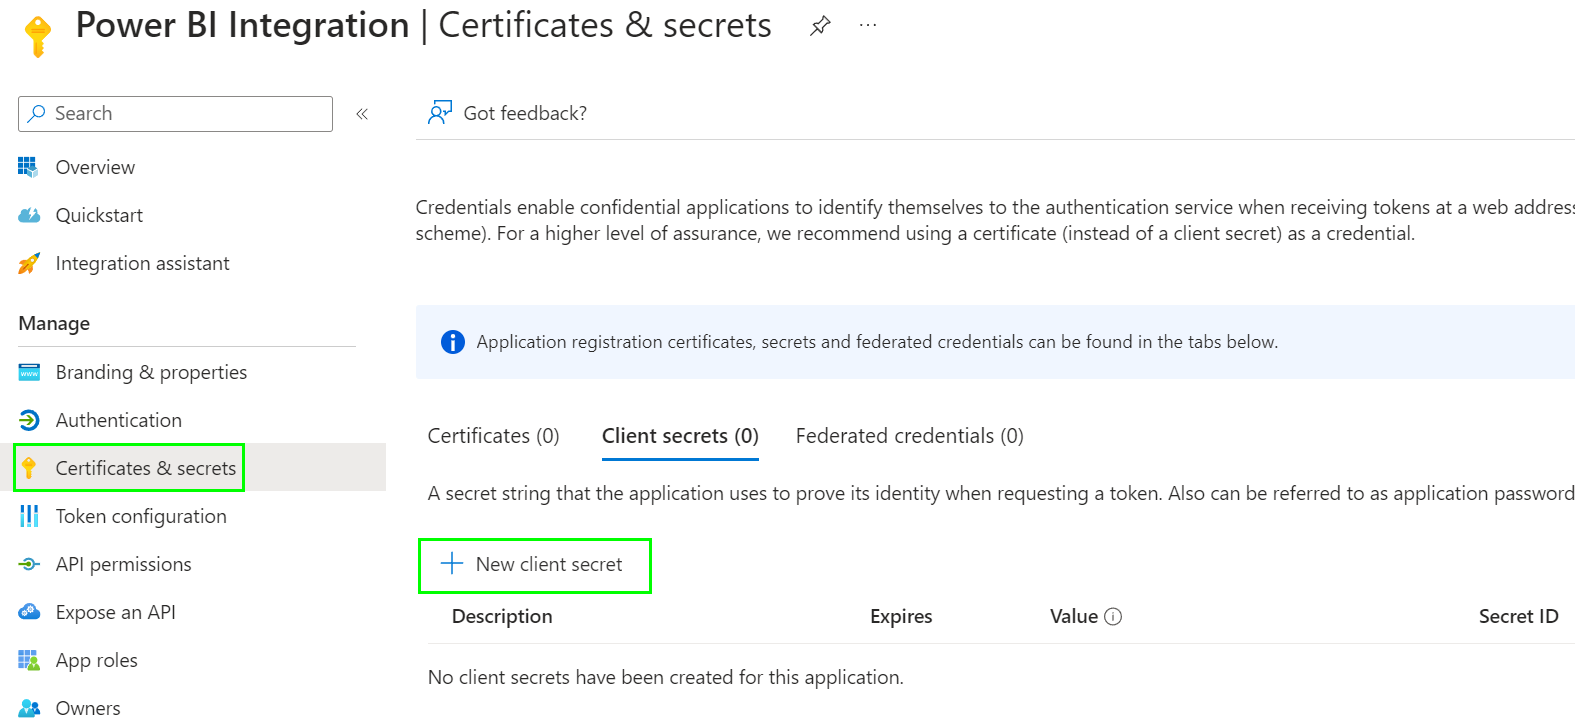
6. Select 'Certificates & secrets' and click 'New client secret' to create a secret for the application. The 'Add a client secret' dialog will open.
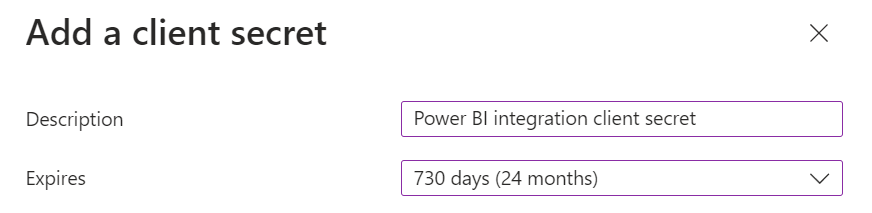
7. Enter a description for the client secret and set an expiration date. We recommend using 24 months so you don’t need to update the secret too often. If the secret expires the integration will stop working so make sure you update the secret before it expires. Click the 'Add' button to proceed.
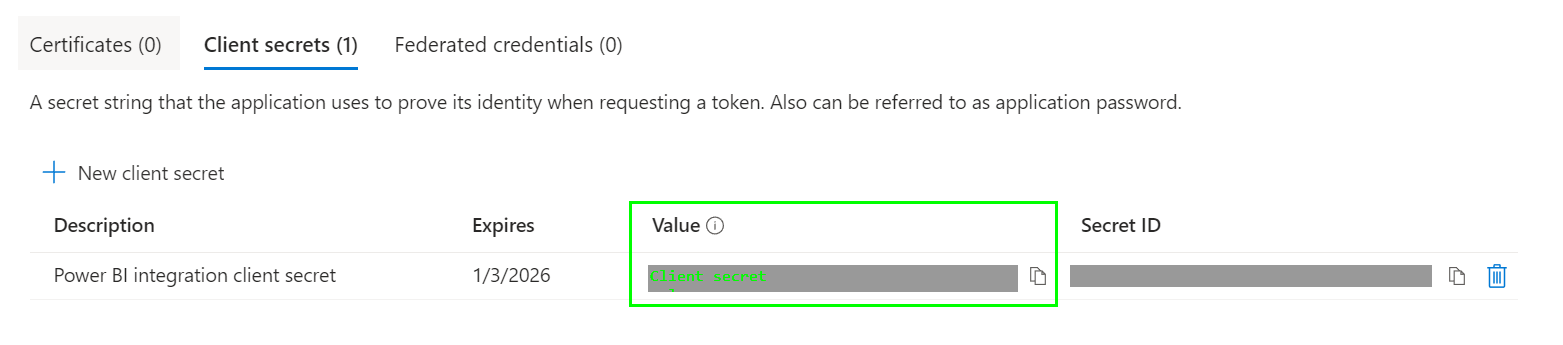
8. Copy and save the client secret's 'Value'. It is needed for setting up the integration with Microsoft Power BI in Therefore™. The client secret will not be accessible again after this window is closed.
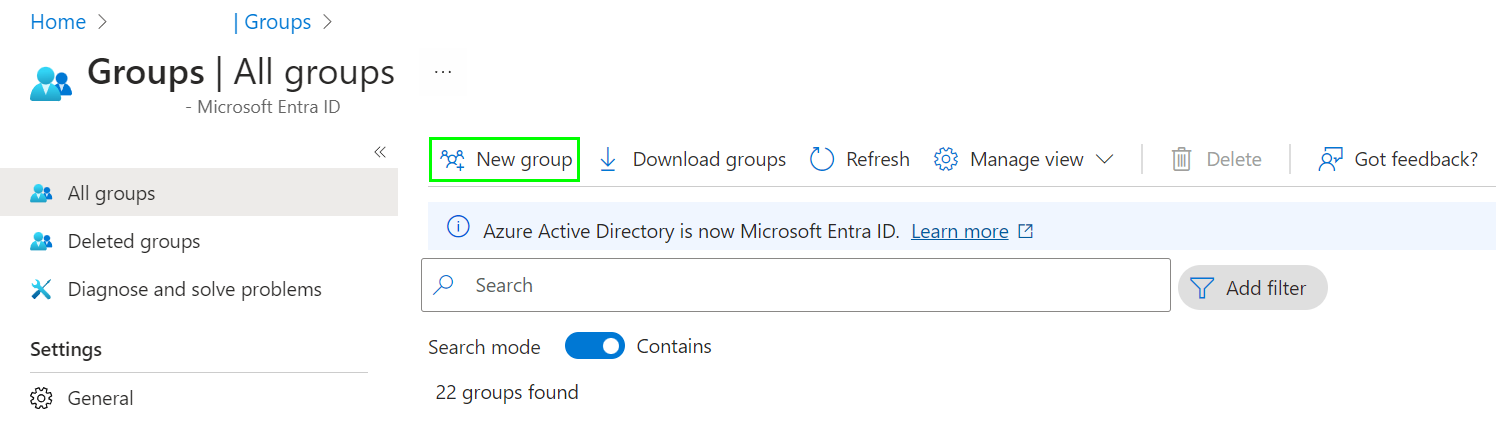
9. Go to Microsoft Entra ID > Groups and select 'New Group'. Create a new group.
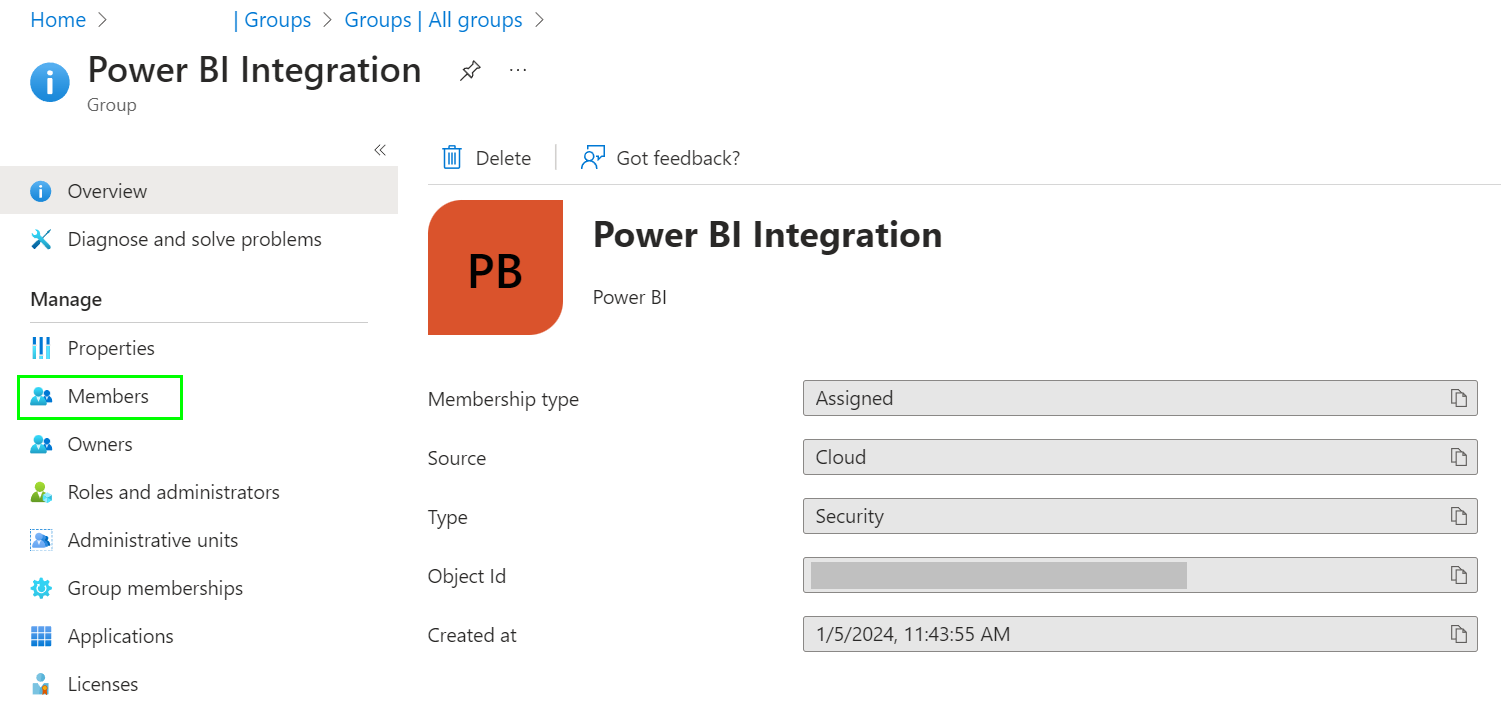
10. Go to Microsoft Entra ID > Groups and select the group you created. Click 'Members'.
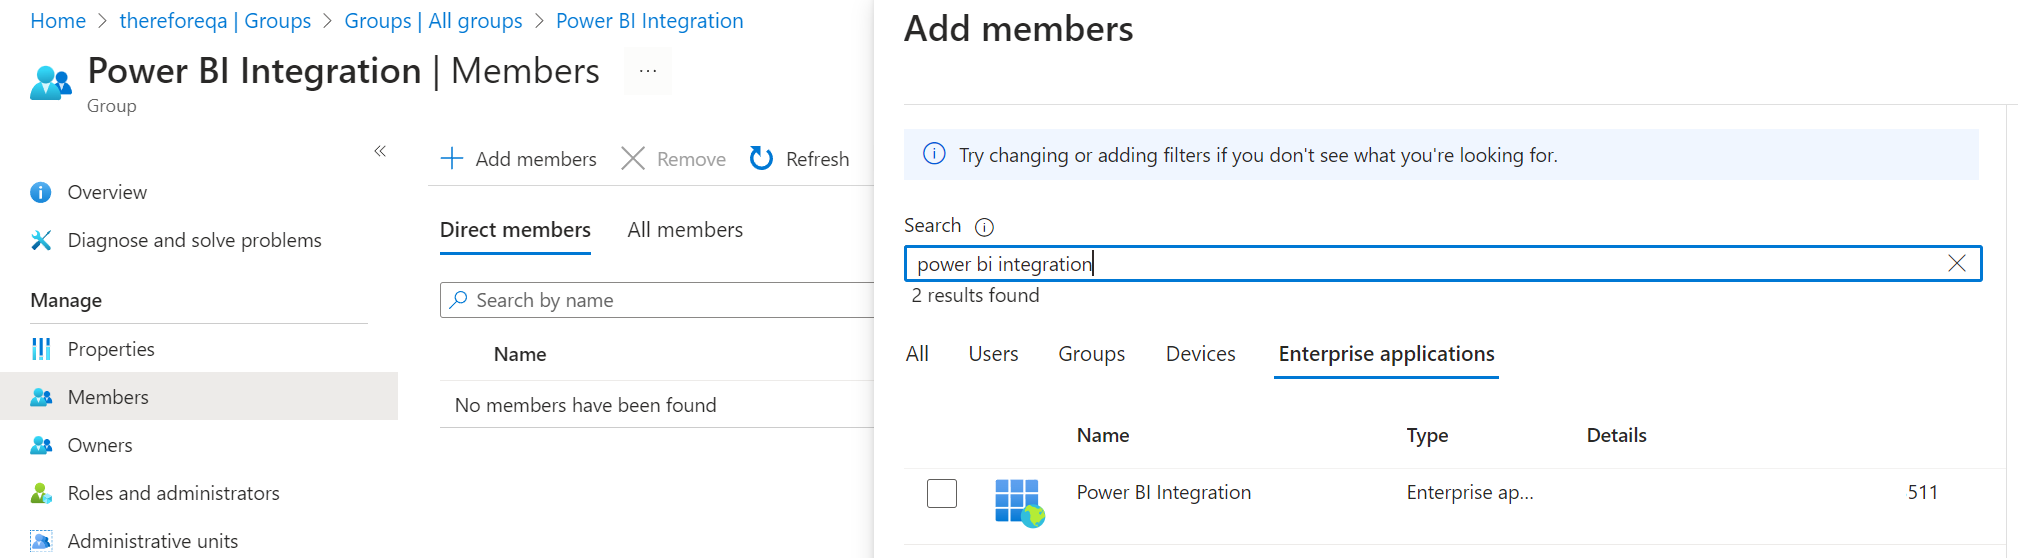
11. Click 'Add members'. The Add members dialog will open. Select the 'Enterprise applications' tab and check the application you created. Click the button labeled 'Select' to proceed.
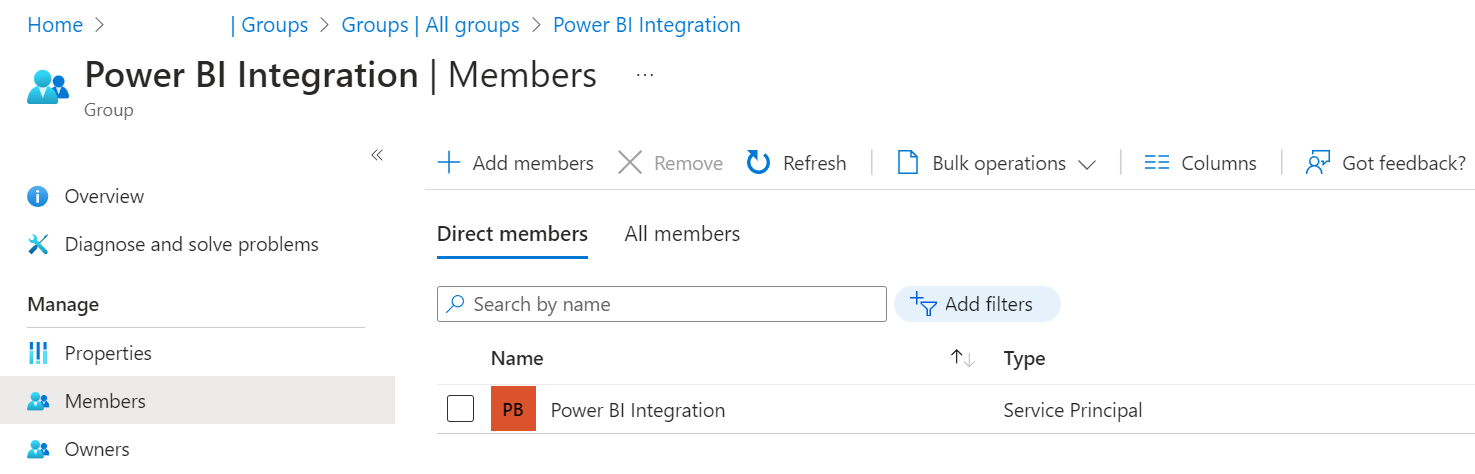
12. The application will now be listed as Service Principal.
Configuration in Microsoft Power BI
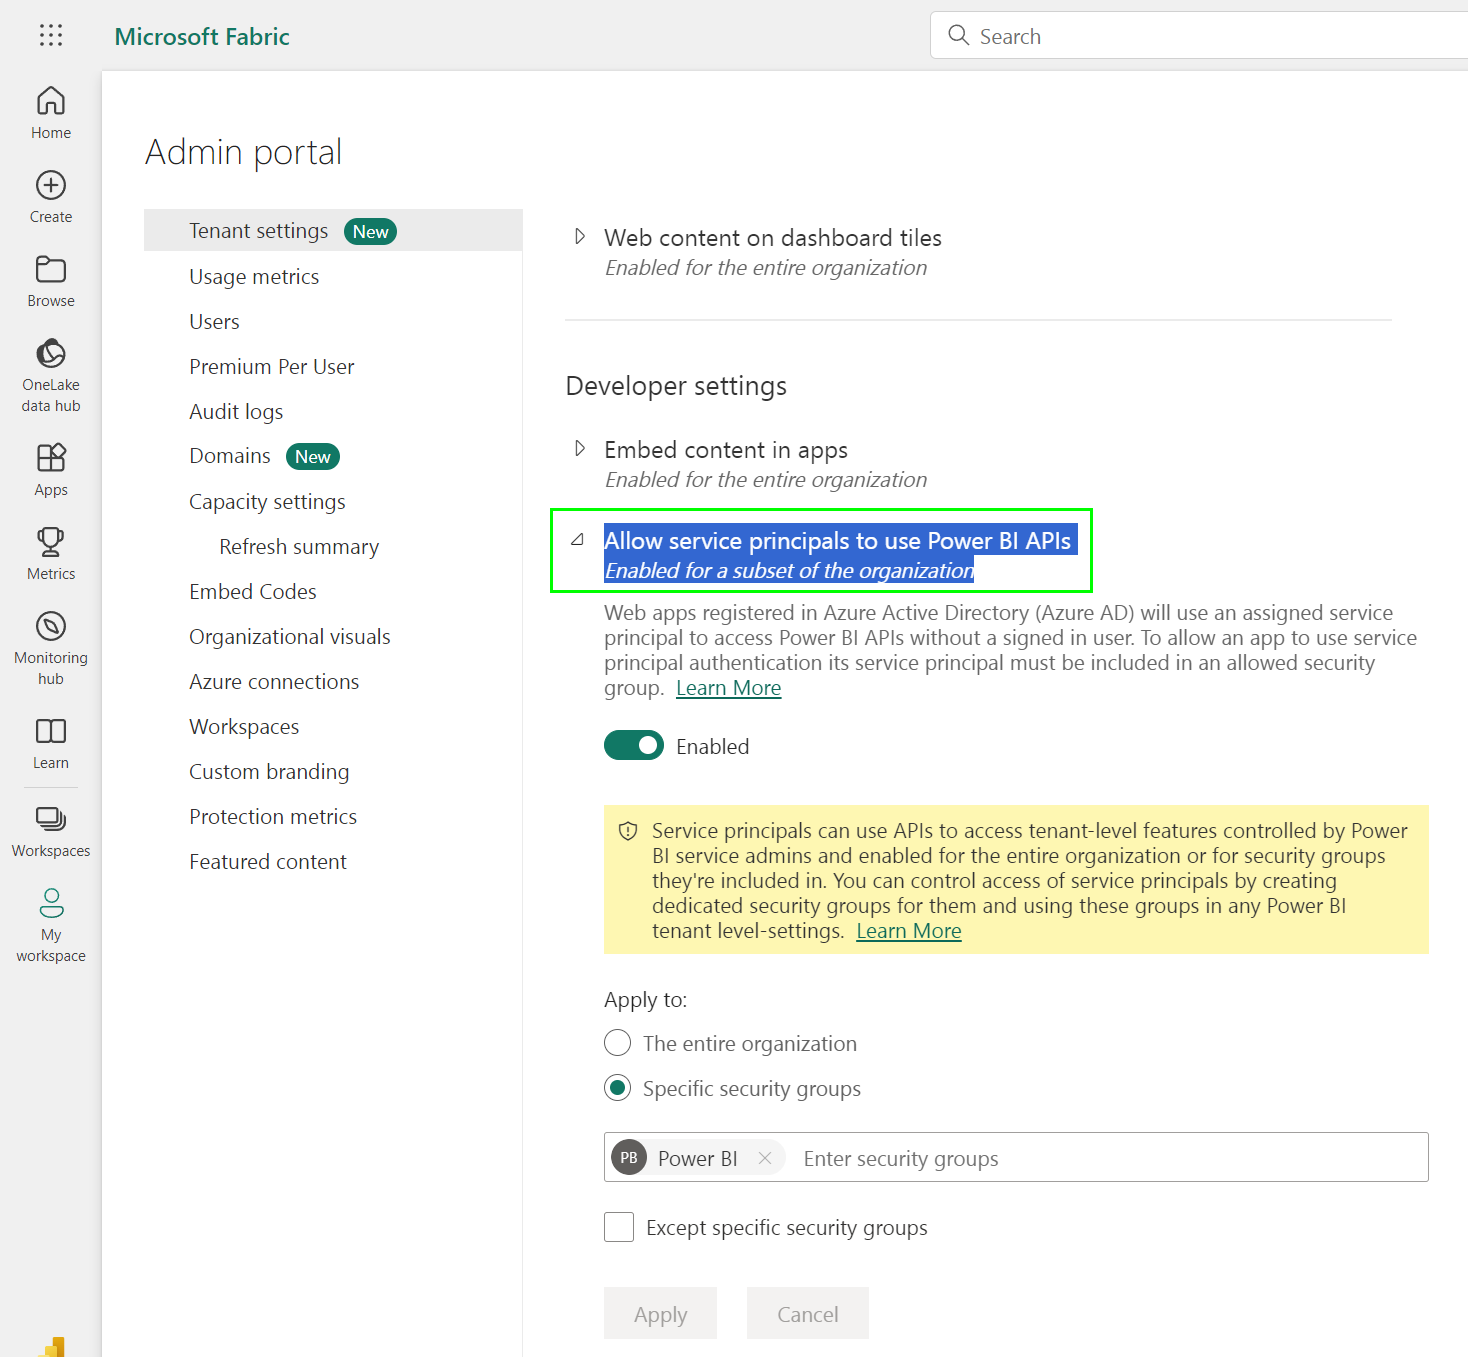
13. Log into Microsoft Power BI as administrator and enable access by service principals. The setting can be found under: Settings > Admin Portal > Tenant settings > Developer settings > Allow service principals to use Power BI APIs. Under 'Apply to', add the security group you have created for your application in the previous step. Power BI can be accessed using the following link: https://app.powerbi.com/
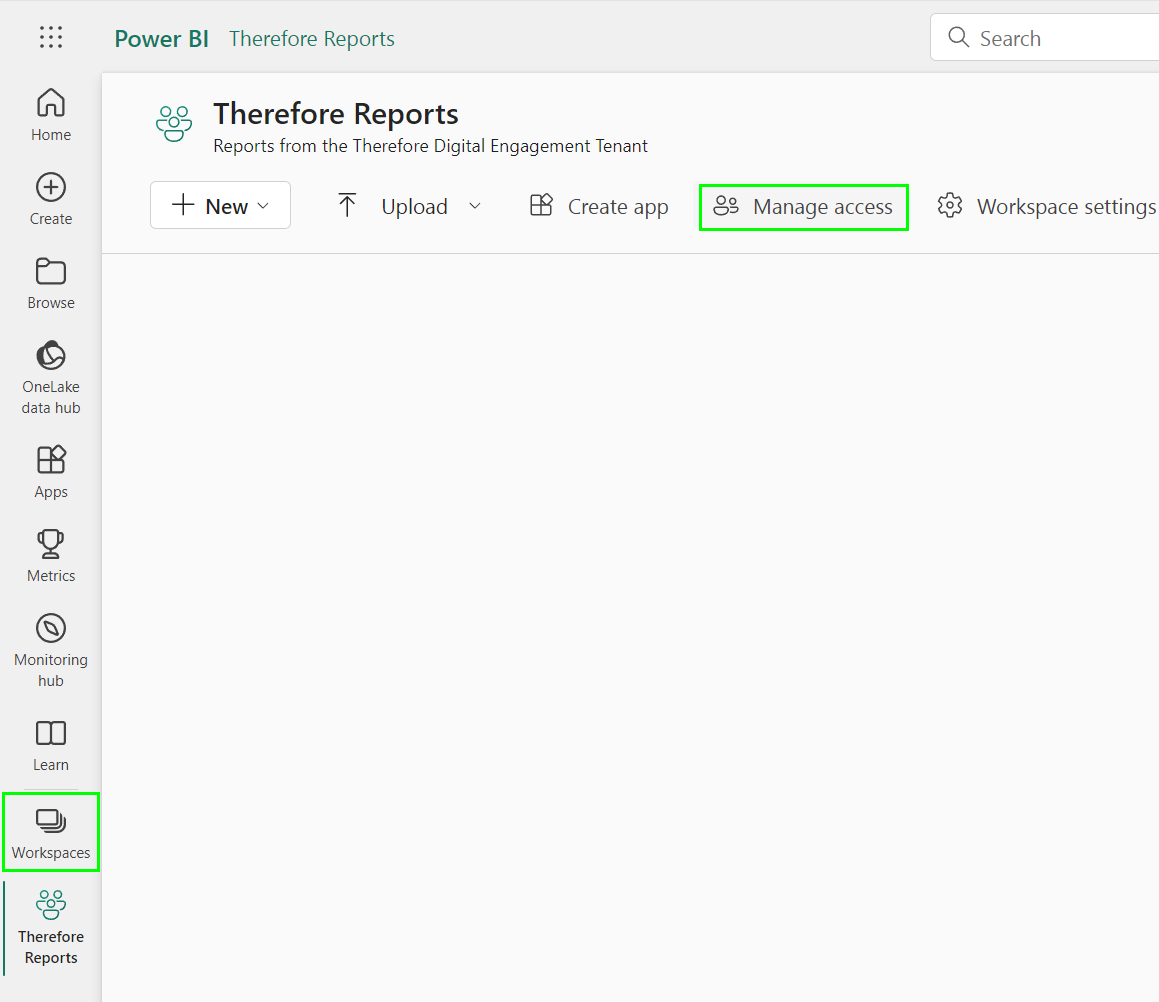
14. Select 'Workspaces' and create a new workspace or access an existing workspace. Click 'Manage Access' to open the Manage Access dialog.
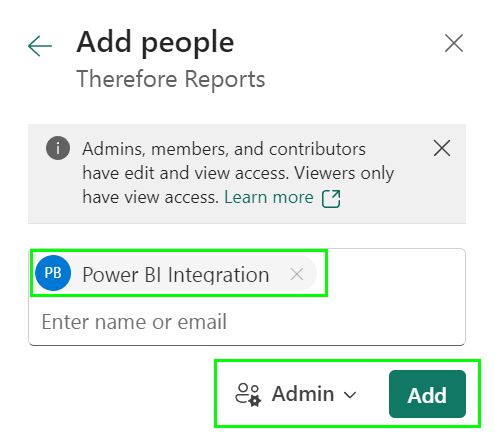
15. In the Manage Access dialog, click the button labeled 'Add people or groups' to open the 'Add people' dialog. Search for and check the application you created. Select 'Admin' from the dropdown menu. Click 'Add' to proceed.
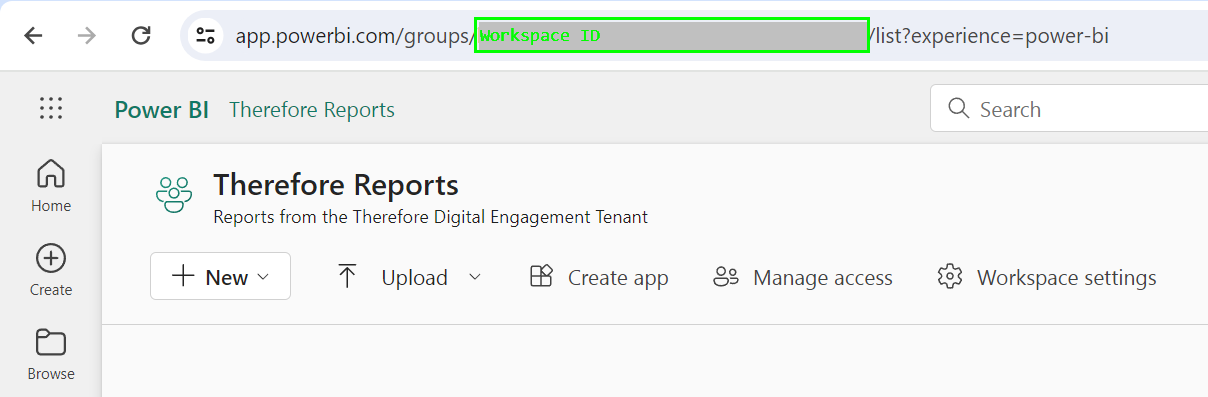
16. Extract the workspace ID from the URL. This ID is needed for setting up the integration with Microsoft Power BI in Therefore™.
Configuration in the Therefore™ Solution Designer
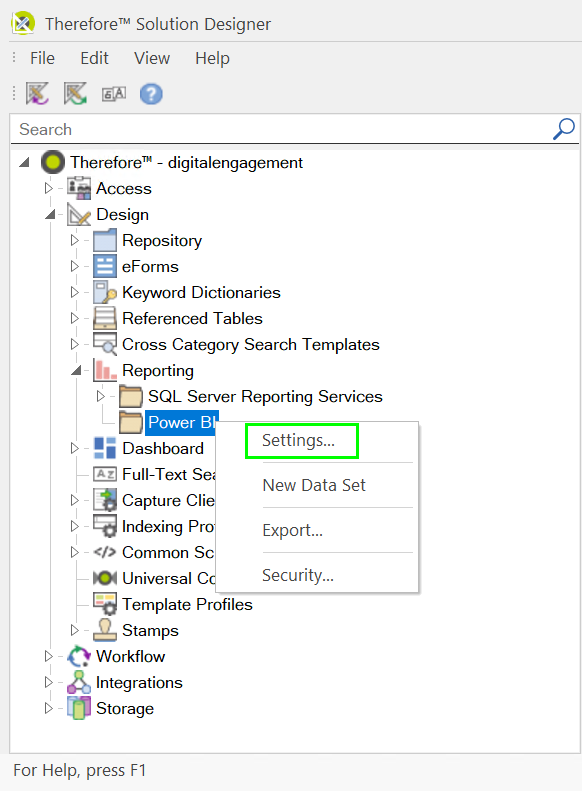
17. In the Therefore™ Solution Designer, right-click on Power BI and select 'Settings'.
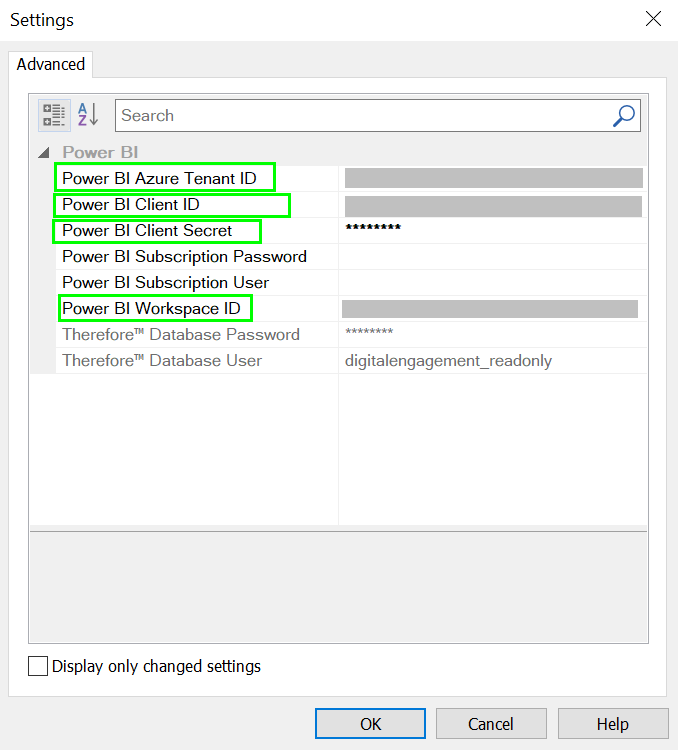
18. Enter the Tenant ID, Application (Client) ID, Client Secret, and Workspace ID.
19. Continue by sending data to Power BI to create reports.
