|
Data matching |
Scroll |
How to set up data matching in Therefore™ Smart Capture
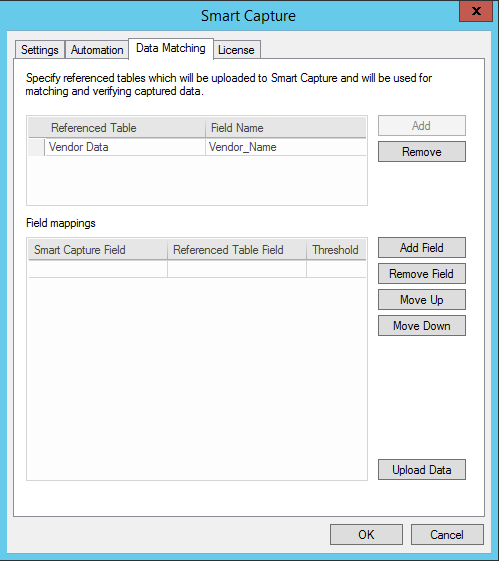
1. Click on the Smart Capture node in the Therefore™ Solution Designer and go to the Data Matching tab.
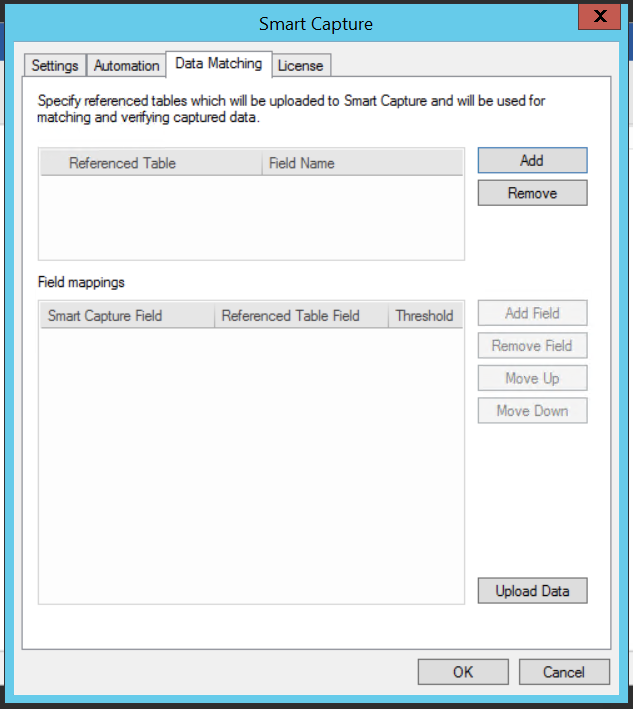
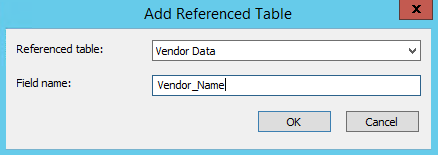
2. Click Add and select a saved referenced table from the drop down menu.
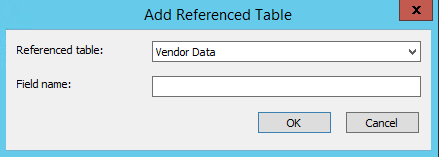
3. Enter a Field name of your own choosing. This field will show up in the manual verification UI, and this is where the information Smart Capture gathered from the referenced table will be displayed. Click OK to proceed back in the Data Matching tab.
4. Click on the referenced table to select it and click Add to add a new row to Field mappings.
5. Select a Smart Capture field and a Referenced Table Field to match these fields together. Set a matching percentage for this field under Threshold.
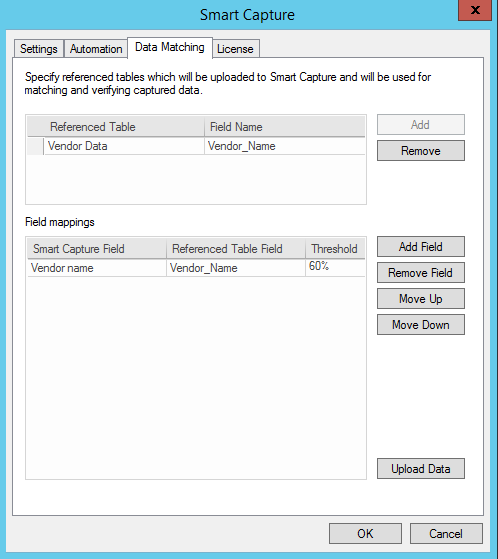
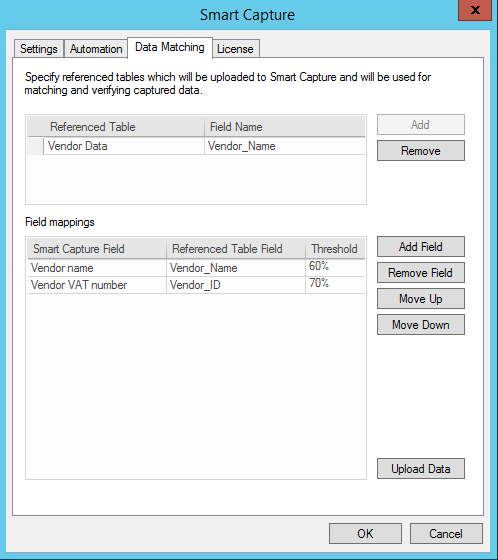
6. If multiple fields were mapped, use the Move Up and Move Down buttons. The field on top of the list will be processed first. In the below example, if no match for Vendor name could be found the system will move on to find data for Vendor ID Match.
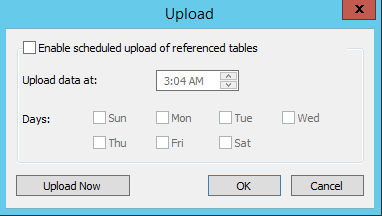
7. Click Upload Data to go to the Upload dialog. Set a time and date for the data from the referenced table to be uploaded to the Smart Capture server or click Upload Now to manually upload the data.
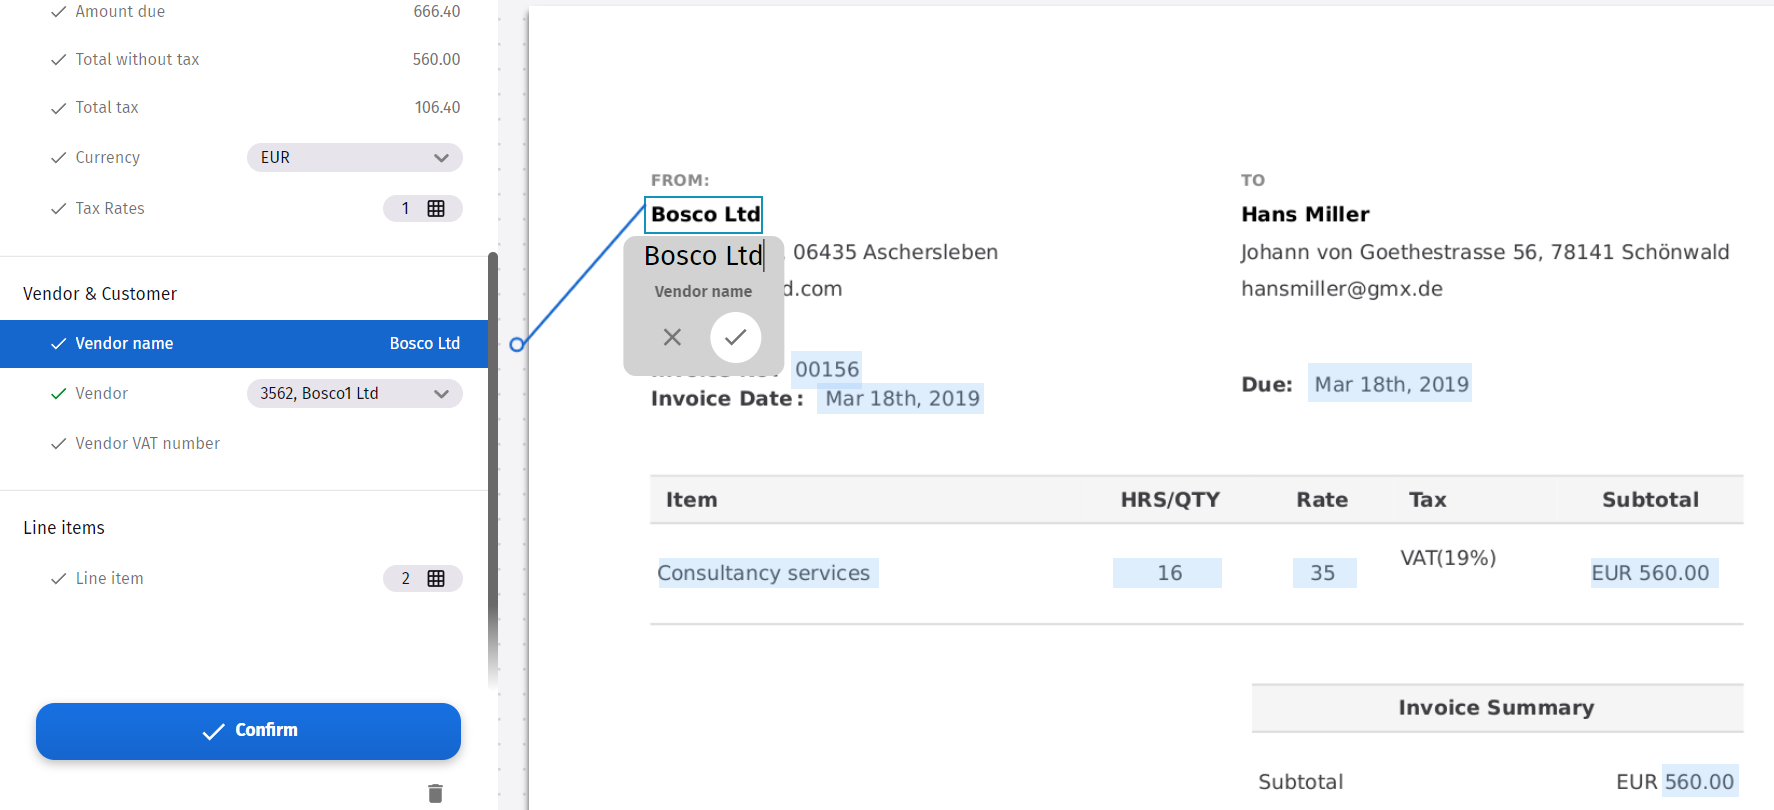
8. The matched fields will show up in the manual verification step of Therefore™ Smart Capture. In this example, a match for Vendor Name was found.