
|
Server Connection |
Scroll |
Set up the connection to the Therefore™ Online server.
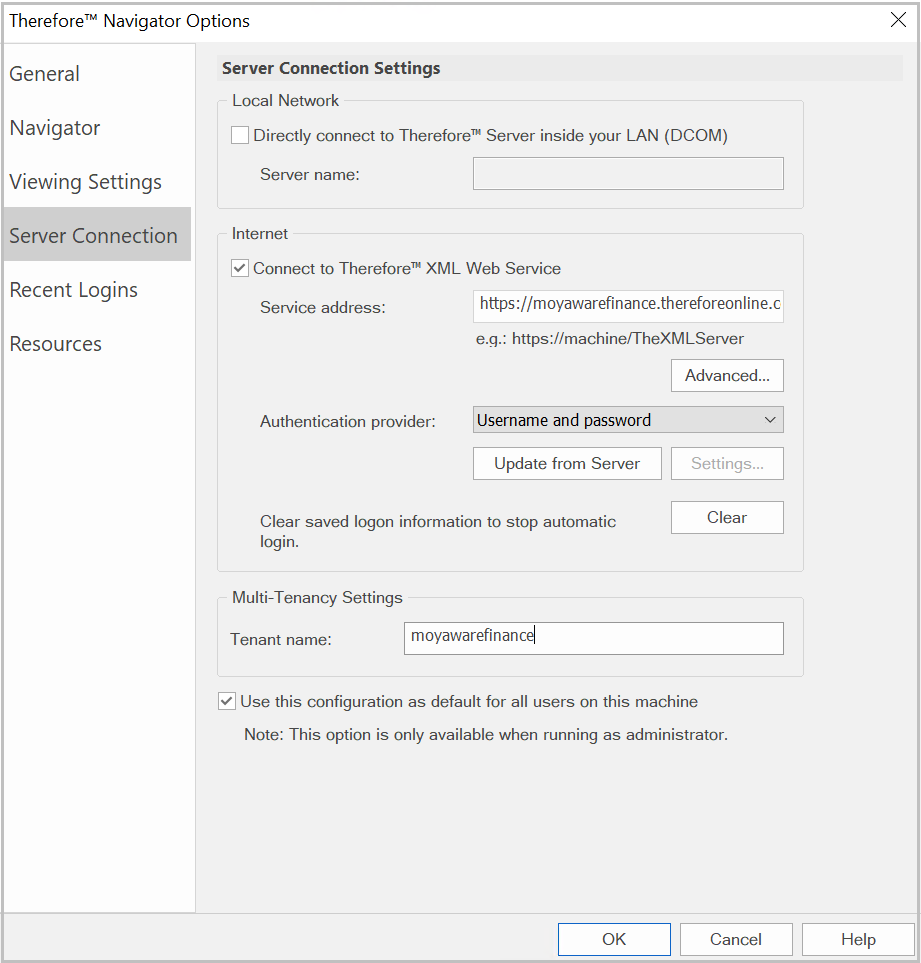
Local Network
Directly connect to Therefore™ Server inside your LAN (DCOM)
Enable this type of connection inside a Local Area Network (LAN) using DCOM.
Server Name:
Enter the DNS name or its IP Address. If the Therefore™ Server name is empty, the default Therefore™ Server from the Windows Registry will be used.
Internet
Connect to Therefore™ XML Web Service
If this option is selected, the connection will be established to the Therefore™ Server using the Internet.
Service Address:
Enter the URL for the Therefore™ XML Web Service. Use the following format: https://tenantname.thereforeonline.com/TheXMLServer
Advanced...
Configure proxy settings.
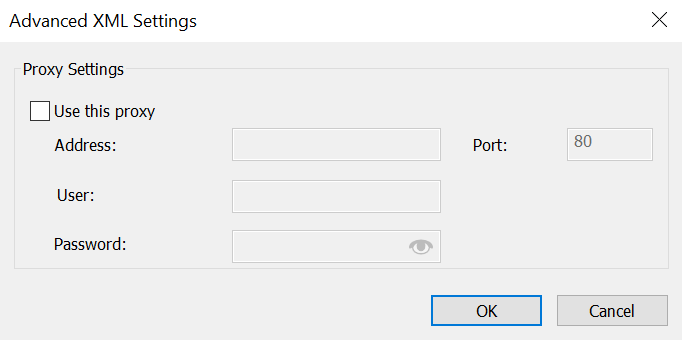
Use this proxy
In case you want to use a different proxy server, select the check box Use this proxy and type in the DNS or IP Address of the Server and the connecting Port number.
Authentication provider
By default this setting is set to 'Username and password'. If an SSO provider should be used, select it from the drop-down menu.
Update from Server
Retrieve an SSO configuration from the server.
Settings
Opens the authentication settings dialog of the selected SSO provider.
Clear
Clears saved login information to stop automatic login for clients that connect via XML Web Service.
Multi-Tenancy Settings
Tenant Name:
Enter the name of your Therefore™ Online tenant.
Use this configuration as default for all users on this machine
If this check box is selected, the settings will be used for all future Therefore™ Navigator users on this computer.
