Table replication was created particularly for Therefore™ Online customers, or Therefore™ systems where the Therefore™ server does not have direct access to the database server. It allows customers to replicate the data to Therefore™ and use it to Create a New Referenced Table.
Please see Table Replication in the reference section for more details on individual settings.
1.Please make sure you understand the Connection Requirements before proceeding.
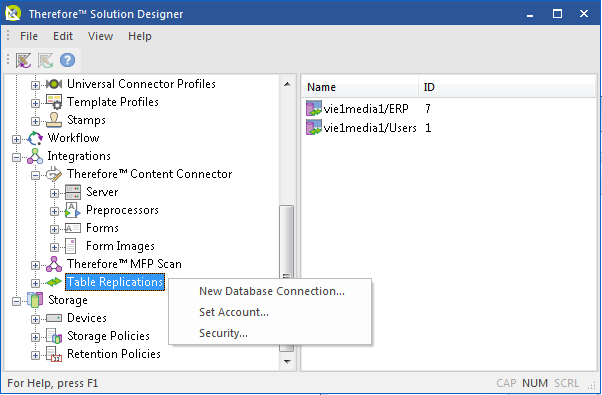
2.Open the Therefore™ Solution Designer and expand the Integrations object. Right-click on Table Replications and choose New Database Connection...

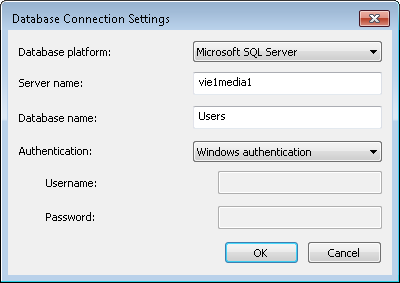
3.Select the Database platform, enter the Server name (or IP address) and the Database name. Then select the type of authentication. For database authentication the user name and password must be specified. See the Connection Requirements for details on what authentication settings should be used and for details on how and when to use Set Account... Click OK to create the connection.

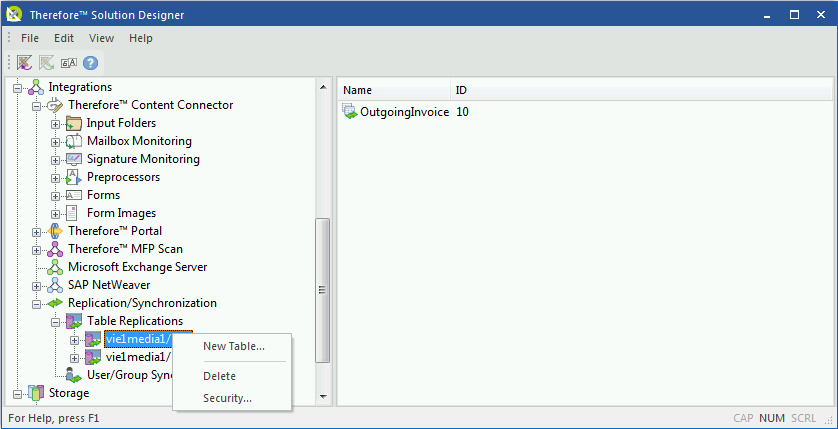
4.Right-click on the database connection that you have created and select New Table...

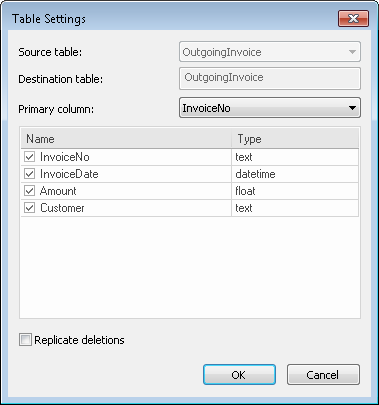
5.Select the Source table from the database. Under Destination table, enter an intuitive name for the replicated table and choose the Primary column for the table. This must be a unique column that does not contain NULL values. Then de-select any columns that you do not want to replicate and click OK to create the replicated table.


|
•See Database Connections for details on the Replicate deletions checkbox.
•The Table Replication polling interval (how often the destination table should be updated from its source table) can be set in the Therefore™ Solution Designer by right-clicking on the Therefore™ object, selecting Settings and then opening Advanced tab. Expand the Table Replication field and enter the value in minutes for the field Replication Polling Interval. |
6.Now you are ready to create a new referenced table. See the tutorial Creating a New Referenced Table for more details.
|


