
|
Generic OIDC |
Scroll |
How do I allow user authentication using OpenID?
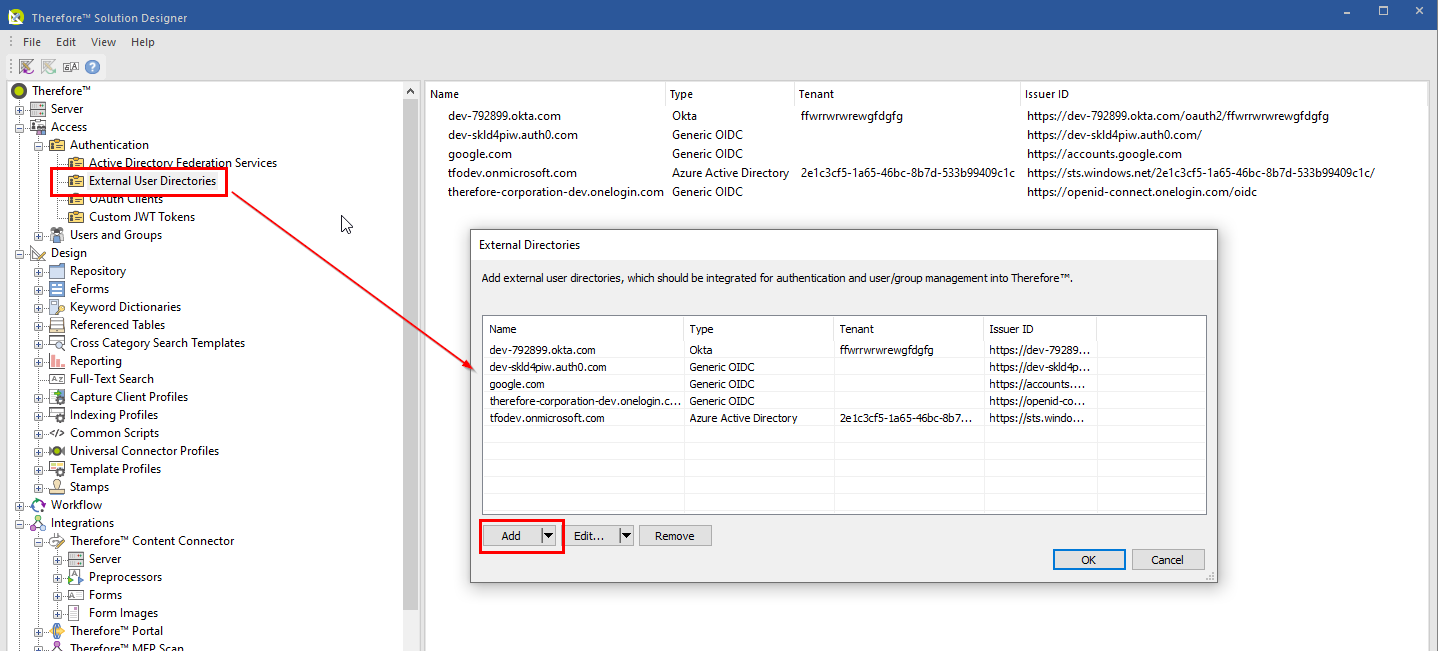
1. In the Therefore™ Solution Designer, select the 'External User Directories' option under the 'Authentication' node.
|
Note: Currently, the external login with Google is not supported in the Therefore™ Go app. |

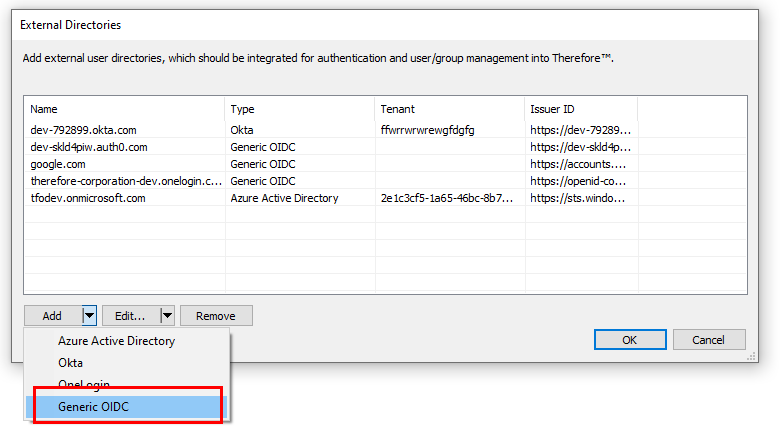
2.In the 'External Directories' dialog, click on the arrow next to the 'Add' option and select the 'Generic OIDC' option.
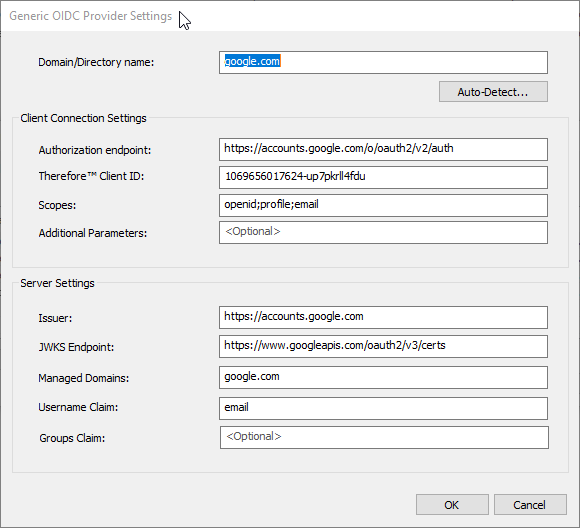
3.In the 'Generic OIDC Provider Settings' dialog, enter the settings information of the OIDC provider (e.g. Google, as shown below).
|
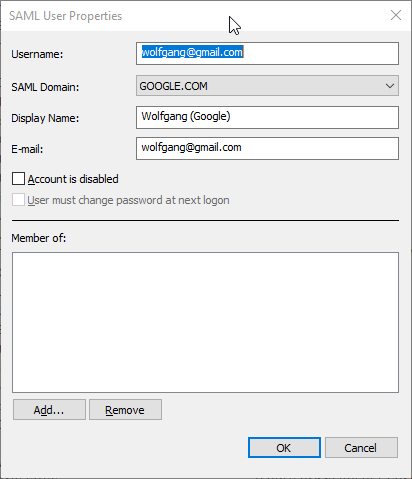
In some cases (e.g. with Google), specific users have to be further defined in Therefore™ before they can use the OpenID authentication:
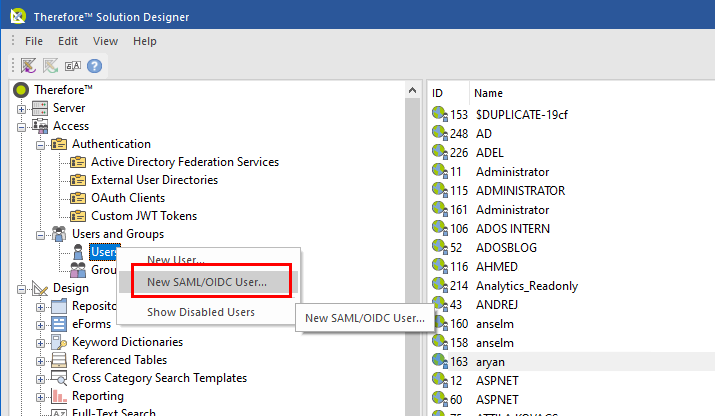
1.In the Therefore™ Solution Designer, select 'New SAML/OIDC User'.
2.Define the specific user in the SAML User Properties dialog.
|
|
Note: •For a generic OIDC it is always required to manually create the user before configuring the authentication. •For the Auto-Detect feature, a custom client will need to be defined in the external directory like Google (similar as with configuring Google Drive). The Auto-detect feature allows loading most of the settings automatically from a defined discovery URL – For Google this is the following URL: https://accounts.google.com/.well-known/openid-configuration - click here for further details. |
|
|---|
