
|
Migrate Document Links |
Scroll |
This chapter describes how document links from the “Therefore Documents Table” in Navision (and Business Central 14) can be exported and imported to Business Central (Version 15 and later).
The “Therefore Documents Table” contains all links between NAV/BC-objects and Therefore™ documents.
For migration to work, the following conditions must be met:
•During the upgrade from Navision to Business Central 14 the IDs of NAV/BC objects must have stayed the same. For example, if Invoice XYZ was linked to Therefore™ DocNo 123 before the upgrade and it should be migrated it needs to be ensured that both documents XYZ and 123 are there after the upgrade as well.
•The Therefore™ Server must also be the same so document numbers are matching. Document numbers stay the same if the system was upgraded from Therefore™ On-Premises to Therefore™ Online.
If everything was done correctly, documents that were shown in the DropZone in Navision will also be visible in Business Central.
Export Document Links from Navision (or BC14)
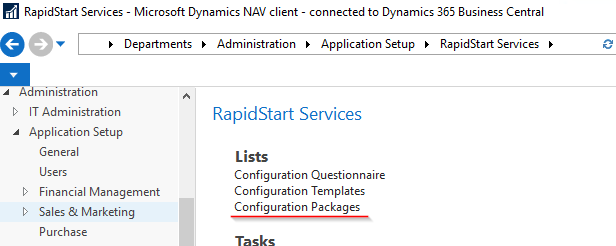
Open Navision and search for „RapidStart services”:

Select “Configuration Packages”.
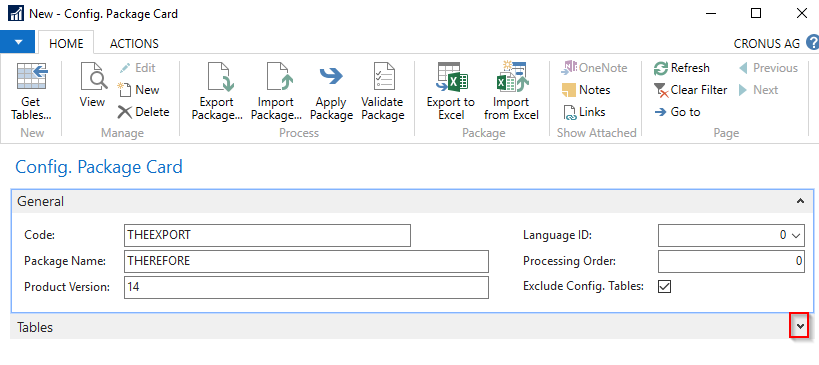
Click on “New” to create a new entry:

Enter a name and all other relevant information and make sure that “Exclude Config. Tables” is checked.
Then, click the small arrow next to “Tables”:
To find the right table, filter for “Therefore Documents” or copy and paste the table ID 52101144.
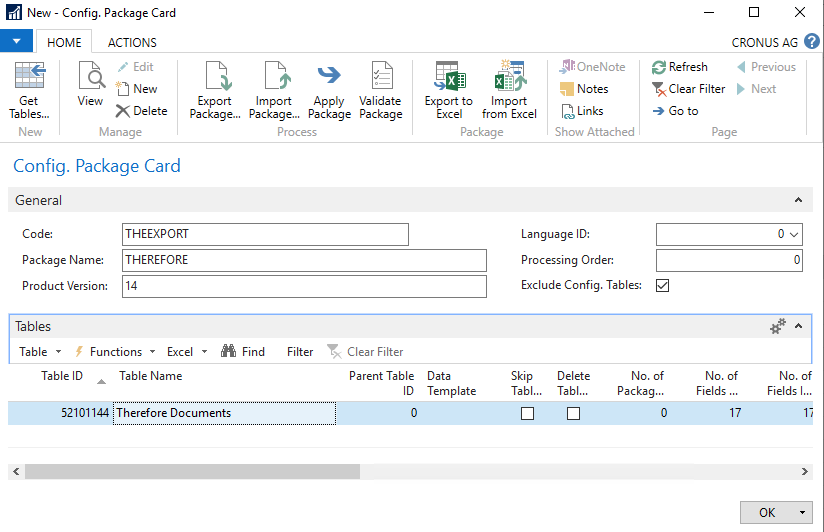
Next, scroll to “No. of Fields Included”, as one field needs to be removed. Click on the displayed in this column to bring up a list of included fields.

Make sure to exclude the “Path” and “Keyword Field No.” by unchecking “Include Field” and “Validate Field”.
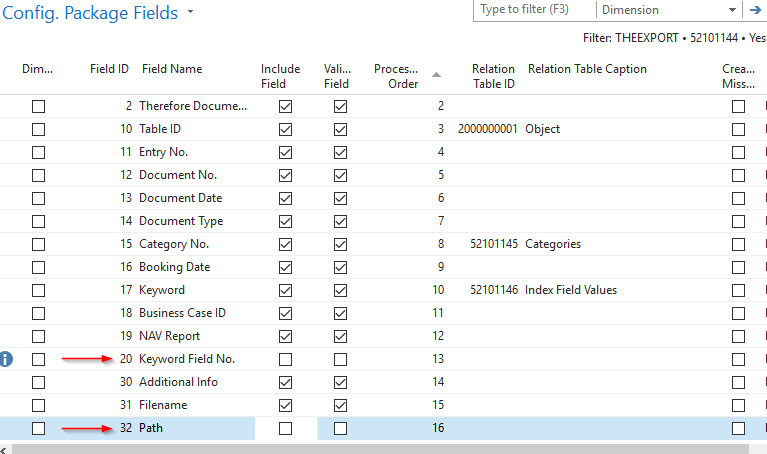
After confirming the changes, you should see 15 included fields:

Scroll to the right until you see “No. of Database records”:

This is the number of links between NAV and Therefore™ documents. It can be used to check the successful import later. Click OK to save the changes and close the dialog.
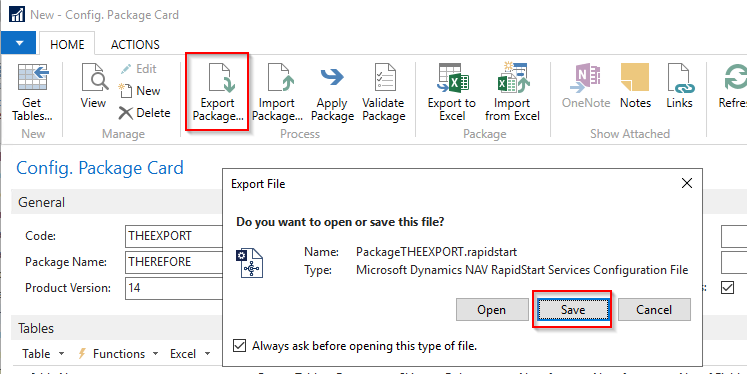
Export the configuration by clicking on “Export Package…” and then on “Save”:
Export the data by clicking on “Export to Excel” and then on “Save”:
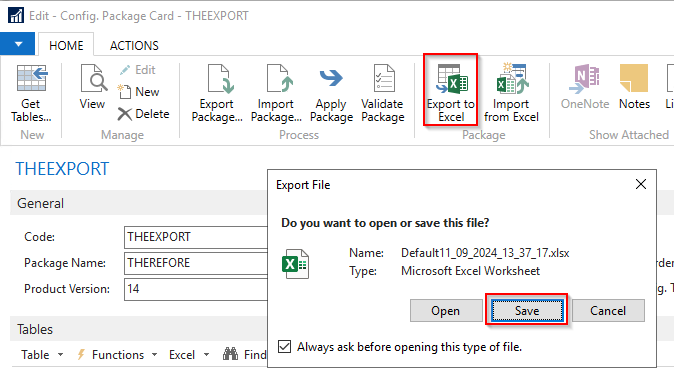
You should have two files now: one that contains the configuration and one that contains the data.
Import Document Links to Business Central (Version 15 and later)
Search for “configuration packages” and open it.

Click on “import package” and select the .rapidstart file.

If the import was successful you should see a new entry here:

Open the entry and scroll to the right until you see the column “No. of Fields included”. After the import it will only show a single field. Click on the number to fix that.
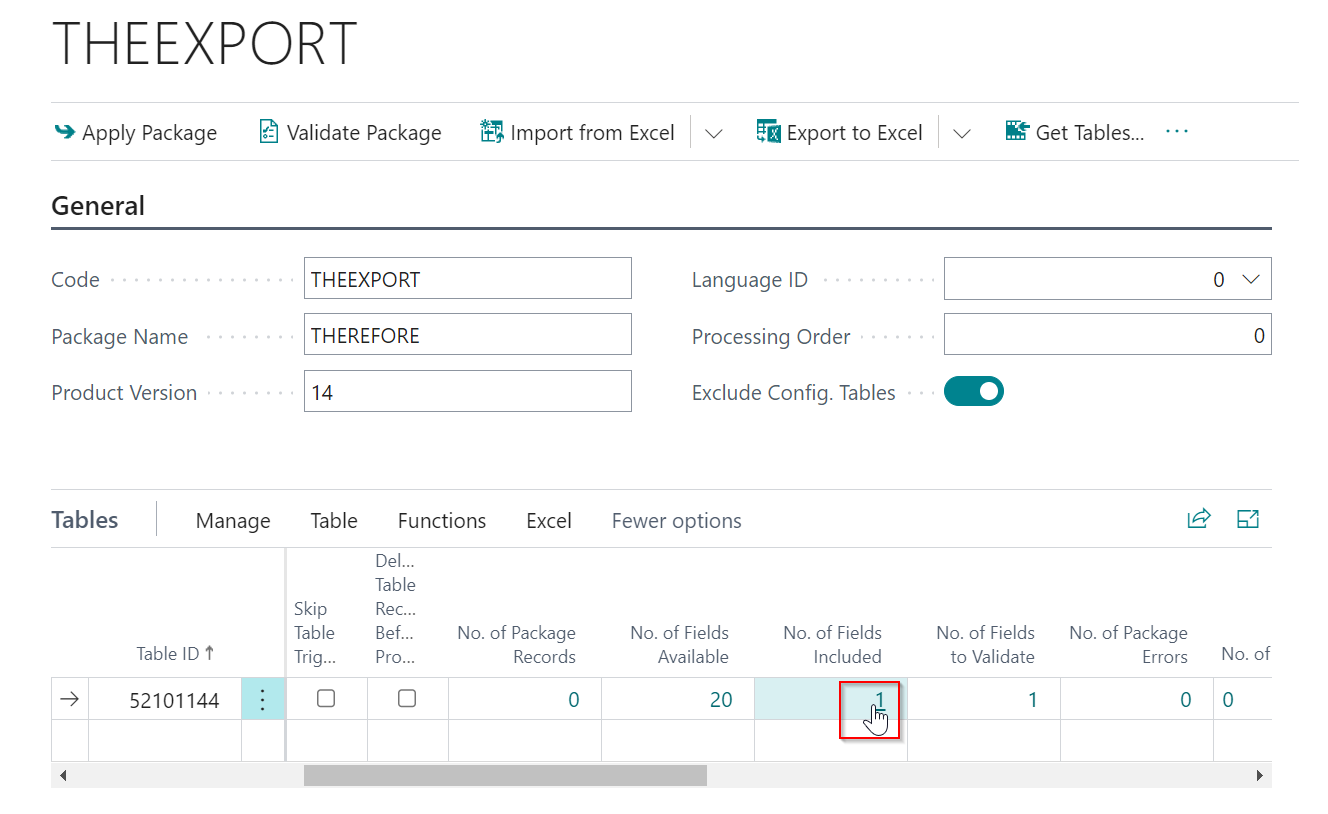
Click on “Set Included” to include all available fields.

Next, click on “Edit List” and remove the following fields by unchecking “Include Field”:
•20 Keyword Field No.
•21 Document Type Sales
•22 Document Type Purchase
•26 Mapping No.
•8000 ID_GUID
Validation needs to be turned off for all fields by unchecking “Validate Field”.
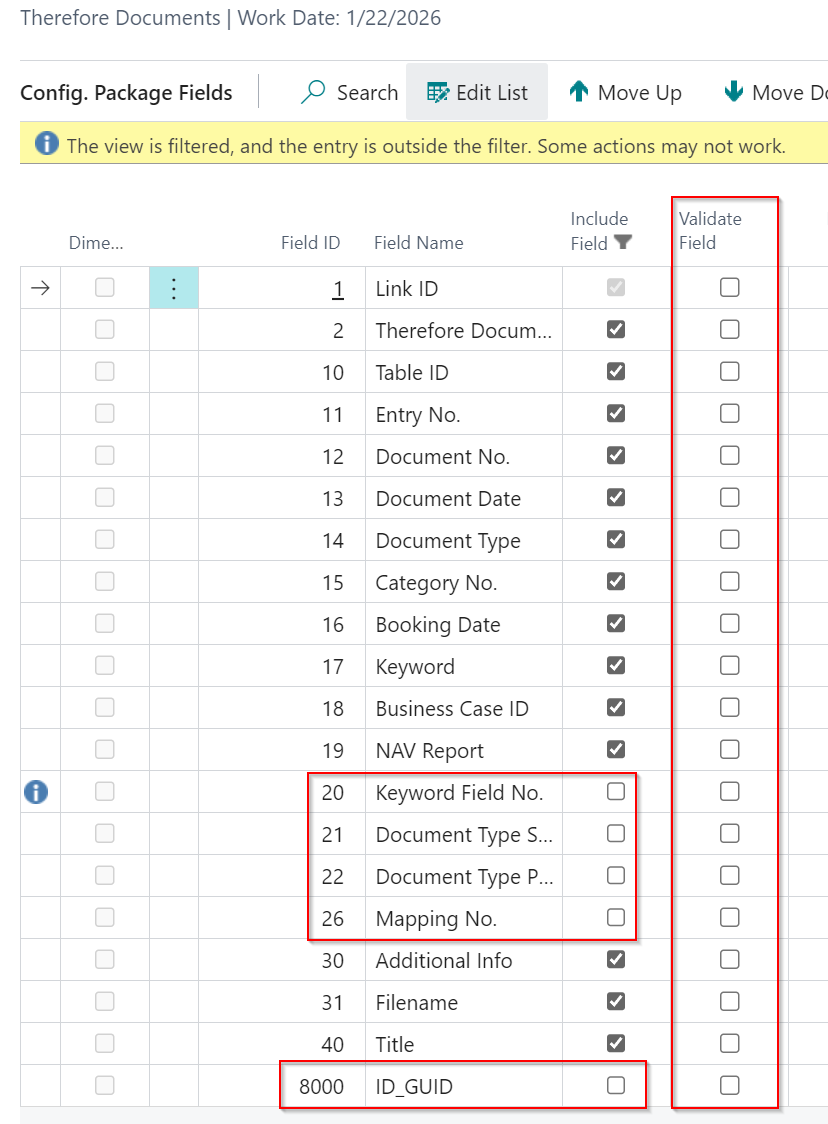
Make sure that both “Include Field” is not checked for the fields shown on the screenshot above and “Validate Field” is also unchecked for all fields.
Apply the changes and double check the field count to make sure everything was done correctly.

The value for “No. of Fields Included” should be 15 and the value for “No. of Fields to Validate” should be 0.
As there are slight differences between the Excel files generated by Navision and by Business Central, the empty Excel needs to be exported from BC.
Although there might not be any data to export, still click “Export to Excel” to get a correctly formatted Excel:

Compare both Excel files:
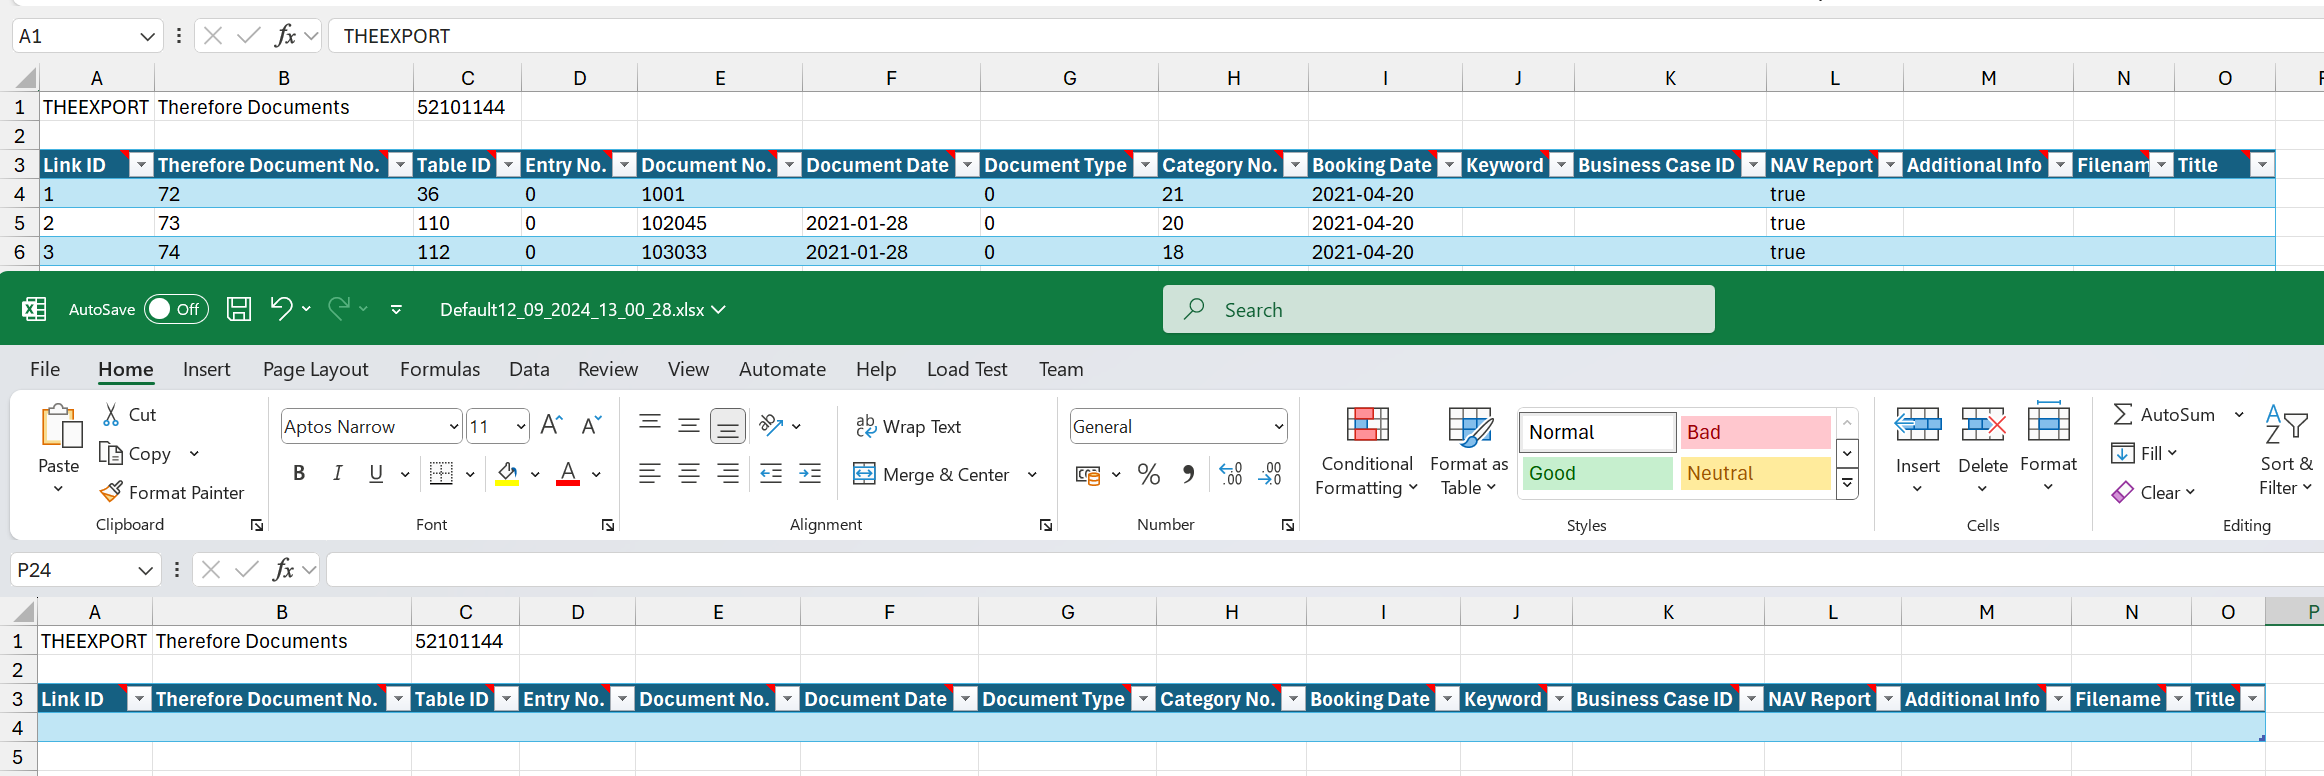
The column count, as well as the column order, have to be exactly the same. If both are matching, copy all rows from the “Navision Excel file“ to the “BC Excel file”. To import the data, click on “Import from Excel” and chose the XLSX file you just modified.

Click “Import” on the preview dialog to import the data.
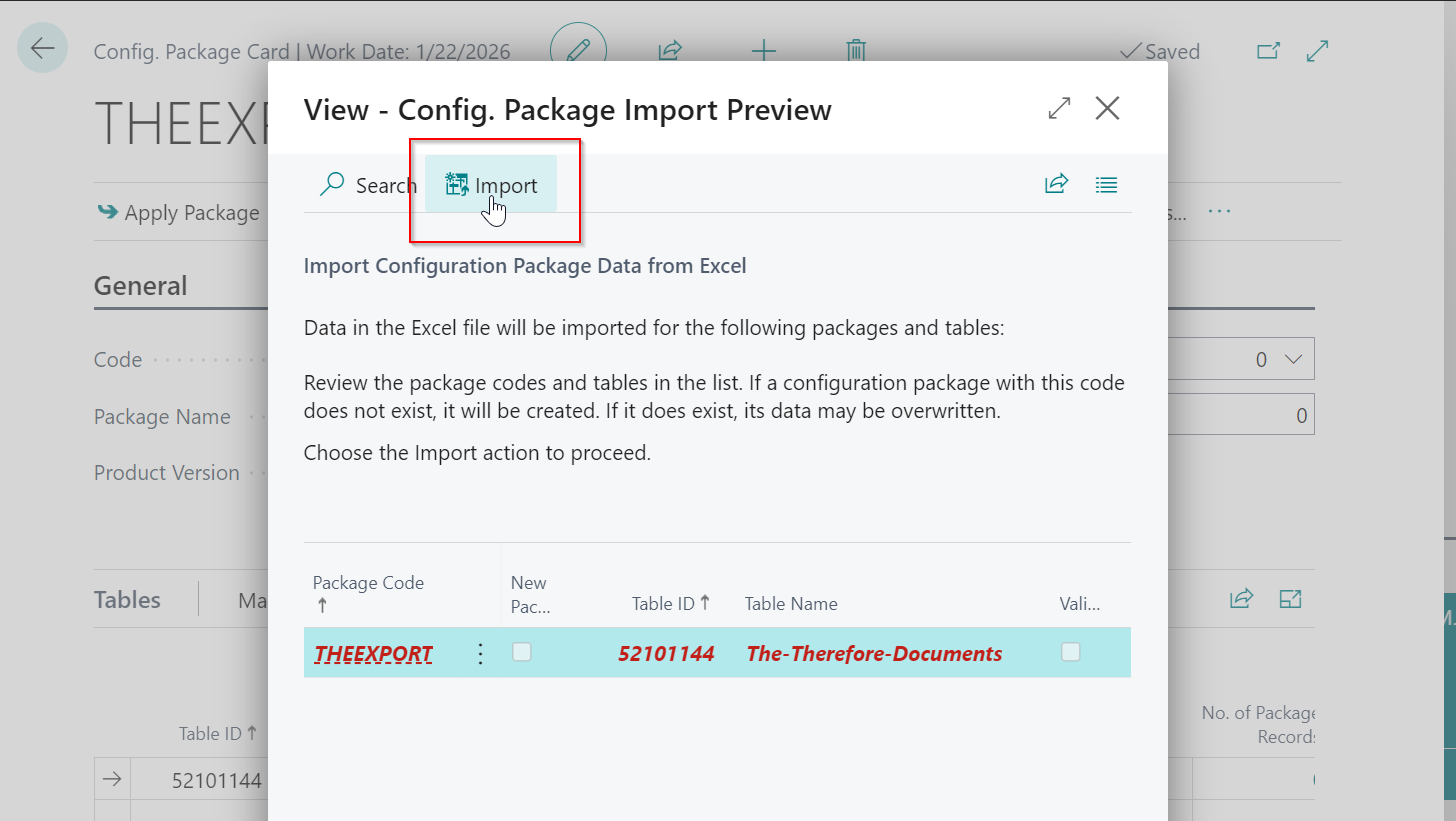
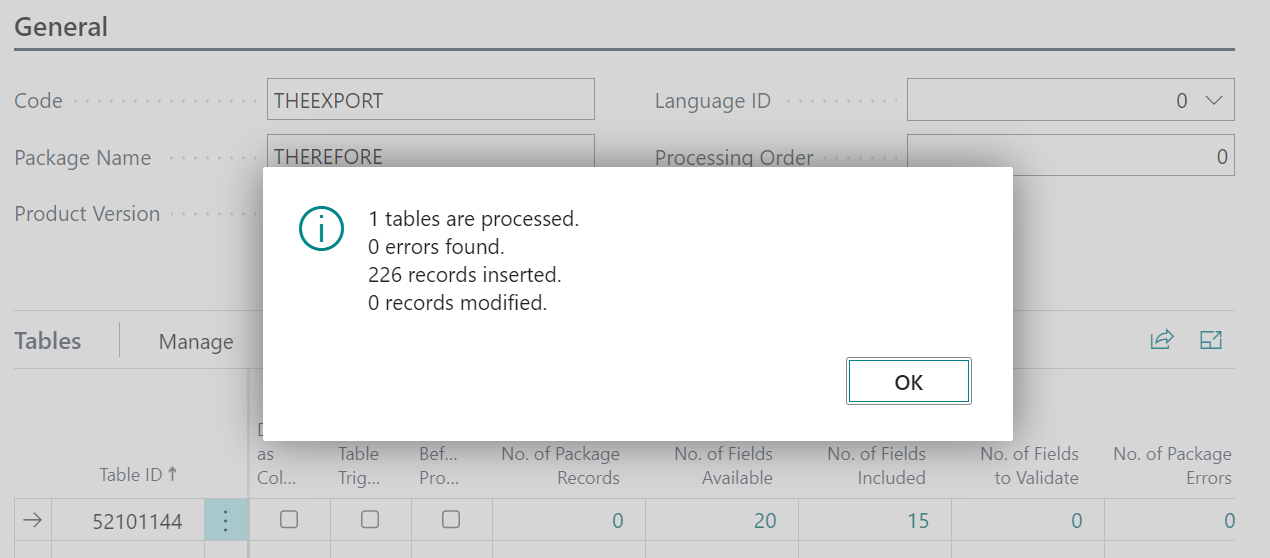
After this step, the “No. of Package Records” should match the number of exported entries from Navision:

Finally, apply the package:

If everything was done correctly, there should be no errors. The number of reported records should match the old value in Navision.
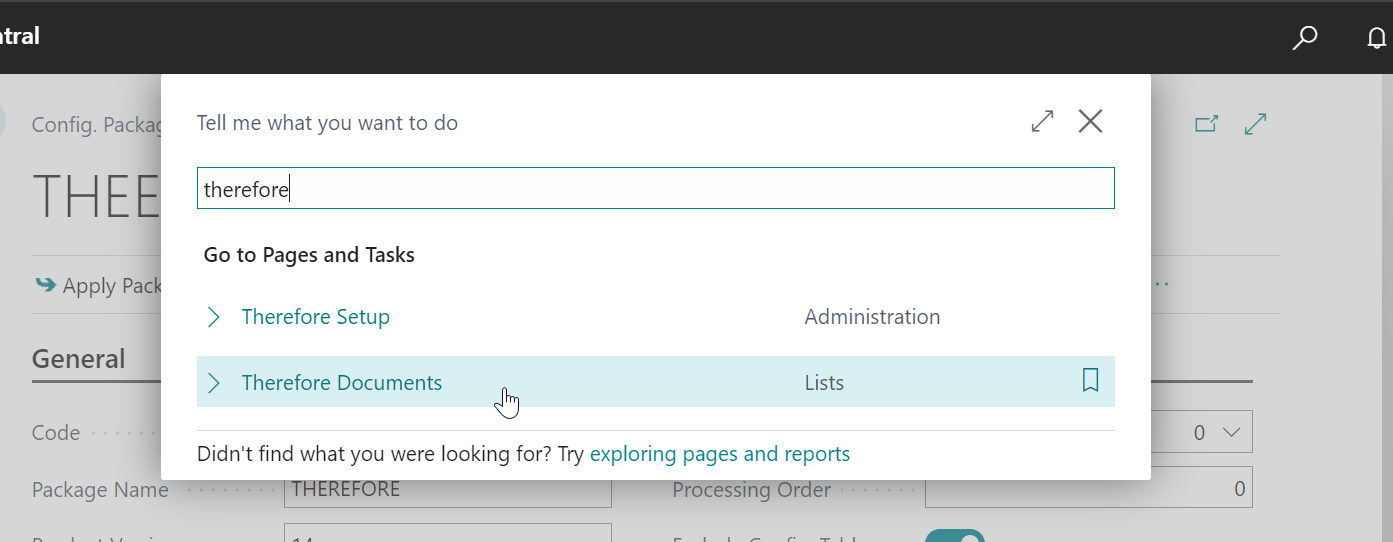
Optionally, you can search for “Therefore Documents” to visually check if the entries look the same as in the Excel table.
You should see the imported entries here:

