|
Export/Send |
Scroll |

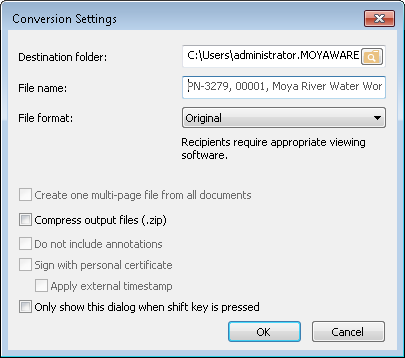
Destination Folder (not shown when sending):
Select the folder where the document(s) should be saved.
File name: by default the file name is the document title as set in category settings. However, you can change this to suit your needs.
File Format: the document can either be converted to another format or left as original. In addition it is possible to export/send the whole Thereforeā¢ document or just a link to the Thereforeā¢ document.
|
Empty documents that only contain index data can only be exported as a Thereforeā¢ document (.thex) or as a link to a Thereforeā¢ document. |
Compress output files (.zip)
The exported or sent files are compressed into a .zip file.
Create one multi-page file for all documents
This is only available when multiple documents are selected in the hit-list. All selected documents are converted into a single multi-page document. Available formats are: PDF and Multi-page TIFF.
Do not include annotations
This is only available when converting to PDF, PDF/A-1b or Multi-page TIFF. If this check box is selected, any annotations that exist will not be exported (this only applies to Thereforeā¢ annotations on TIFF files).
Sign with personal certificate: before exporting, the user can select a personal certificate with which to sign a document being exported in PDF or PDF/A-1b format.
Apply external timestamp: an external timestamp is applied to the signature before exporting. You can configure which external timestamp server to use in the Solution Designer. An external timestamp makes sure that the time is exactly correct and not dependent on the server settings which could be changed.
Only show this dialog when the shift-key is held down
Any changes a user makes to this dialog will be retained and hence this dialog can be bypassed if the same settings are repeatedly used. To open the dialog again the shift-key must be held down.
|
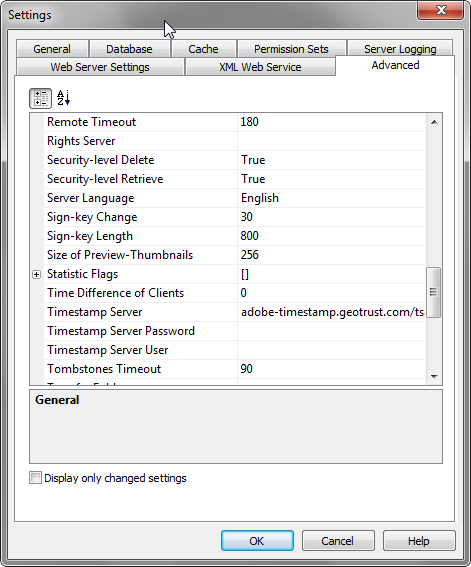
•Sending a link is the most secure method since the document will be retrieved from the Thereforeā¢ server and only users with required permissions can view the document. A link is also better for e-mail transmission speed and network load. •You can configure which external timestamp server to use in the Solution Designer under Advanced Settings. Expand the General group and scroll down to Timestamp Server. Here you can specify the URL of the Server, plus if required, a Timestamp Server Password and Timestamp Server User.
|


