|
Mailbox Monitoring for All Mailboxes |
Scroll |
How do I register the Therefore™ App in Azure for Mailbox Monitoring?
This tutorial will show you how to enable mailbox monitoring for all mailboxes. If you want to give access to specific mailboxes please click here.
App Registration:
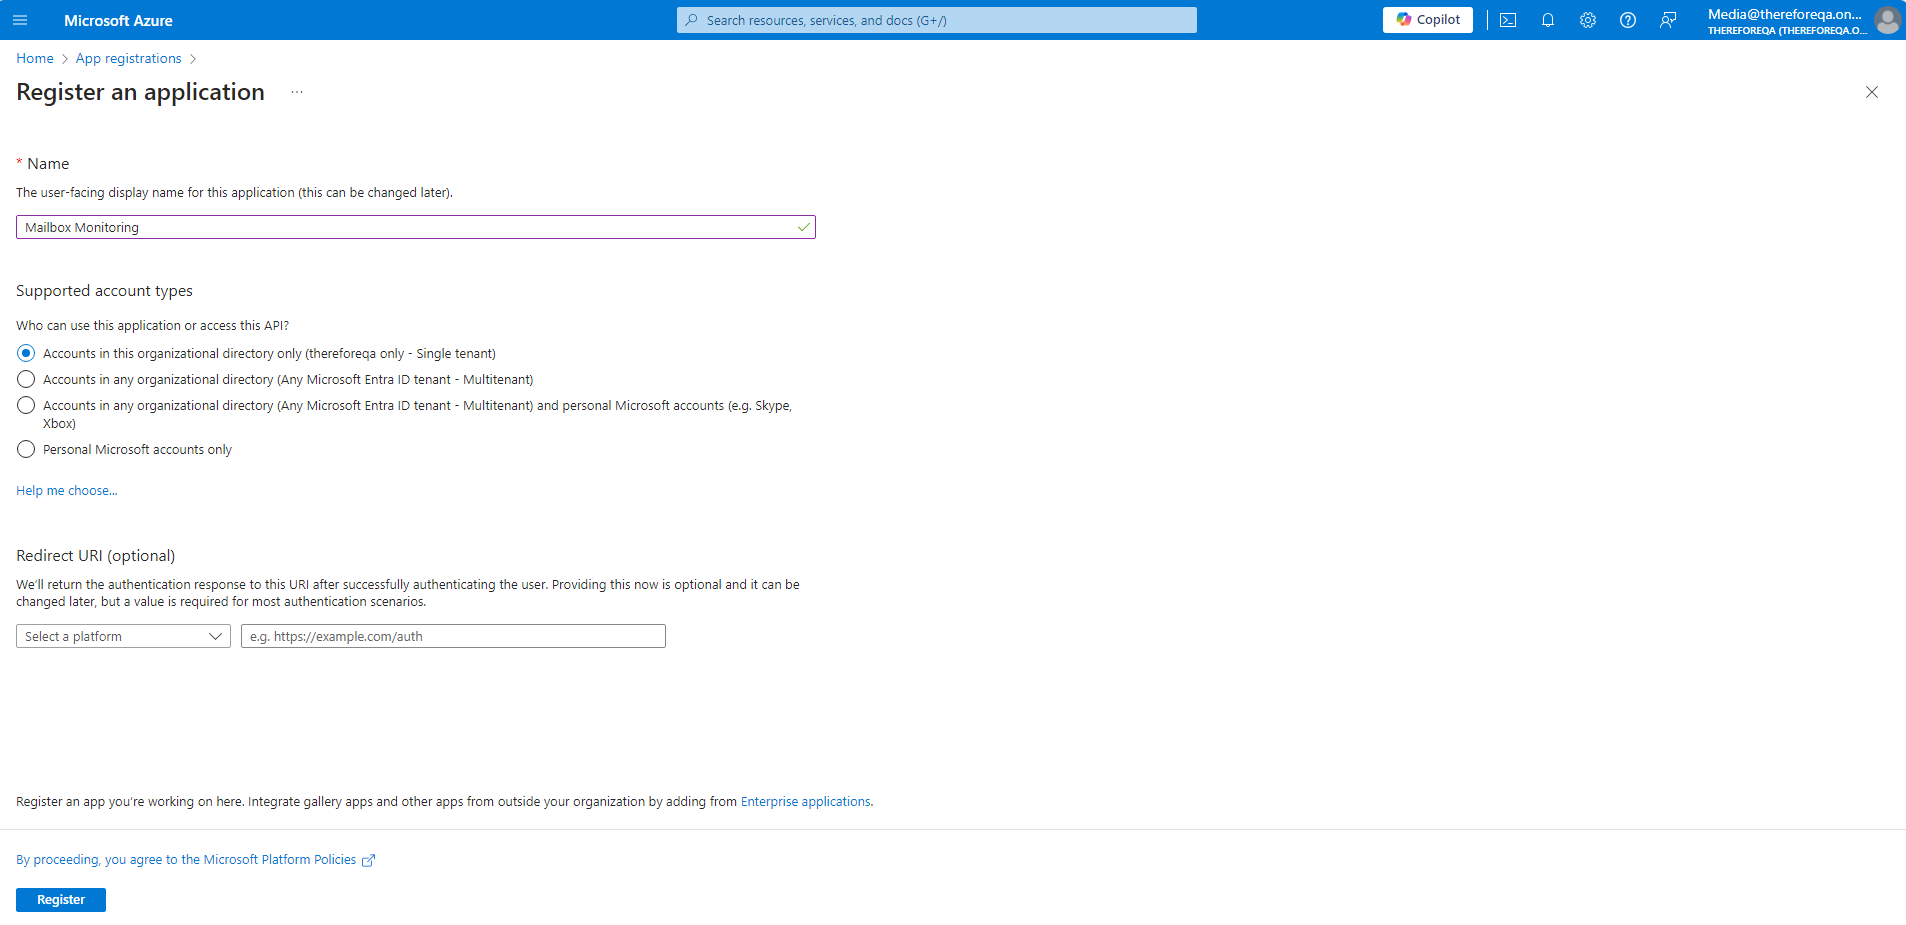
1.Access the Azure Portal through the following link:
Home - Microsoft Azure

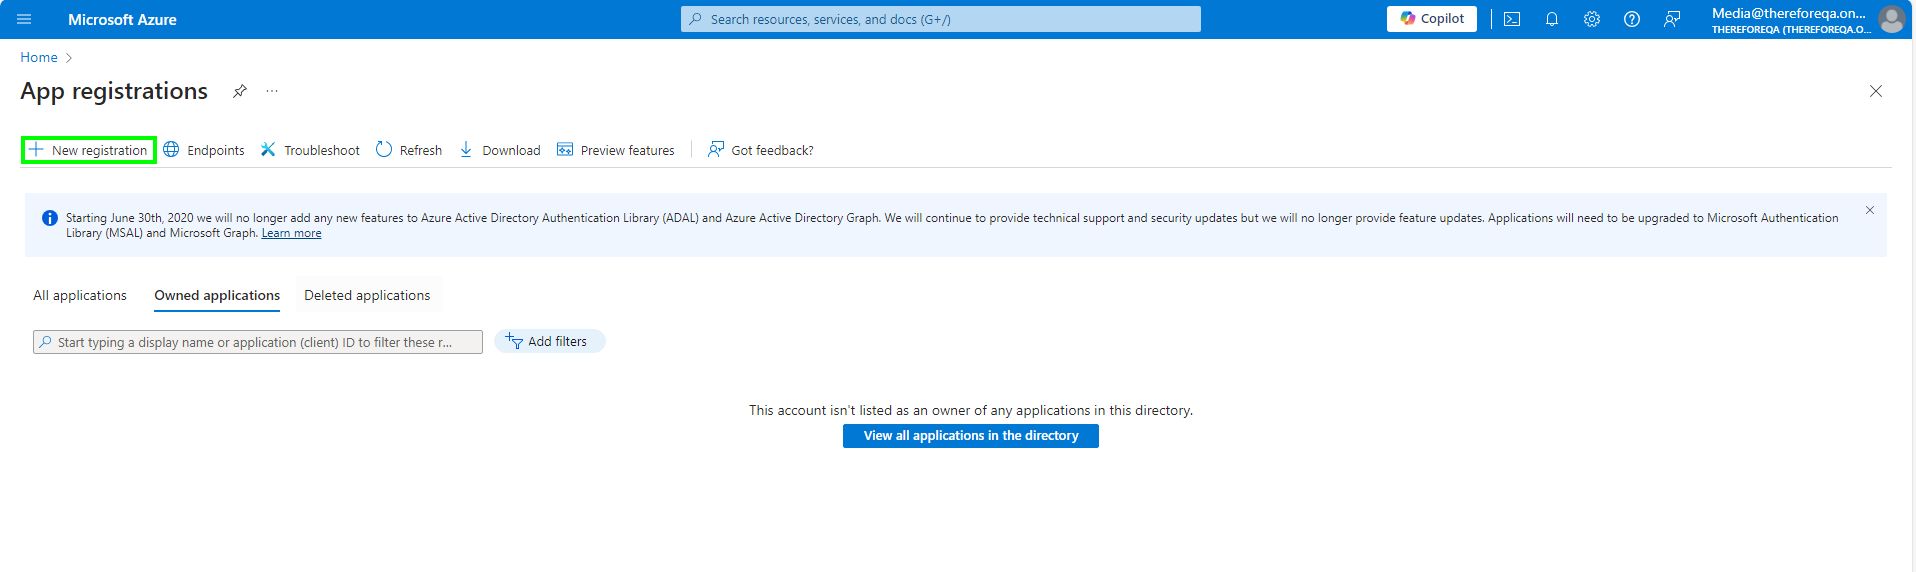
2.Navigate to the New App Registration page by either going to the 'Microsoft Entra ID' page, clicking the Add button in the top left of the screen and selecting 'App Registration'. Alternatively you may follow the steps taken in this tutorial by navigating to the 'App Registrations' page and selecting 'New Registration'.
3.Name the application and configure any of the optional settings you require. Press 'Register' when ready to proceed to the next steps.
Adding Permission:
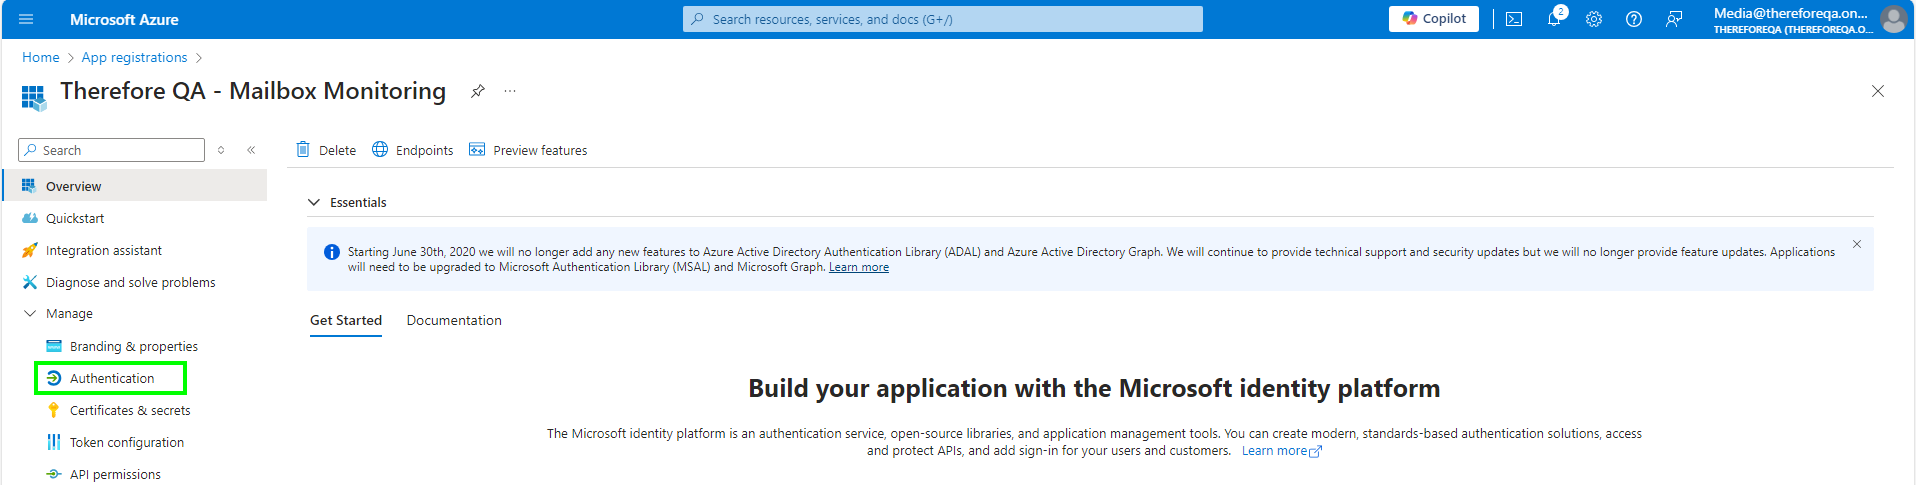
1.Registering the app should automatically redirect you into the app overview page. Otherwise you may navigate here from the home page by going to your 'App Registrations' page and selecting the one you just created. On this page, click 'Authentication' under the 'Manage' menu.
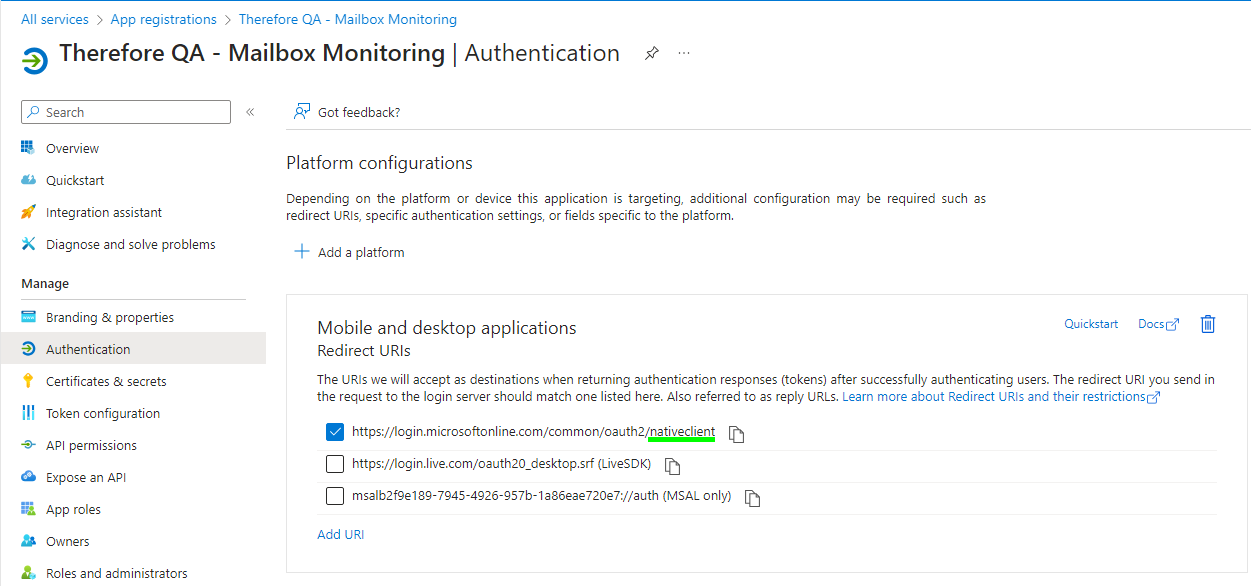
2.Under 'Mobile and desktop applications', select the option with 'nativeclient'.
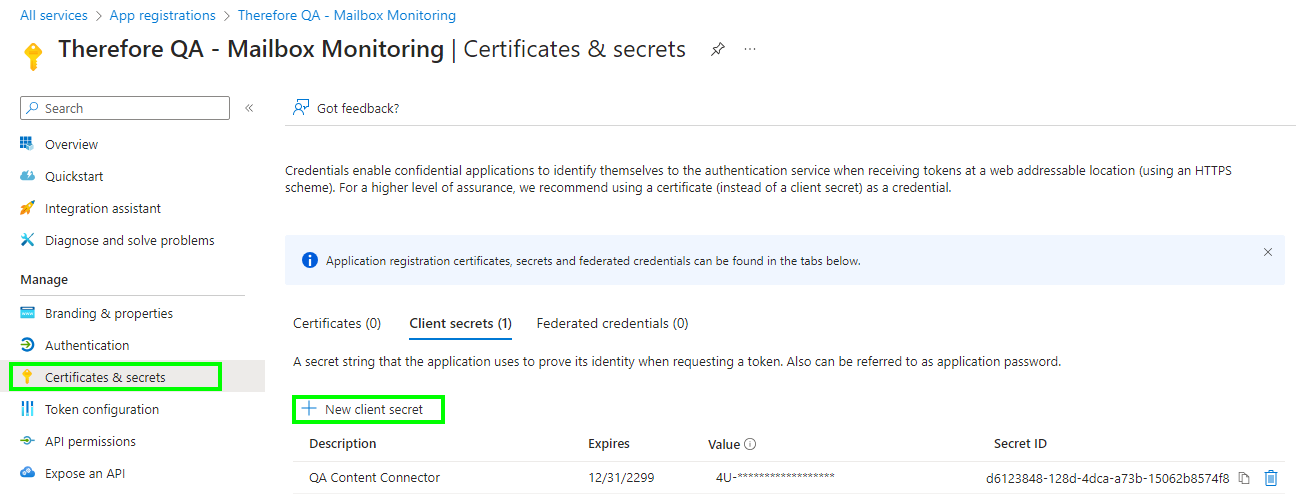
3.Then click on 'Certificates and Secrets' and select 'New client secret'.
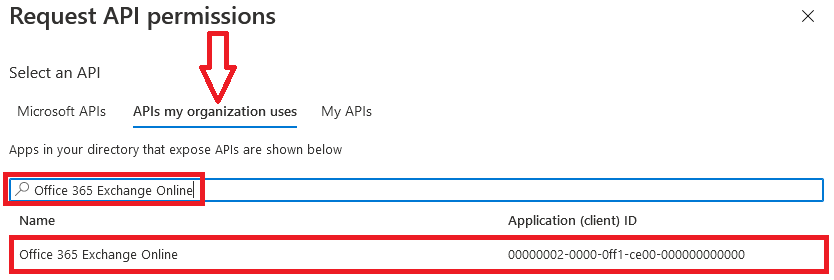
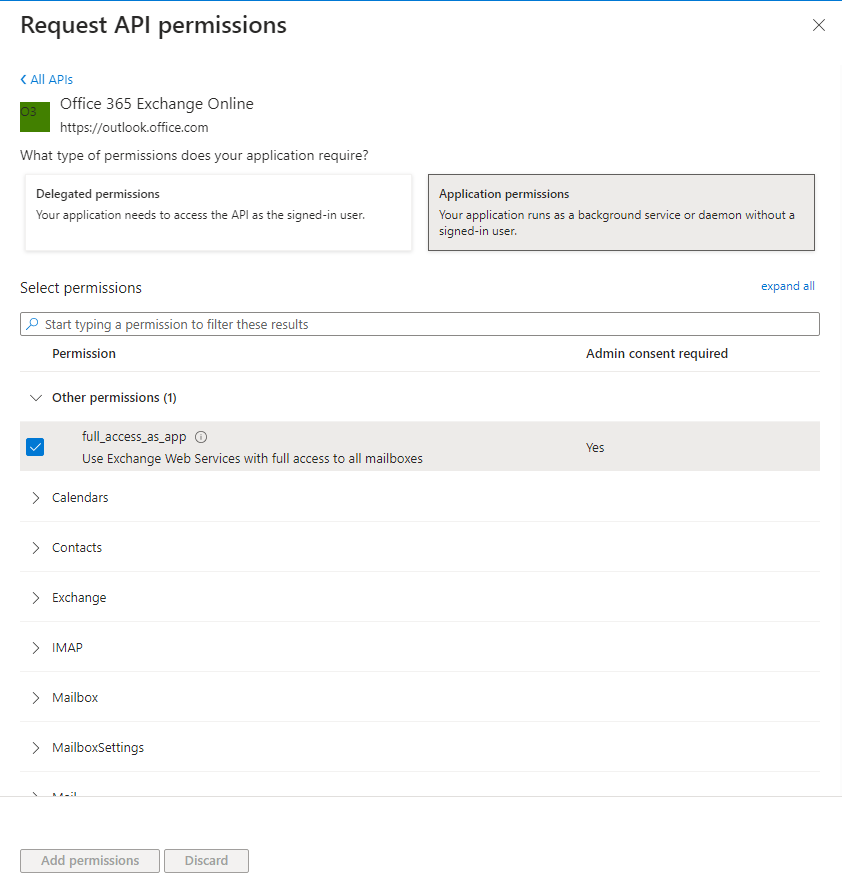
4.Click on 'API permissions', and in the dialog, select, 'Add a permission'. This will open a window on the right side of the screen. Under 'APIs my organization uses', search for 'Office 365 Exchange Online'.
Once you locate the Office 365 Exchange Online entry, click on it and proceed with adding the necessary permissions.
5.In the 'Request API permissions' menu for 'Office 365 Exchange Online', click 'Application permissions' and click the check-box to enable permissions for full access to the app under 'Other permissions'.
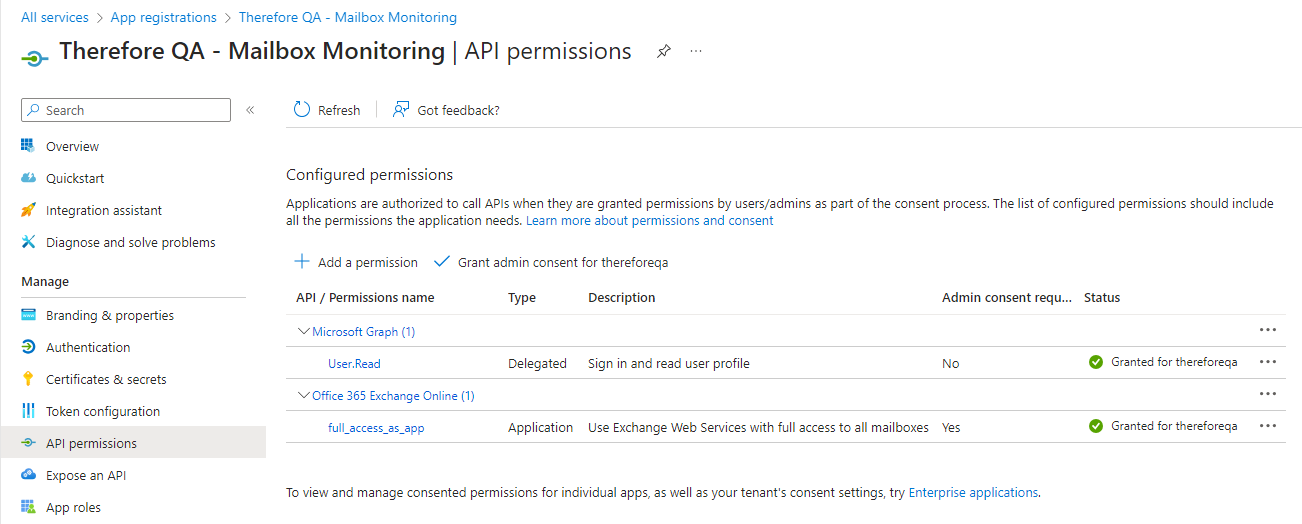
6.Click on 'API permissions', and in the dialog, select, 'Add a permission', 'Grant admin consent for......' in order to provide a consent requirement for the app listed below.
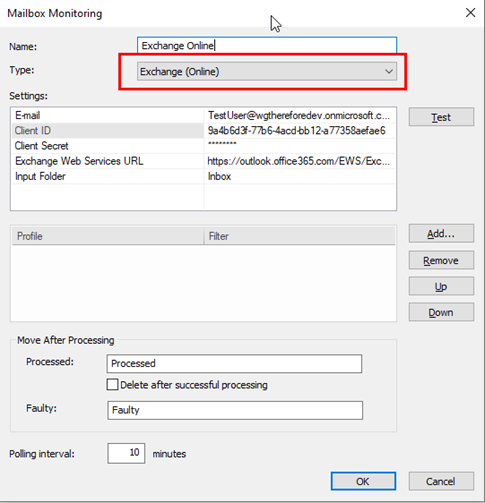
7.In the Therefore™ Solution Designer, In the Mailbox Monitoring configuration settings, set the Type to 'Exchange (Online)' and complete the settings details.
|
|---|