|
AD FS Therefore™ Configuration |
Scroll |
This tutorial demonstrates how to add an AD FS (OIDC) External User Directory in the Therefore™ Solution Designer.
Configuration
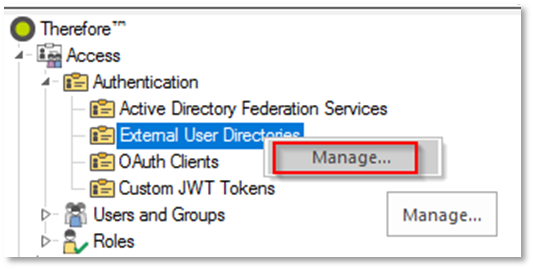
1.Right-click on 'External User Directories' and click 'Manage...':
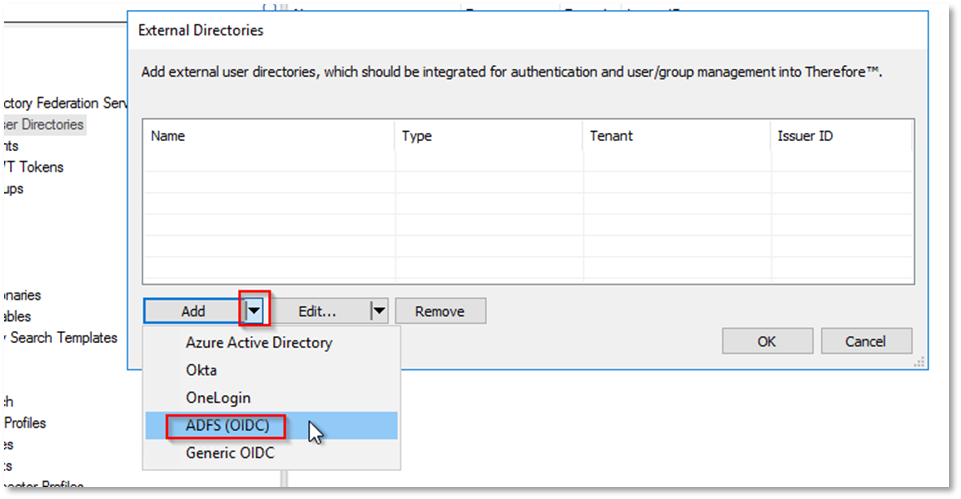
2.Click on the down arrow and select 'AD FS (OIDC)':
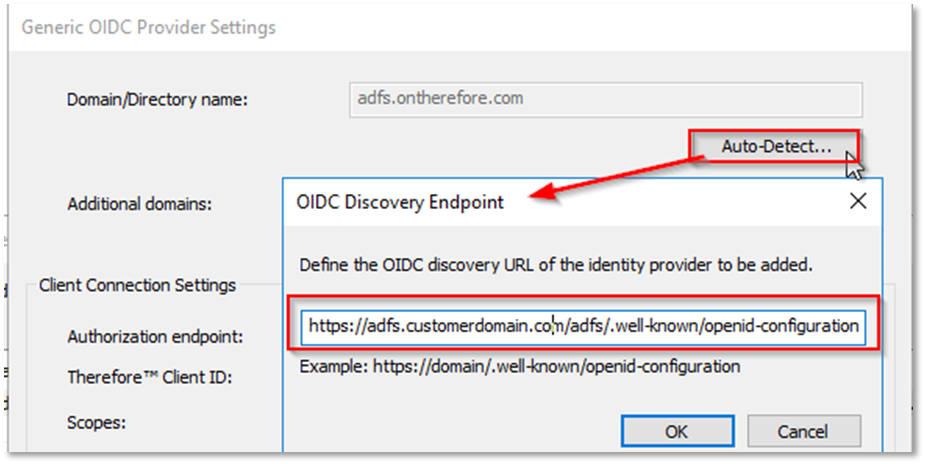
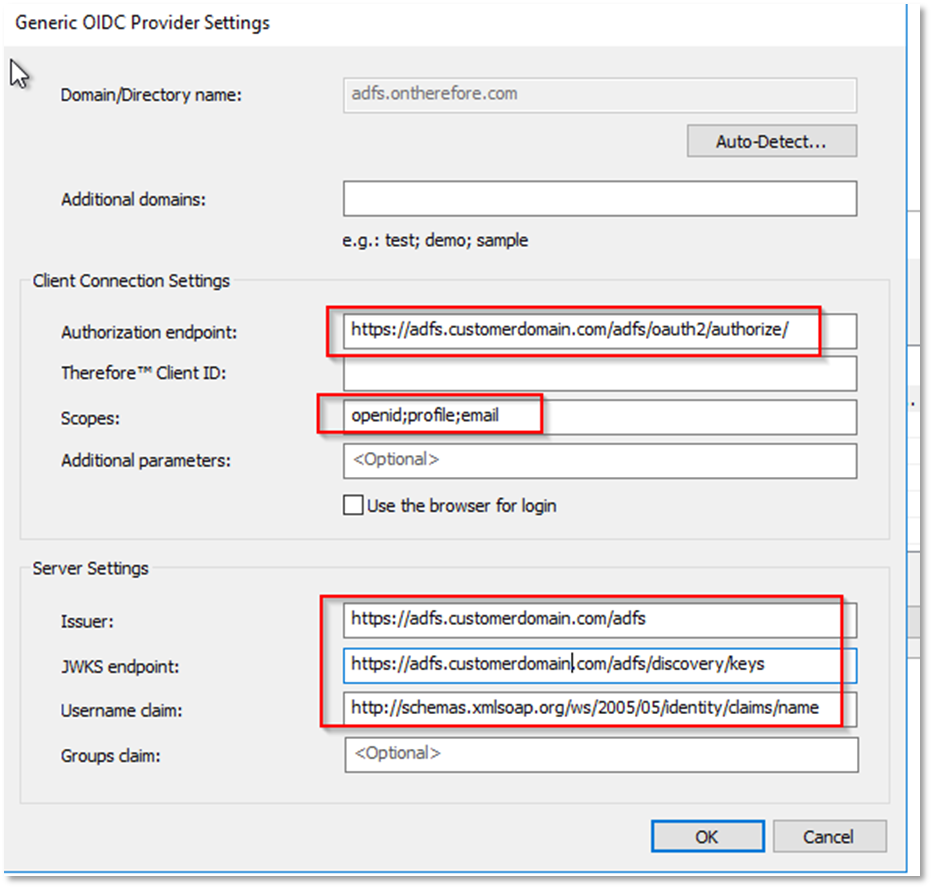
3.Click 'Auto-Detect' and type in the 'OIDC Discovery Endpoint':
4.Clicking OK should automatically fill out most of the details below:
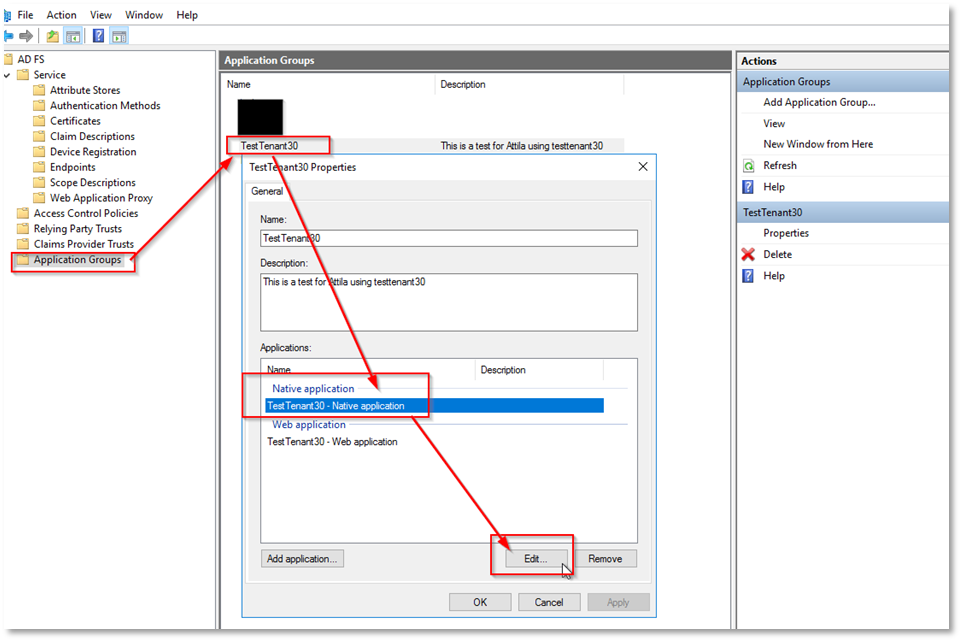
5.You will need to add the 'Therefore™ Client ID' which is found on the 'AD FS Server' in the newly created 'Application Group'. Edit the 'Native Application' by click on the 'Application Group's Properties' on the left side.
6.Copy the 'Client ID':

7.and paste it in the 'Designer':
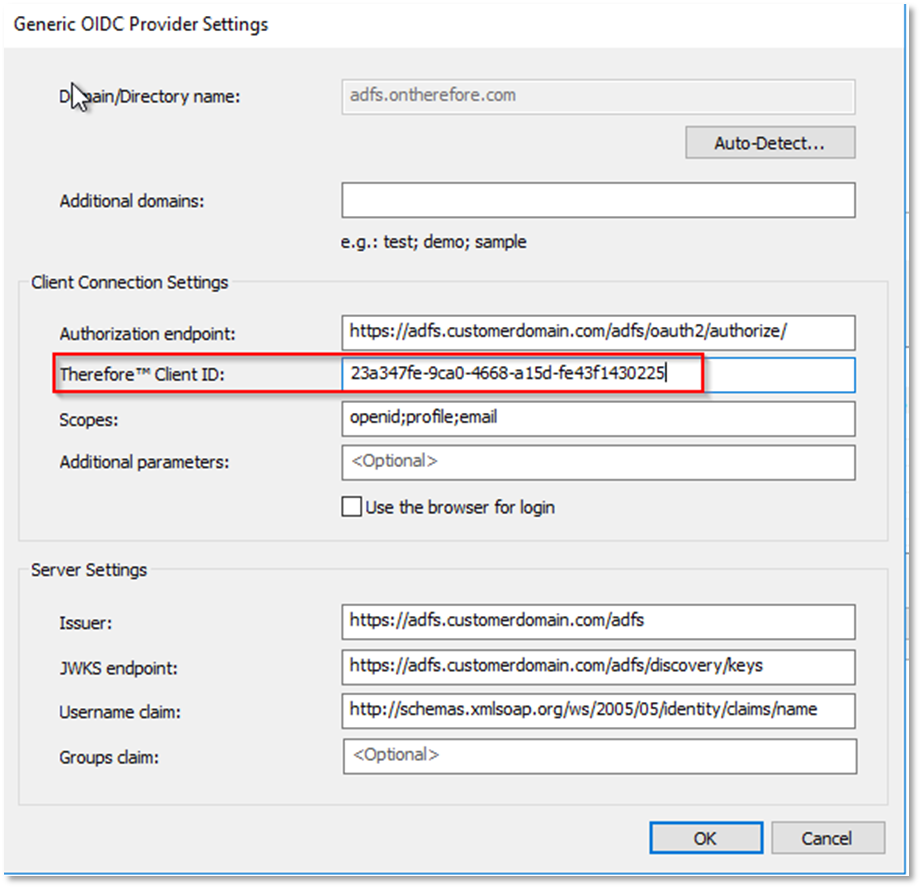
Click 'OK'.
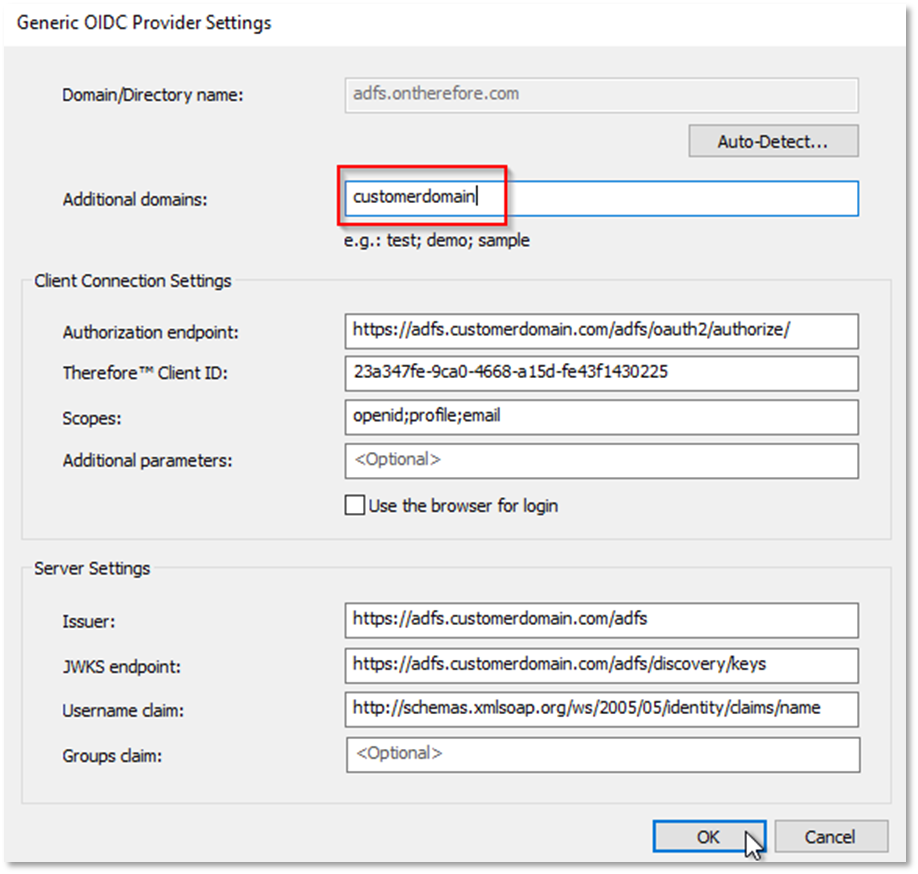
8.Type in the domain(s) here:
Checking your configuration
You can check if the External Provider is properly added to the tenant website by visiting the following URL:
https://<tenantname>.thereforeonline.com/Client/?NoSSO=1 (replace <tenantname> with your Therefore™ Online tenant).
The new provider should appear on the bottom of the page:
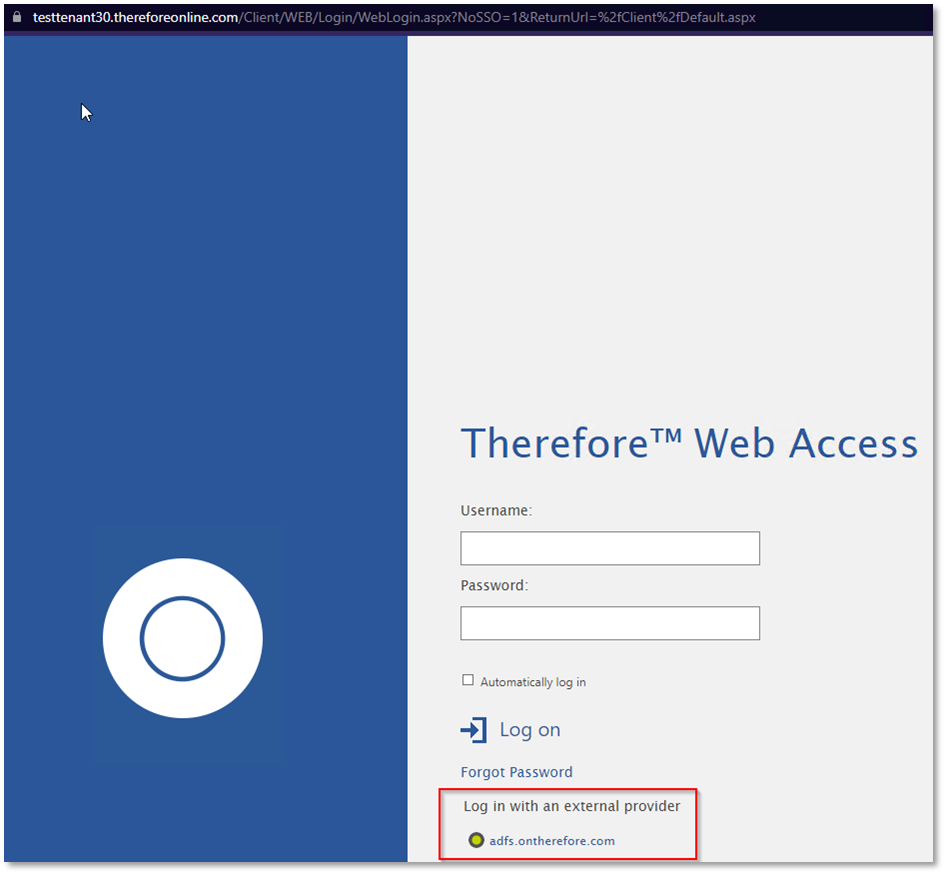
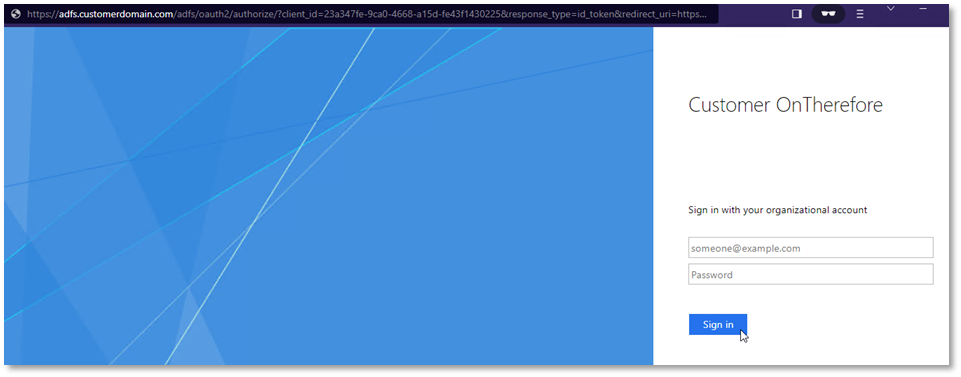
Clicking this new provider will take you to the AD FS login page:
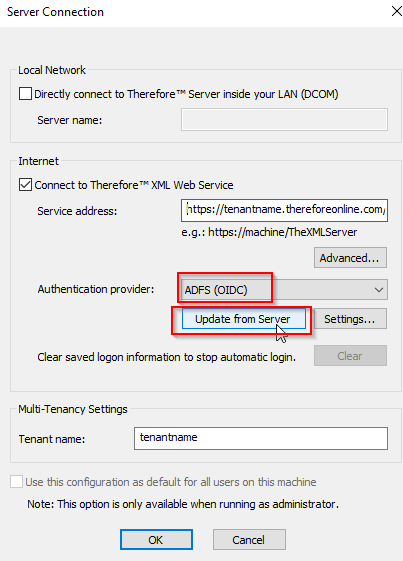
If you are using the Therefore™ Navigator or Therefore™ Solution Designer you can change the authentication provider to 'AD FS (OIDC)' (open 'Connection Settings' from the File Menu in the Therefore™ Navigator or Therefore™ Solution Designer):