|
Configuring the Therefore™ Settings |
Scroll |
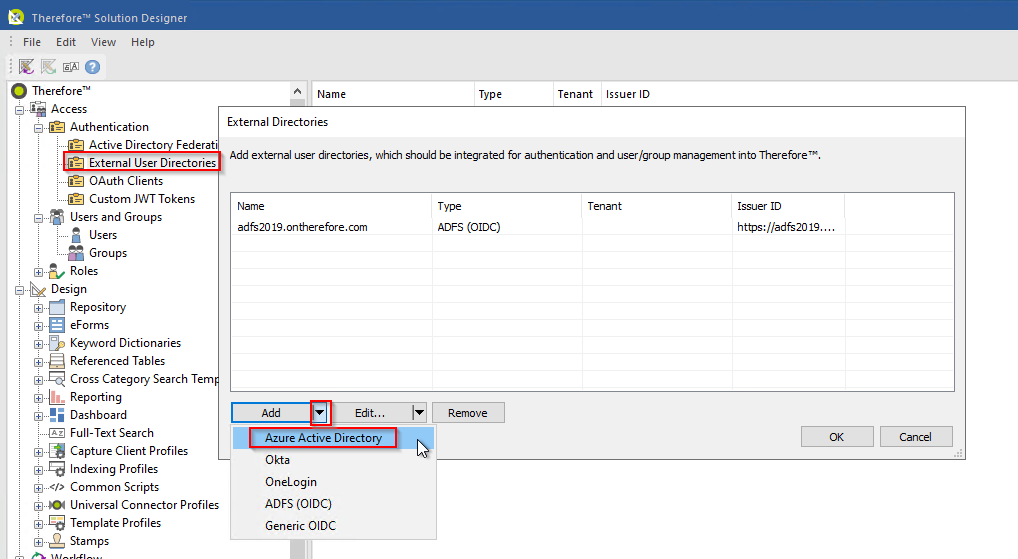
1.Establish a connection in the Therefore™ Solution Designer by double-clicking on the External User Directories node. Then click Add and select the option Azure Active Directory.
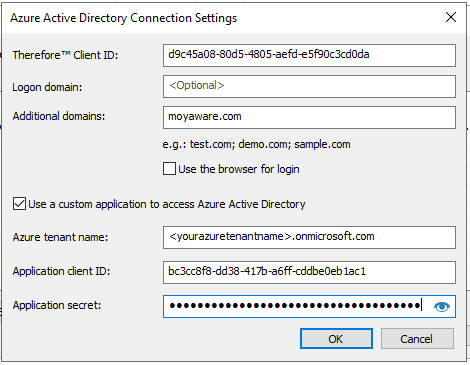
2.In Therefore™ Client ID, enter the application (client) ID created previously in Step 1 (Therefore™ Client Login). An Additional Domain is required if the Azure Active Directory contains users from external domains (i.e. through Azure AD, Connect Synchronization). For example: if the directory contains users like adam.smith@contoso.onmicrosoft.com, and also users like john.dow@moyaware.com, moyaware.com must be entered in the Additional Domains field. Tick the box "Use a custom application to access Azure Active Directory" and populate all fields. "Azure tenant name" is the name of your Azure tenant (this is the "mycompany.onmicrosoft.com" from Azure, please refer to the Microsoft documentation if in doubt). "Application client ID" is the Client ID from Step 2 (Therefore™ Server Login). "Application secret" is the "client secret" from Step 2. Click OK to establish the connection.
By default, Therefore™ uses an internal Chromium Browser to open the Azure user sign-in page. In some cases, this may not be sufficient (e.g., Conditional Access is defined in Azure whereby the user must be signed in to the system browser before they are allowed to login with Azure credentials). If you experience issues with the user login you can use the “Use the browser for login” checkbox which will use the default system browser instead of the internal Chromium Browser to open the Azure user sign-in page. This usually solves login issues especially with installed clients such as the Therefore™ Navigator.
3.Login Domain can be left empty and is only required if SSO is configured (see https://docs.microsoft.com/en-us/azure/active-directory/hybrid/how-to-connect-sso). To enable this, the correct login domain must be set here. For example: for testuser@ontherefore.com, the login domain would be ontherefore.com.
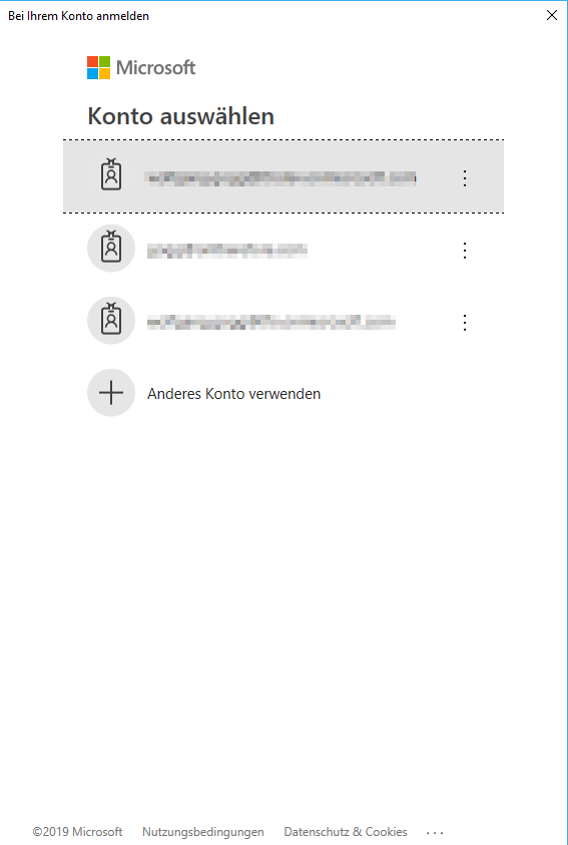
4.After clicking OK in the previous dialog, a login screen is presented. Login with an account that has Administrator permission for the Azure Active Directory to be integrated. There will be two login dialogs shown. Both are required and need to be accepted. The first one is to allow Therefore™ to access the Azure Active Directory tenant. The second one is to allow access to user profile information for Openid login.
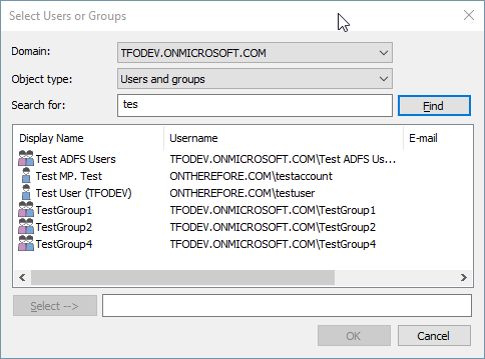
5.Once the connection has been established, the new domain can be accessed from user or group selection dialogs to select users and groups and grant the appropriate permissions.
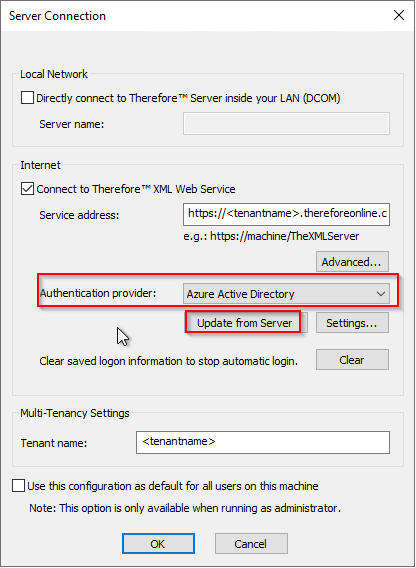
6.When connecting to Therefore™ through an installed client application, the connection settings need to be configured. For Authentication provider, select the option for Azure Active Directory, then click Update from Server. The settings will be populated automatically.
|
|---|