How do I configure an eSignature task into a workflow?
1.Right-click on the eSignature node in the Therefore™ Solution Designer and select the provider's credentials to configure.
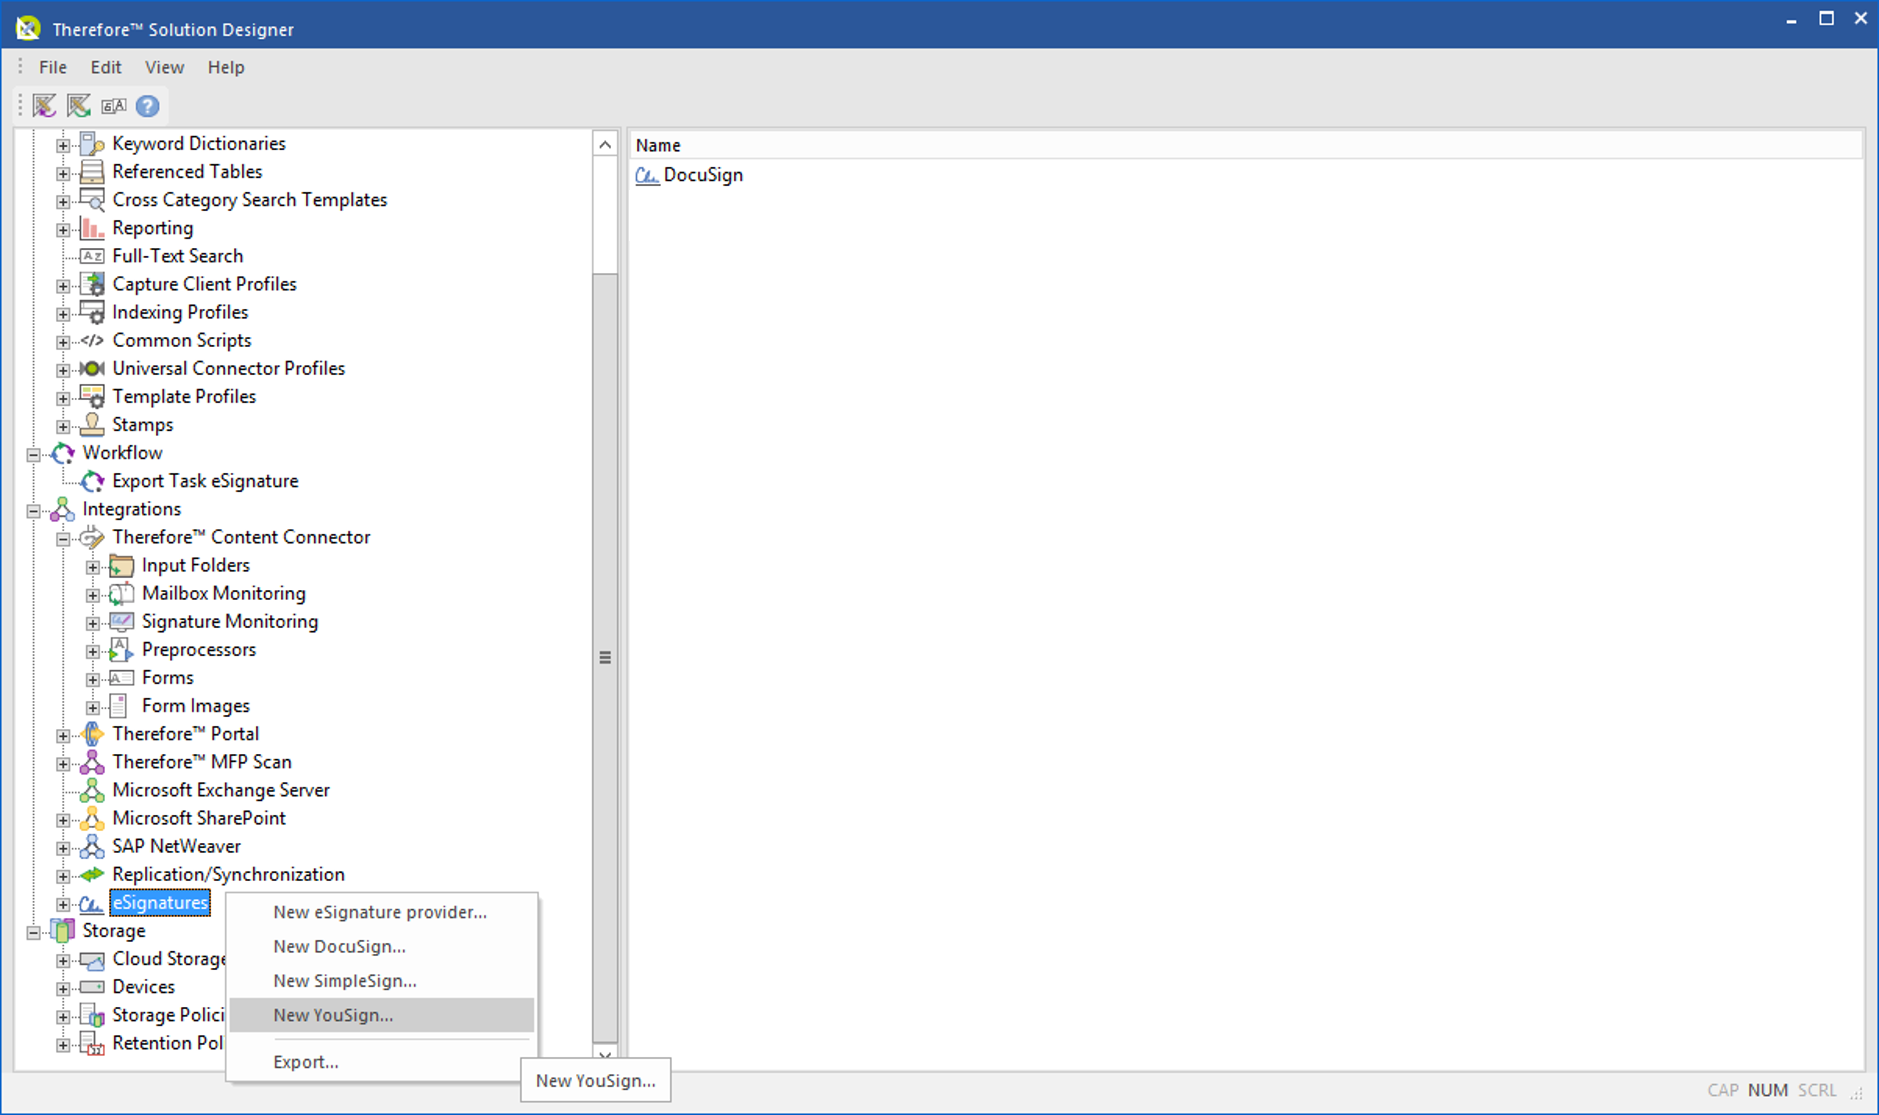
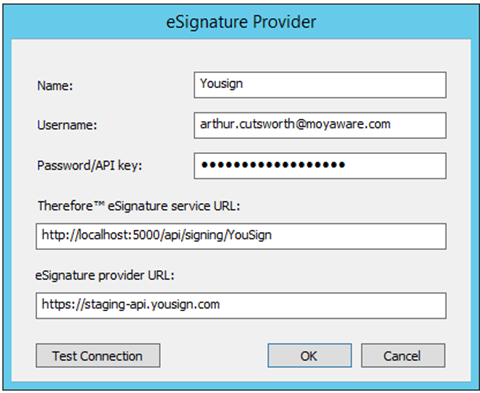
2.In the eSignature provider dialog, enter all the necessary details.

|
Note:
•The Therefore™ eSignature service URL is dependent on where the Therefore™ Server has been installed.
•The Therefore eSignature service URL will be set automatically (as this is managed by Therefore™ in Therefore™ Online).
•The API key can usually be found within the respective account of eSignature provider's website after logging in. |
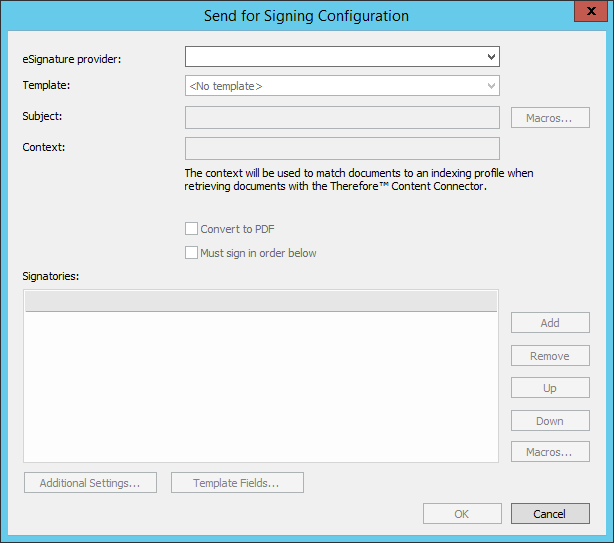
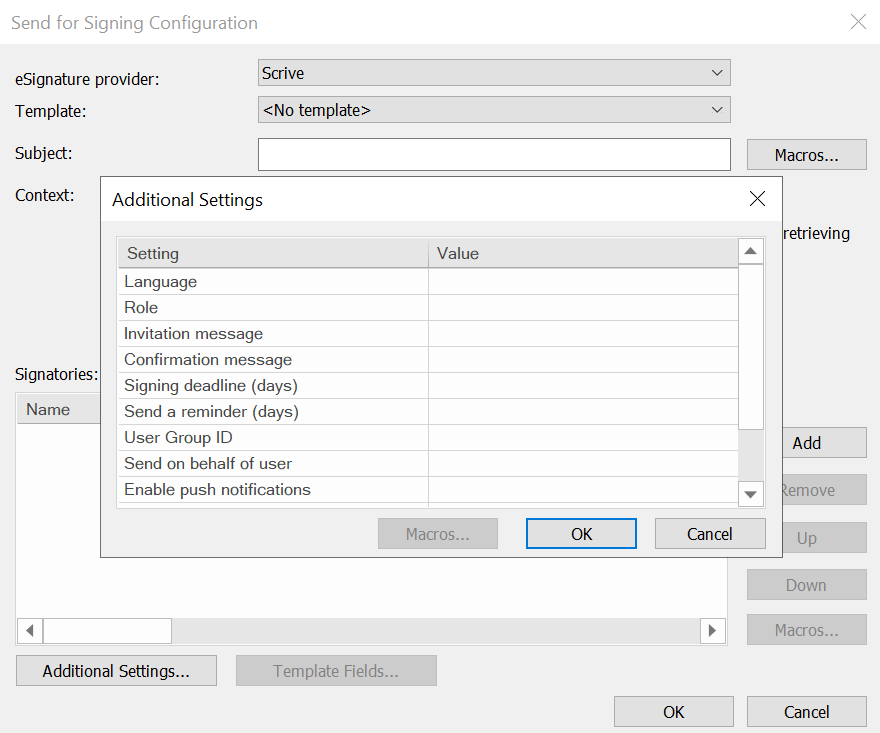
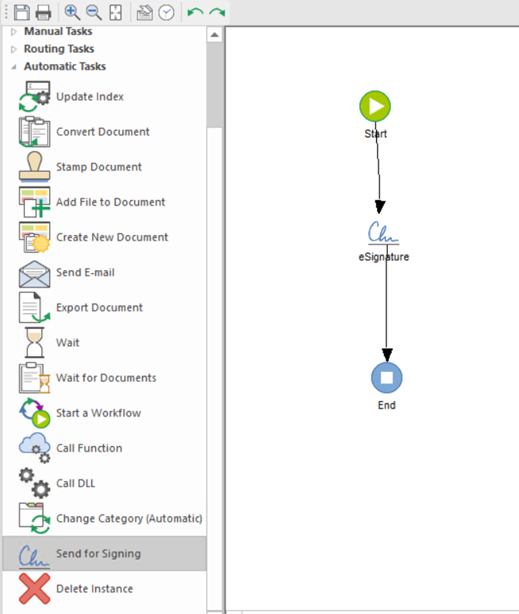
3.Under Workflows, include a 'Send for Signing' task to the workflow under the Automatic tasks list. Then configure the details therein.
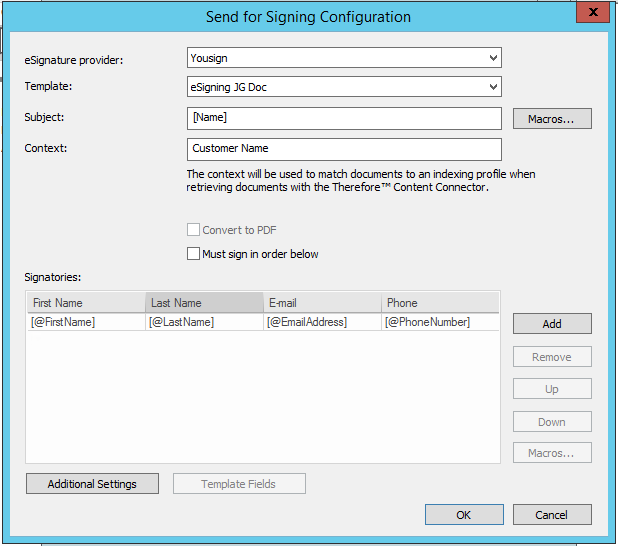 
|
Note:
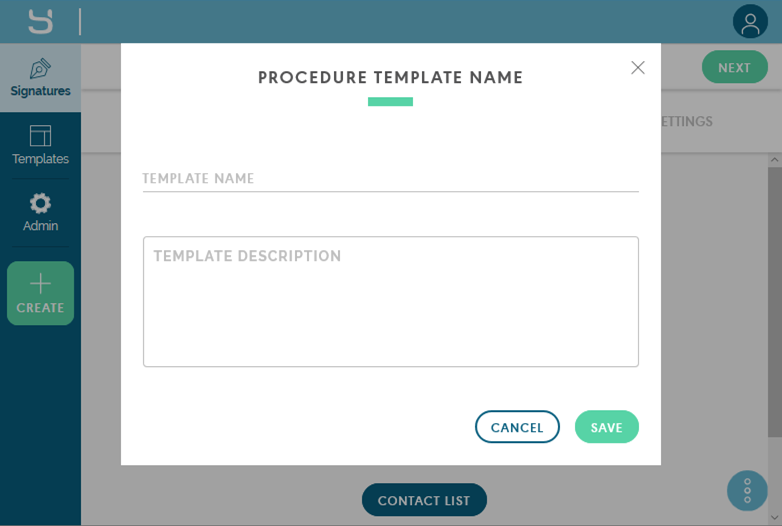
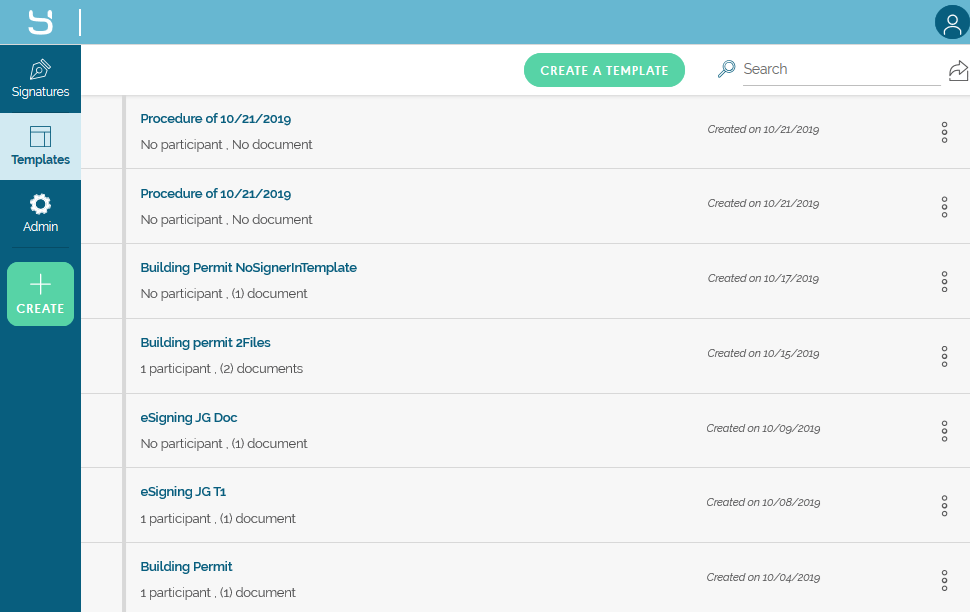
Templates can be configured within an account of an eSignature provider's website.
|
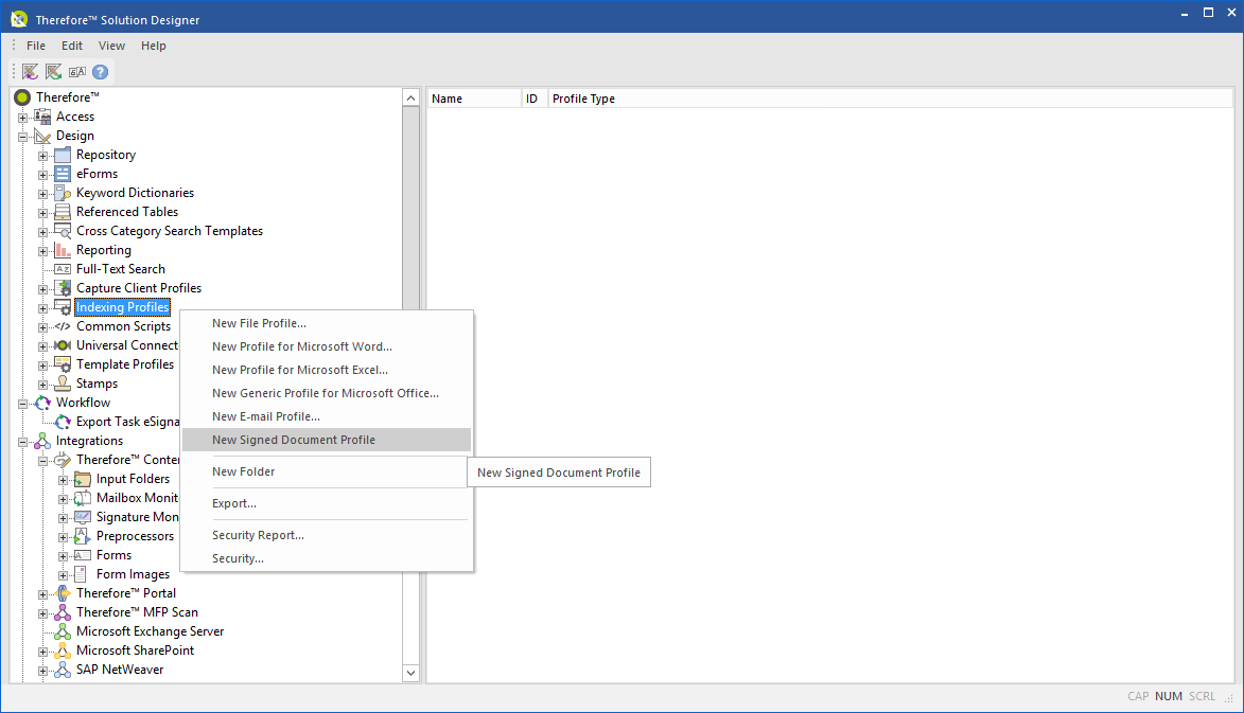
4.Return to the Therefore™ Solution Designer, right-click Indexing Profiles (under Design) and select New Signed Document Profile from the context menu.
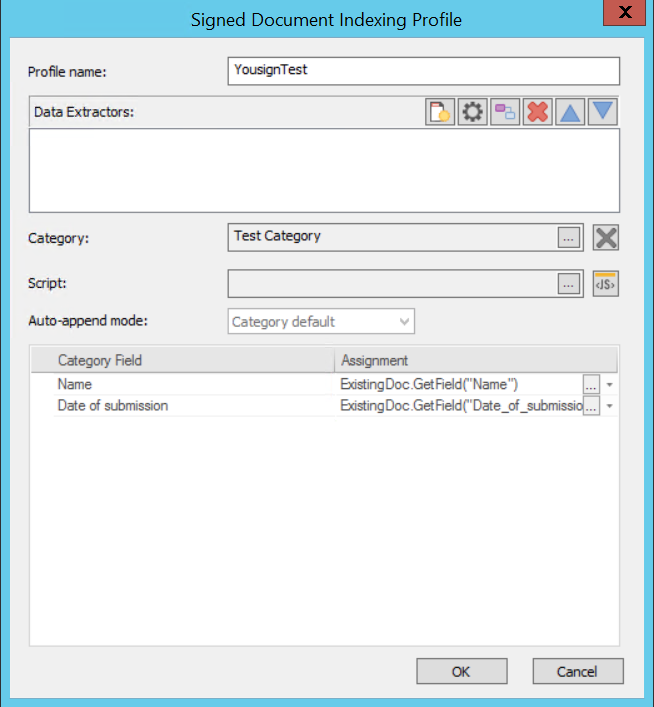
5.In the Signed Document Indexing Profile dialog, assign the necessary category to the profile, and then set the Assignments to the respective Category Fields.
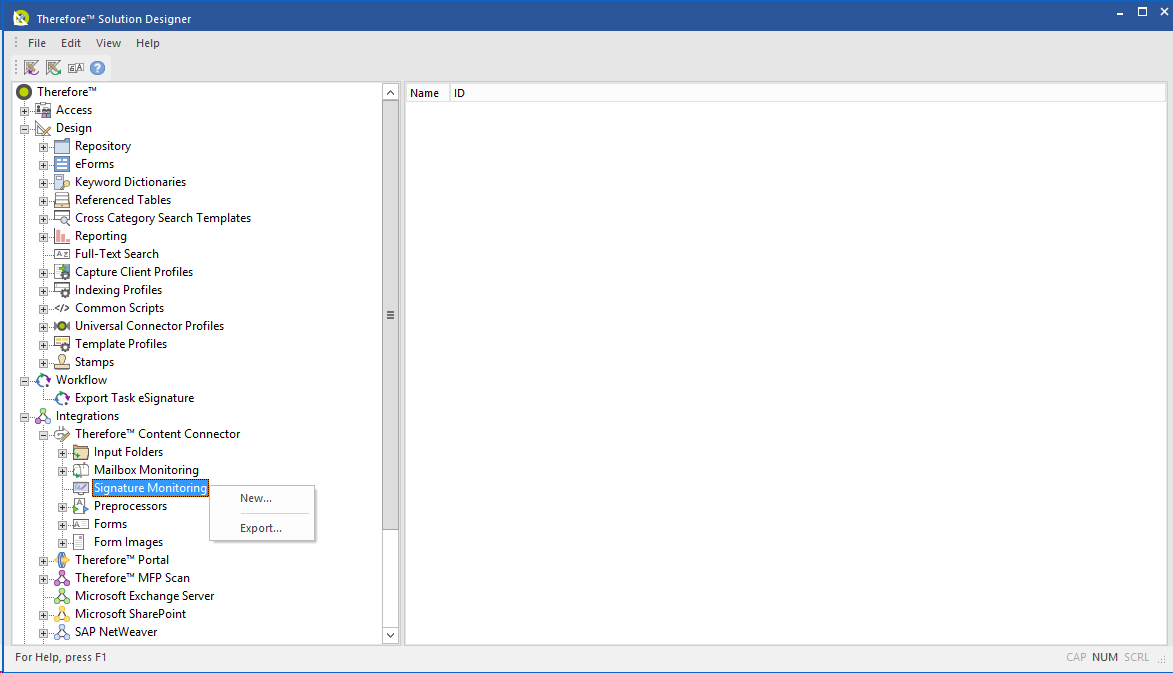
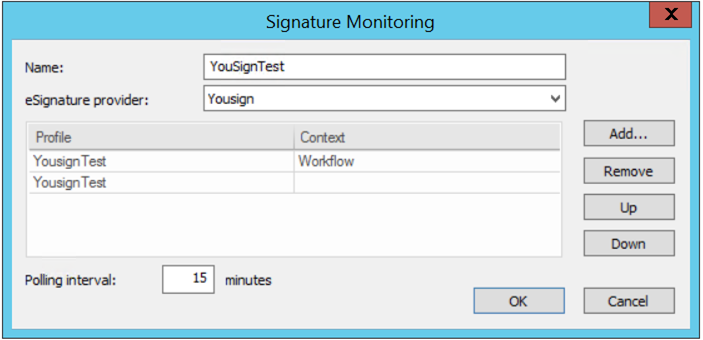
6.Return to the Therefore™ Solution Designer, right-click Signature Monitoring (under Integrations) and then select New from the context menu.
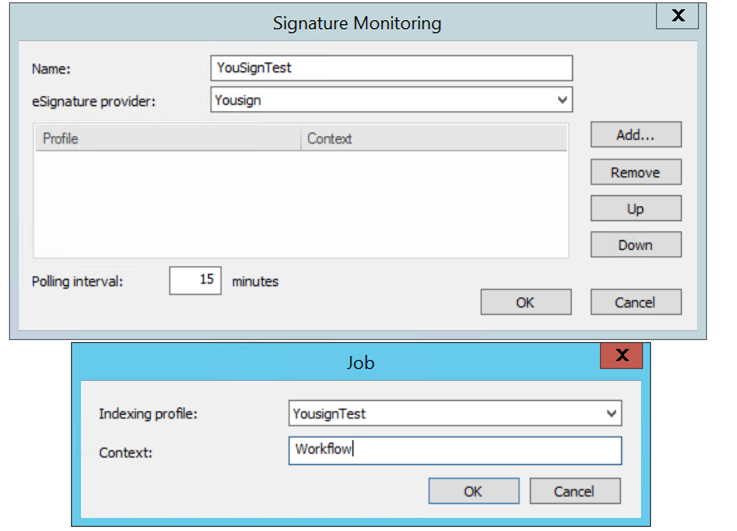
7.In the Signature Monitoring dialog, select the eSignature provider and click the 'Add' button to raise a Job dialog where Contexts can be added to Indexing Profiles.
What signatory details will I need to provide for my specific eSignature provider?
|