
|
Changing from AD FS Legacy to OIDC |
Scroll |
This tutorial is for Therefore™ Online customers using the legacy (deprecated) AD FS login method. The steps below will show you how to update to the new 'AD FS (OIDC)'.
Requirements: Windows 2016 Server or above with AD FS on customer side.
1. Start by creating the 'Application Group' by following every step on the following page:
Creating Application Group
2. Continue with 'Setting Client Permissions', by following the steps on this page:
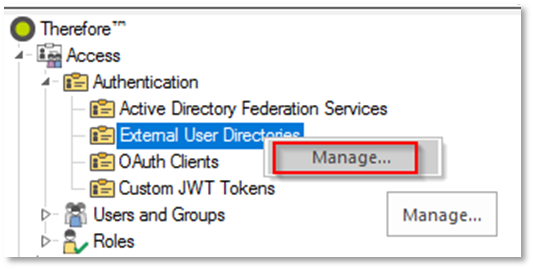
3. Add an 'External User Directory' authentication method in the Solution Designer:
a. Right-click on 'External User Directories' and click 'Manage...':
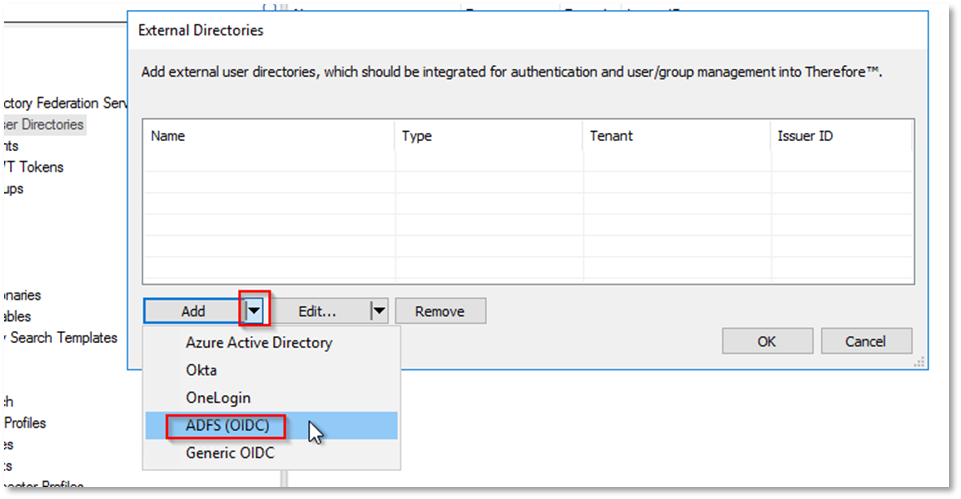
b. Click on the down arrow and select 'AD FS (OIDC)':
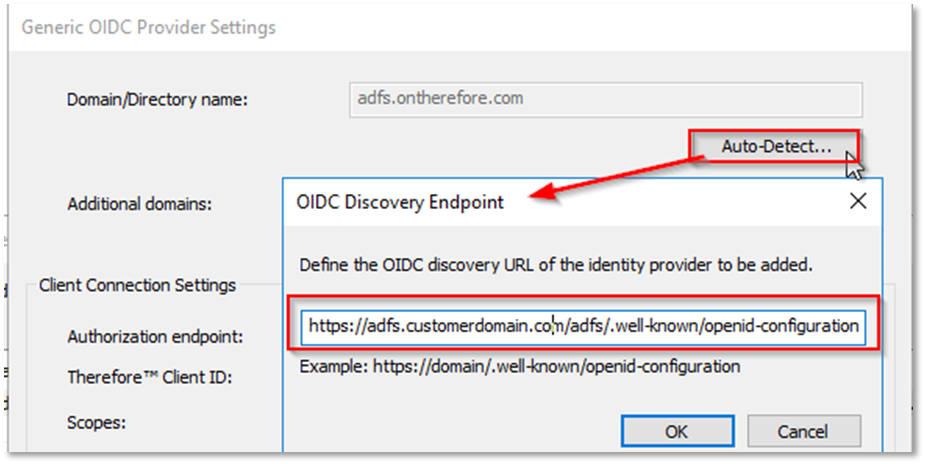
c. Click 'Auto-Detect' and type in the 'OIDC Discovery Endpoint':
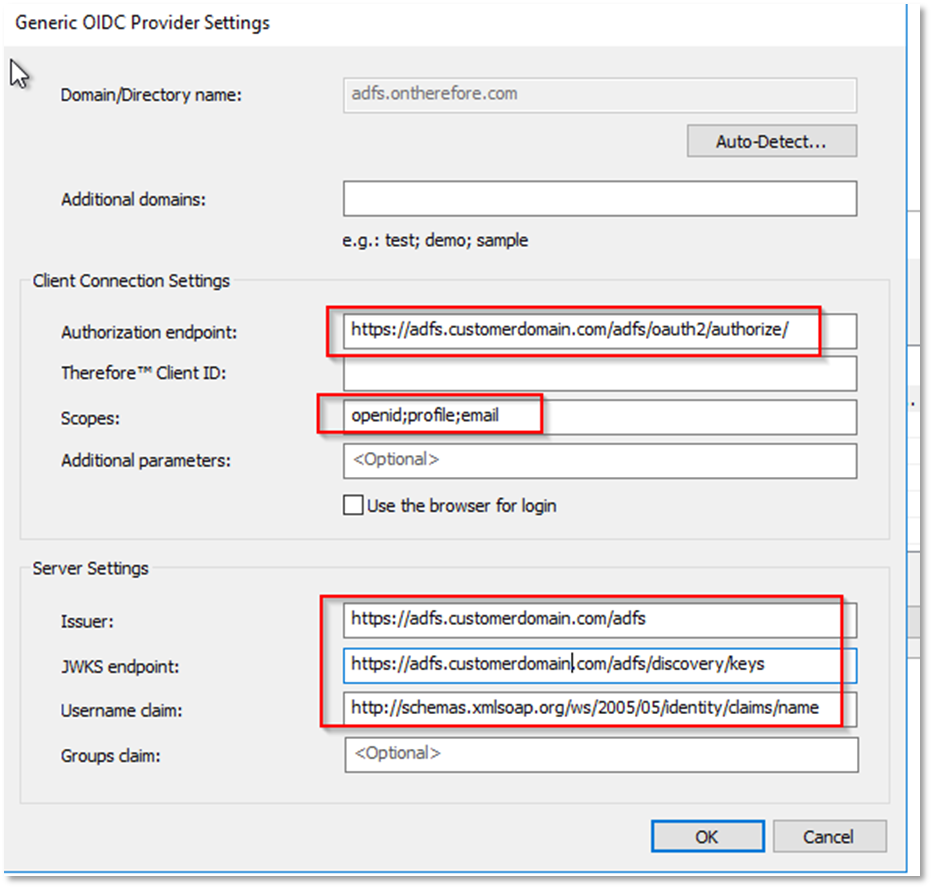
d. Clicking OK should automatically fill out most of the details below:
e. You will need to add the 'Therefore™ Client ID' which is found on the 'AD FS Server' in the newly created 'Application Group'. Edit the 'Native Application' by click on the 'Application Group's Properties' on the right side.
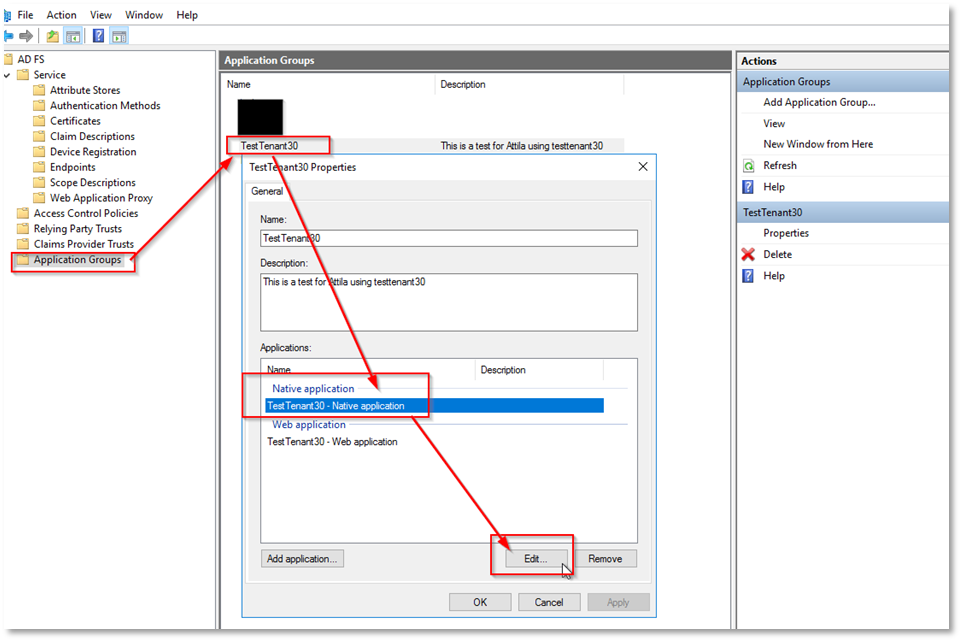
f. Copy the 'Client ID':

and paste it in the 'Designer':
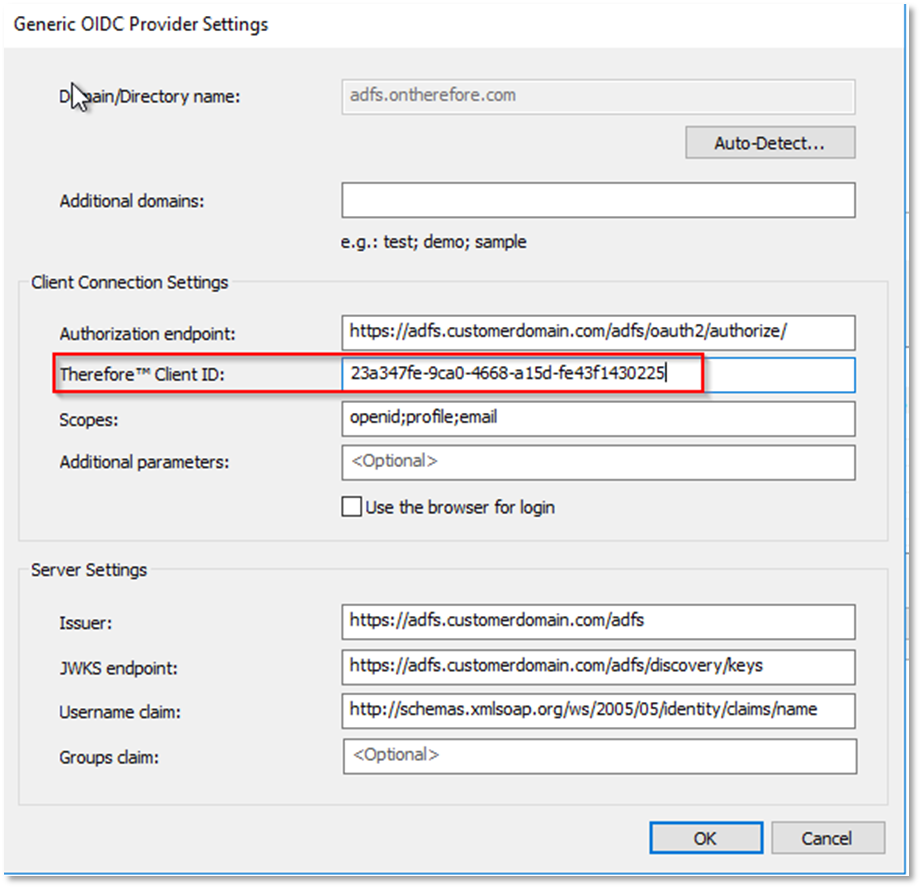
Click 'OK'.
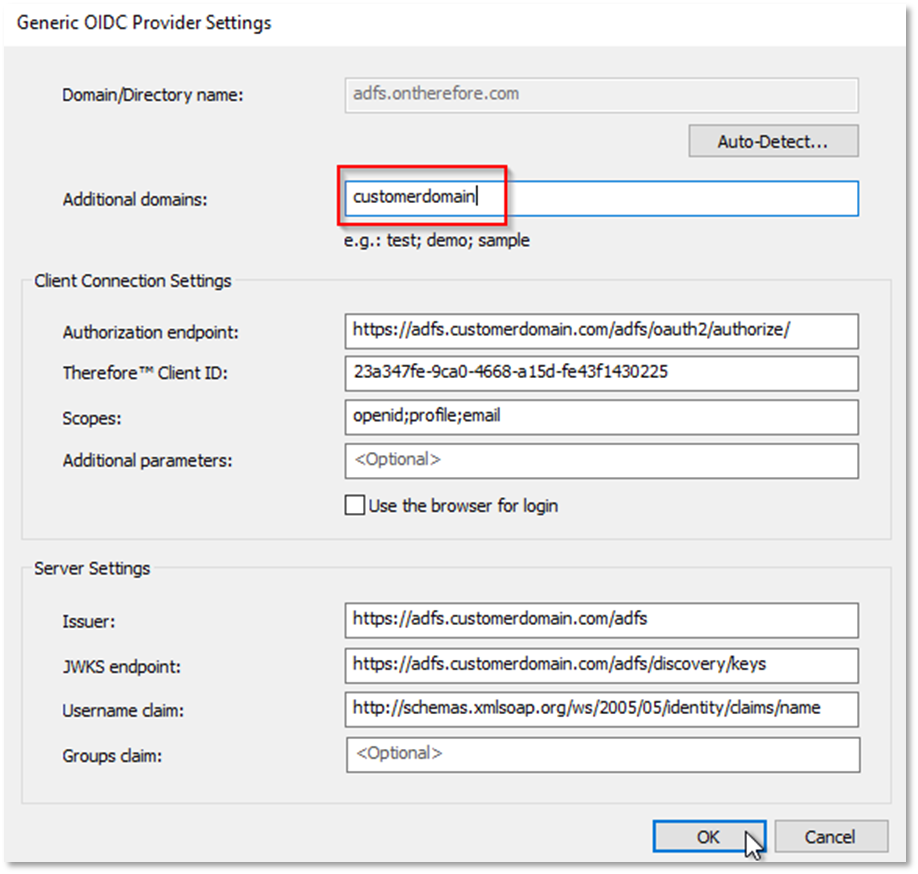
g. In case you had a domain set up for the AD FS Legacy method you also need to copy that to the 'Additional Domains' field. Click on 'Active Directory Federation Services' under 'Access / Authentication' tab in the 'Solution Designer' to see the domains:
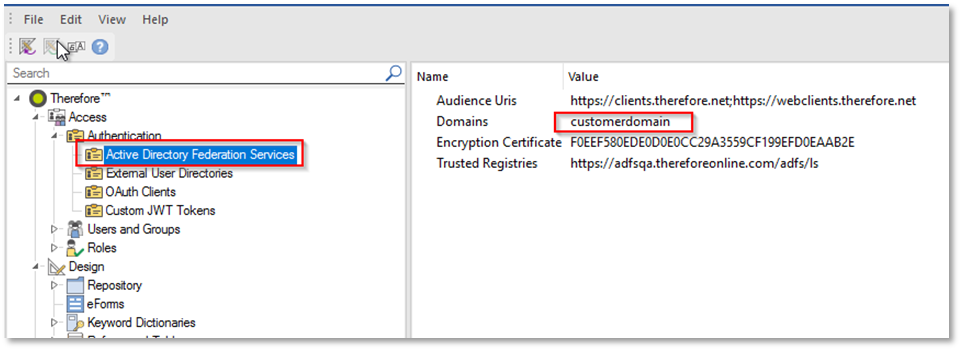
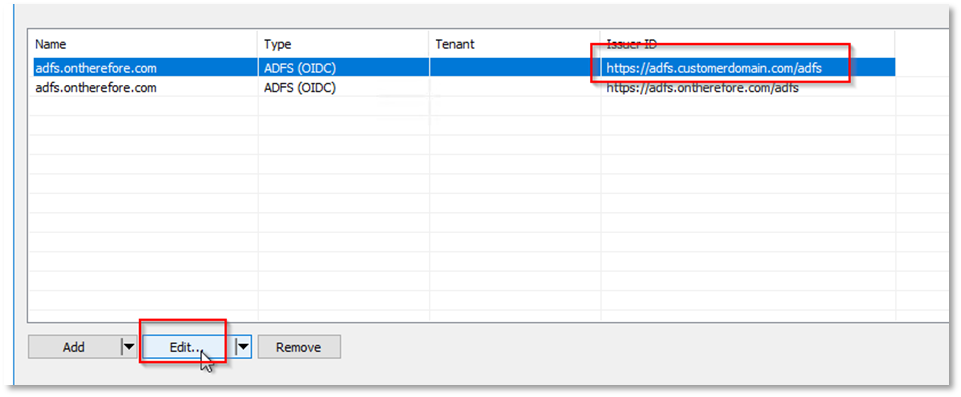
h. Add the value of the 'Domains' row to the new 'AD FS (OIDC) Configuration'. Return to 'External User Directories' and edit the directory created in previous steps:
i. Type in the domain(s) here:
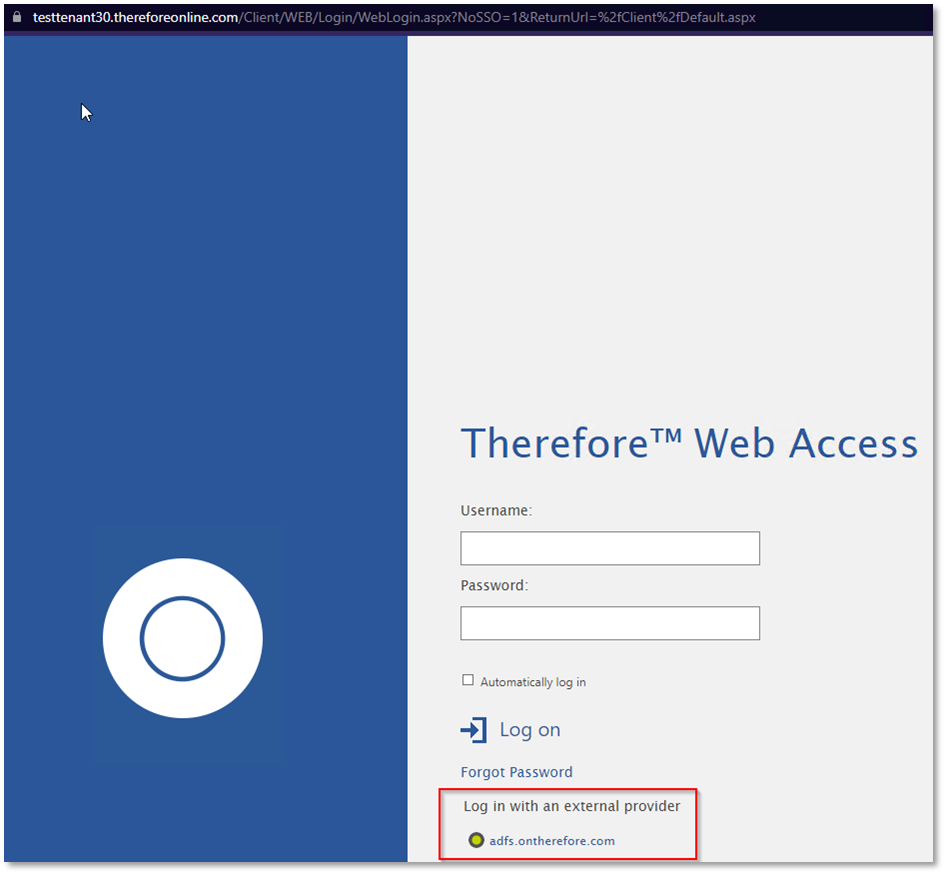
4. You can check if the 'External Provider' is properly added to the tenant website by visiting the following URL:
https://<tenantname>.thereforeonline.com/Client/?NoSSO=1 (replace <tenantname> with your Therefore™ Online tenant).
The new provider should appear on the bottom of the page:
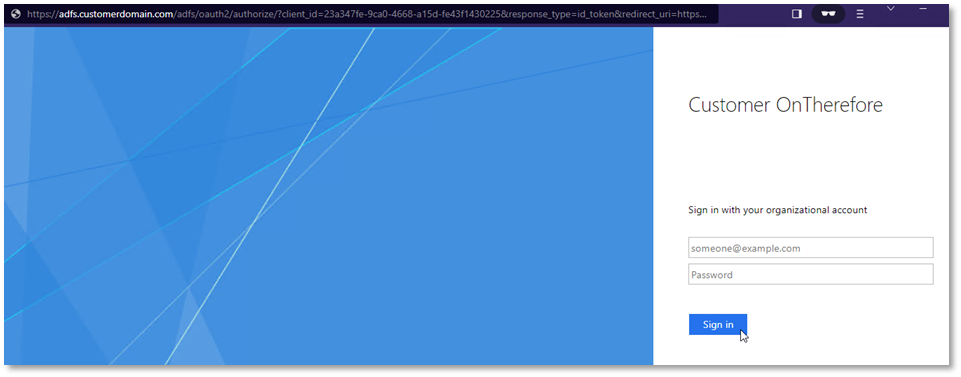
Clicking this new provider will take you to the AD FS login page:
5. If you are using 'Navigator' or 'Designer' you can change the 'Authentication' provider to 'AD FS (OIDC)' (open 'Connection Settings' from the File Menu in the 'Navigator' or 'Designer'):
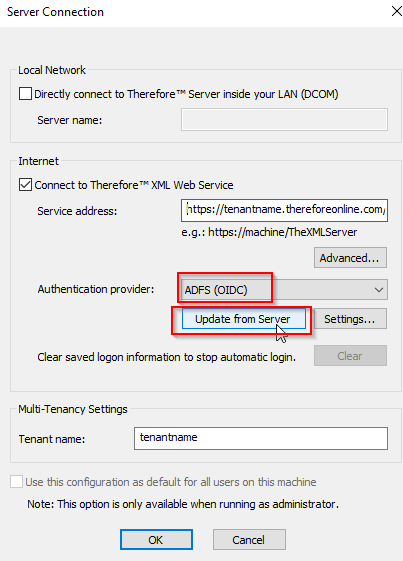
Select 'AD FS (OIDC)' and click 'Update from Server'. This will automatically populate the settings required for the connection.
Close and open the 'Navigator' or 'Designer' again and it will now use 'AD FS (OIDC)' login method.
Additional Information:
1. Users and groups are not required to be changed as they are the same Active Directory users that are being used by the legacy AD FS method.
2. You can use the legacy AD FS and the new AD FS (OIDC) methods at the same time. The same user log in with either method.
3. You can set up the new AD FS (OIDC) external provider for testing, as this will not affect the behavior of any existing legacy AD FS methods.
4. Once confirmed that the new AD FS (OIDC) log in works, Therefore™ Support will remove the settings for the legacy AD FS method from the Tenant and only the new method will be used.
|
Note: Redirect URIs for other Therefore™ applications such as the Therefore™ Go app can be found here. |

