
|
Tools |
Scroll |
Recycle Bin
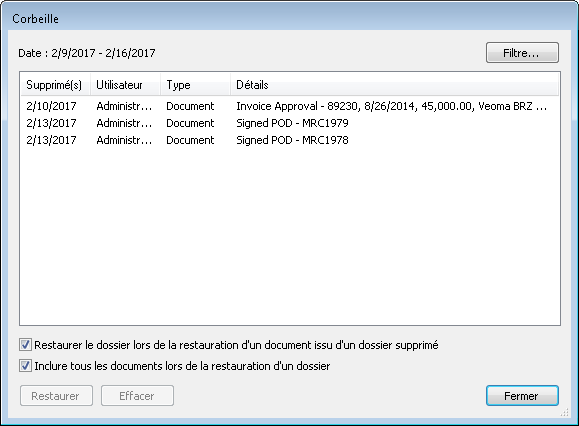
The Recycle Bin is used to hold all Therefore™ documents and cases that have been deleted by users. This means that deleted documents and cases can be found in the Recycle Bin and can be restored from there. For reasons of document security Therefore™ does not provide any means to work around this Recycle Bin or to delete documents physically. The Recycle Bin contains all deleted documents since the system went live.
The list can be filtered by clicking on Filter and selecting search parameters. Documents and cases can either be restored or permanently erased. Erasing a document or case will remove its data from the Therefore™ database, and it will be moved to the Retention Queue, where the files themselves will be permanently erased by the Therefore™ Migration Service.
|
•Each user also has access to a personal Recycle Bin in the Therefore™ Navigator. However, only users with Operator permission on the Therefore™ Object can erase from their Recycle Bin in the Therefore™ Navigator. •When a document or case is restored, a dialog will appear. The index data can be changed if necessary. Click on View to open a local copy of the deleted document in the Therefore™ Viewer, or on Restore to restore the document. Note: If more than one document has been selected, they will all be restored without displaying this dialog. •When a document or case is erased a dialog will appear. If the box Erase documents from media is unchecked, the files will remain on the end storage media, although they will not be accessible to the Therefore™ system since any database references will have been erased. |

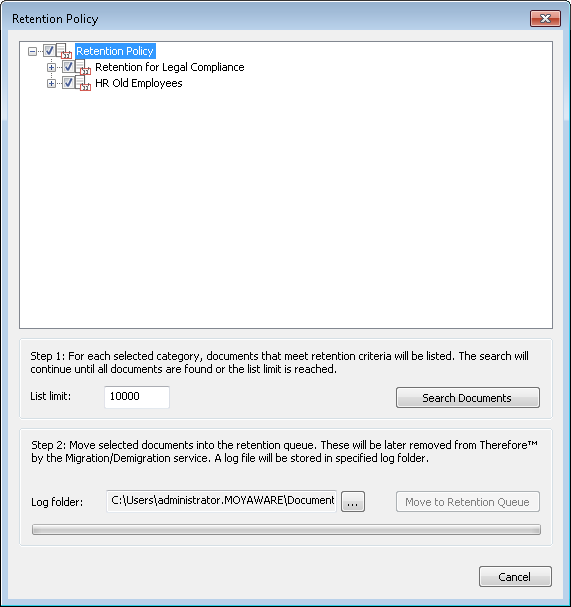
Retention Policy
Here administrators can count, verify and process documents that have reached the end of their retention period. Once the administrator moves the documents to the retention queue they are no longer possible to find in Therefore™. They will be deleted completely at the next scheduled migration. See Retention Policy in the Solution Designer for more details.
Audit Log
The audit log allows operations on the server to be searched, listed and exported.
Manage Faulty
Documents marked as faulty may be managed via this option.
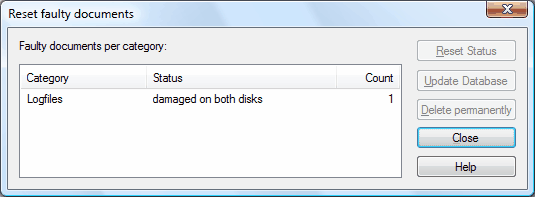
Reset Status
Sets back to not faulty
Update Database
Update the locations in the database for the selected documents.
Delete permanently
Delete faulty documents from database not from Buffer or media
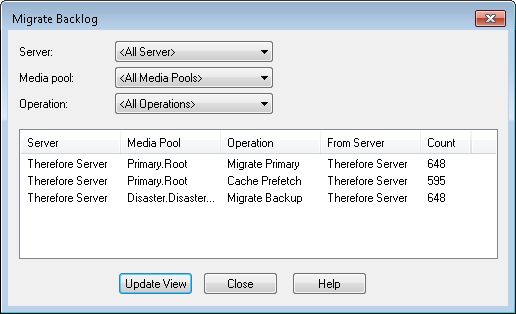
Migrate Backlog
If large numbers of documents are being moved to the Migrate Store a backlog may develop. Normally this is of little consequence - however a backlog may also indicate faulty hardware or insufficient disk space.
Migrate Backlog tool provides information about the number of documents which have not yet been fully migrated. In an installation with multiple Therefore™ Servers, this information is displayed for each Server. The Server, storage group and operation to check can be selected using the drop-down boxes. Update View refreshes the hit-list based on the chosen settings.
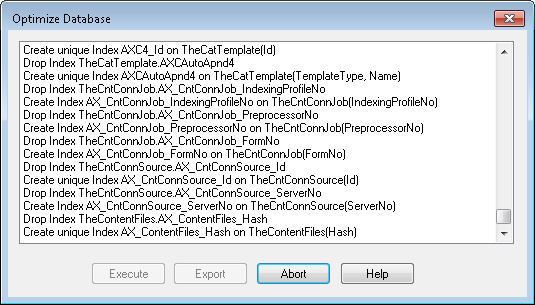
Optimize DB
To optimize the database structure, a script may be created. The script regenerates the Therefore™ table's indexes. This script can be executed immediately or exported.
Backup DB
This facility is available where Microsoft SQL Express database is used. It allows an administrator to perform a complete backup of the Therefore™ Microsoft SQL Express database without the need for any specialist database knowledge.
Therefore™ installations using other databases (Microsoft SQL Server, Oracle, or IBM DB2) should make use of the backup tools supplied with those databases.
The Backup DB command creates a back-up copy of the Therefore™ database held within Microsoft SQL Express. The database copy will be given the ".bak" file extension. This .bak file can be manually restored to Microsoft SQL Express via the Microsoft "osql" utility.
To restore a backup file, the following commands should be used from a command prompt:
osql -E
restore database Therefore from disk = 'drive:\path\file_name.bak'
go
Buffer Cleanup
This facility starts buffer cleanup. This facility is not available for Personal Edition installations. Therefore™ will check all files in the Buffer and delete files that should not exist there.
