
|
Barcode |
Scroll |
|
•Barcodes of different types are recognized without defining coordinates. •Barcodes of the same type are located by coordinates defined in horizontal/vertical position. •Therefore™ also supports barcode recognition using the Kofax barcode engine. |

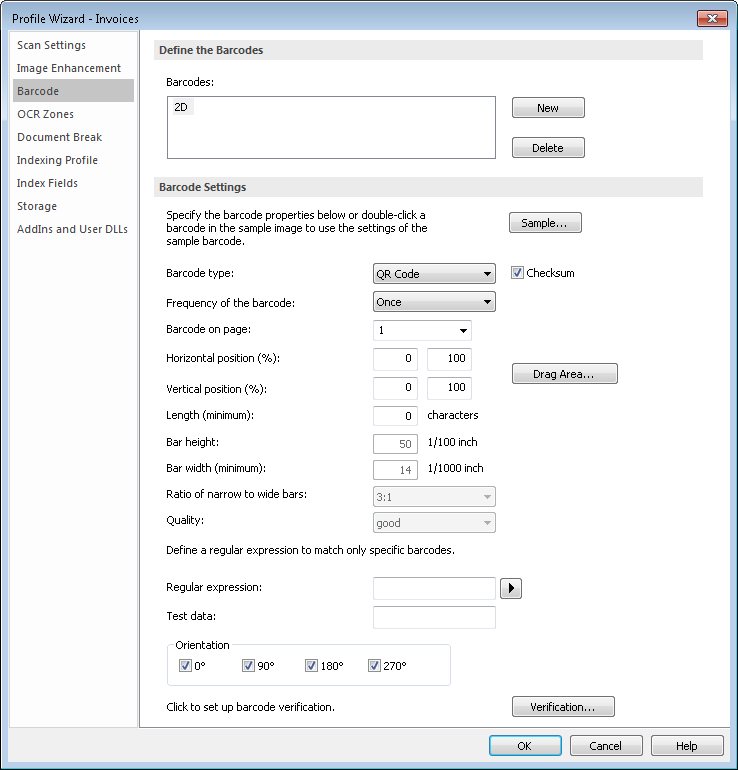
Barcodes
Barcodes can be added by clicking on New and entering a name. To delete a created barcode, select it from the list and click Delete. The first barcode in the list will be used for document breaking if this is configured in the next step of the Profile Wizard.
Sample
The barcode type can be automatically read from a sample. Select the Sample button, open a sample document containing the barcode and then double click on the barcode to capture the type.
Barcode type
Type of barcode to be recognized. Supported types: Aztec, Codabar, Code 128, Code 39 (3 of 9), Code 93, Data Matrix, EAN, EAN-5 Addon, Interleaved 2 of 5, Linear 2 of 5, PDF 417, Postnet, QR Code, UPC-A, UPC-E.
Checksum
When a barcode has a checksum character, this checkbox should be ticked. Otherwise the checksum character will be included in the characters captured.
Frequency of the barcode
Specifies on how many pages the barcode is located.
Once: The barcode occurs only once. In this case the page on which it occurs can also be specified.
On some pages: The barcode exists on some pages of the document, but not on all.
On every page: The barcode is on every page of the document.
Barcode on page
The page on which the barcode is to be found. This field can only be set when the Frequency of the barcode is set to Once.
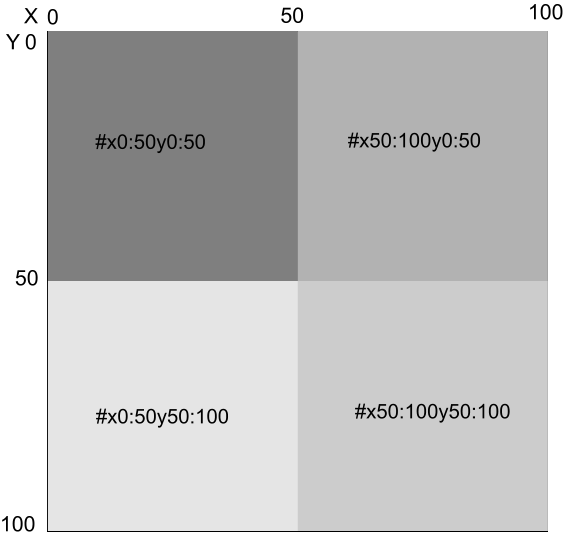
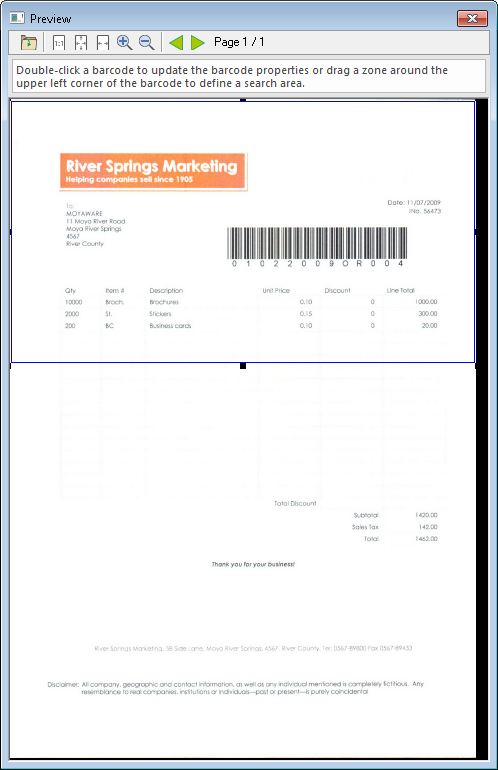
If you want to recognize multiple barcodes of the same type on a single page, you have to include a restriction on the barcode position in the name. This is required by Therefore™ to assign the correct barcode to the correct index field. This is specified as a percentage range as detailed in the figure below. The range can be entered by hand or scan in the a sample document, select the correct page and choose Drag Area to drag a box around the area where the barcode will occur. Alternatively a saved file can loaded by clicking the open-file icon on the Preview window menu bar.
Length (minimum)
The minimum character length of the barcode.
Bar height
The height of the barcode in 1/100 inch increments. This value is only editable in Administrator mode. The default value can generally be accepted.
Quality
The expected quality of the barcode. This value is only editable in Administrator mode. The default value can generally be accepted. However, if the barcode is not correctly recognized, then decrease the expected quality until it is recognized correctly.
Bar width (minimum)
The barcode width in 1/1000 inch increments. This value is only editable in Administrator mode. The default value can generally be accepted.
Ratio of narrow to wide bars
The barcode thickness ratio between narrow bars and wide bars. This value is only editable in Administrator mode. The default value can generally be accepted.
Regular expression
A regular expression can be used to define the format of the desired barcode. This makes it easier to match only barcodes with the correct format. By clicking the arrow button the user is presented with a list of basic elements and sample expressions.
Test data
Data entered in this field will be checked against the regular expression to confirm whether it is valid or not. This is only for testing purposes. If the data entered is valid, the text will turn green. If it is invalid, the text will turn red.
Orientation
Defines the expected orientation of the barcode on a page. This allows for the correct recognition of a barcode that is upside down, or rotated. Choose between 0, 90, 180 and 270 degree rotation.
This is used when the barcode contains a constant character, or a character that ascends linearly. This information is presented for scan operator verification. A warning icon  shows the operator that there is a verification problem. To add a verification definition, click Verification, enter the position and length in the boxes provided, choose a condition from the drop-down box and then click Add. Edits to verification definitions can be performed by selecting the definition, changing the values and then clicking Apply. Definitions can also be deleted.
